All posts by admin

Portrait Workshop

Jim Steinberg’s How to Take Memorable Portrait and Holiday Photos Workshop

.

Whether you are photographing the symbolic subject of the holidays or your friends and family, we will teach you to get creative with your composition, this means paying special attention to how you organize the various elements in each photo.

Small group size will ensure your questions are answered and that you have the opportunity to photograph alongside Jim. Enroll early as we limit the size of our workshops for the participants overall experience. 

Shooting RAW: What it means and when to do it

If you’ve ever been asked before if you prefer shooting RAW or JPEG, but had no idea what those terms meant, this blog is for you.

When your camera is shooting in RAW it means the picture file will come out in RAW format and as such will contain all the raw (unprocessed) image information captured on your camera’s sensor. It will be saved in a proprietary file format specific to your camera’s manufacturer. A RAW file is much larger than a JPEG file because of this.

Shooting in RAW versus Shooting JPEG

When shooting RAW, the camera does not do any interpolation of the metadata, allowing the photographer to do that in post processing. When a camera converts a RAW file to a JPEG it compresses the file size and uses a predetermined algorithm to read and change information on such things as white balance, color space, sharpness, and bit depth. RAW photos must be edited before they can be shared, but because each file contains more information you can do more modifications and add more layers without losing image quality and as a result obtain finer and higher quality images.

Shooting in JPEG means you’ll be getting a much more simplistic picture file. Much of the information encoded in a JPEG file is baked in, so most edits will result in a slight deterioration of image quality. JPEGs are more convenient. As they are universal, they can be read by all smartphones, tablets and computers without the need for any specialized software.

Most professional photographers prefer shooting RAW because image quality, as opposed to ease of use, is the more important factor. The extra editing time is justified by the final product.

Why RAW Image Quality is Better than JPEG

Explaining precisely why RAW images are higher quality than JPEG requires a bit of math. A JPEG is an 8-bit file. Each channel (blue, green and red) in a pixel can register a maximum of 256 levels of luminosity. Multiply the channels together and you have 16,777,216. Translation? An 8-bit file can show over 16 million color tones at each pixel.

Sounds like a lot right? Well not when you compare it to RAW images, which can be shot as 12- or 14-bit files, putting well over 1 billion color tones in each pixel.

What do those extra color tones give you in terms of an image?

Let’s say you take a picture of the blue sky in JPEG, or any other surface with a smooth gradient. If you edit that image, you’re likely to experience color banding, the appearance of lines where they shouldn’t be. That’s because your tonal range is too narrow to replicate all the subtle shifts in color, so the colors in the image will appear like blocks.

Shooting RAW you won’t have that problem. More tonal gradation in RAW means you can have a more smooth transition between the colors and a greater depth of color and tonality.

Learn and Travel with Steinberg Photography

Interested in honing your skills on a photography adventure with professional photographers Jim and Lori Steinberg of Steinberg Photography? We offer numerous exciting workshops and tours that are great for everyone from beginners to professionals.

See where we’re heading next!

How to use Aperture Priority Mode on your Camera

The majority of today’s photographers begin their careers with a lengthy period of “point-and-shoot photography.” You point your camera at what you want to capture, and you click a button.

It’s pretty straightforward. Sometimes the shots are good, sometimes they’re bad, and there’s no repeatable process to follow to increase the number of good pictures and make the good ones truly great.

There are two important steps you need to take to leave your point-and-shoot phase. The first may be the easiest: familiarize yourself with all of you camera’s settings. The second is to make sure the brain is engaged so you know what you want the image to look like.

In today’s blog, I want to address the first, and would like to explain Aperture Priority Mode.

What is Aperture Priority Mode?

You’ll find Aperture Priority Mode on your camera’s mode dial, usually indicated by an A, AP or Av.

Switching your camera to Aperture Priority Mode tells your camera that you are going to decide on the aperture — on how big the size of the opening will be — to control the depth of field. The camera will set the shutter speed automatically.

Choosing the depth of field is one of the most important creative decisions made in your pictures.

Wide Aperture — f/2.8 to f/4

Aperture Priority Mode

A wide aperture opens up the lens to allow the greatest possible amount of light to hit your sensor. This reduces your depth of field, meaning only the point you focus on will appear sharp. Everything else in your composition will appear blurred. Wide aperture shots are great for portraits and landscapes where you want to put the emphasis on the area near the front and allow the background to lose detail.

Medium Aperture — f/5.6 to f/8

Aperture Priority Mode


Medium aperture, naturally, is the middle ground between a wide and a small aperture. You’re letting in less light (unless you decrease the shutter speed) but expanding the depth of field. The area in the foreground will remain sharp, like your shot with a wide aperture, but the background will be less blurry.

Small Aperture — f/11 to f/16

Aperture Priority Mode

A small aperture setting, also called stopping down, limits the amount of light passing through the lens, increasing the depth of field. If you want a picture that captures everything, so most or all of the scene appears in focus, use a small aperture setting.

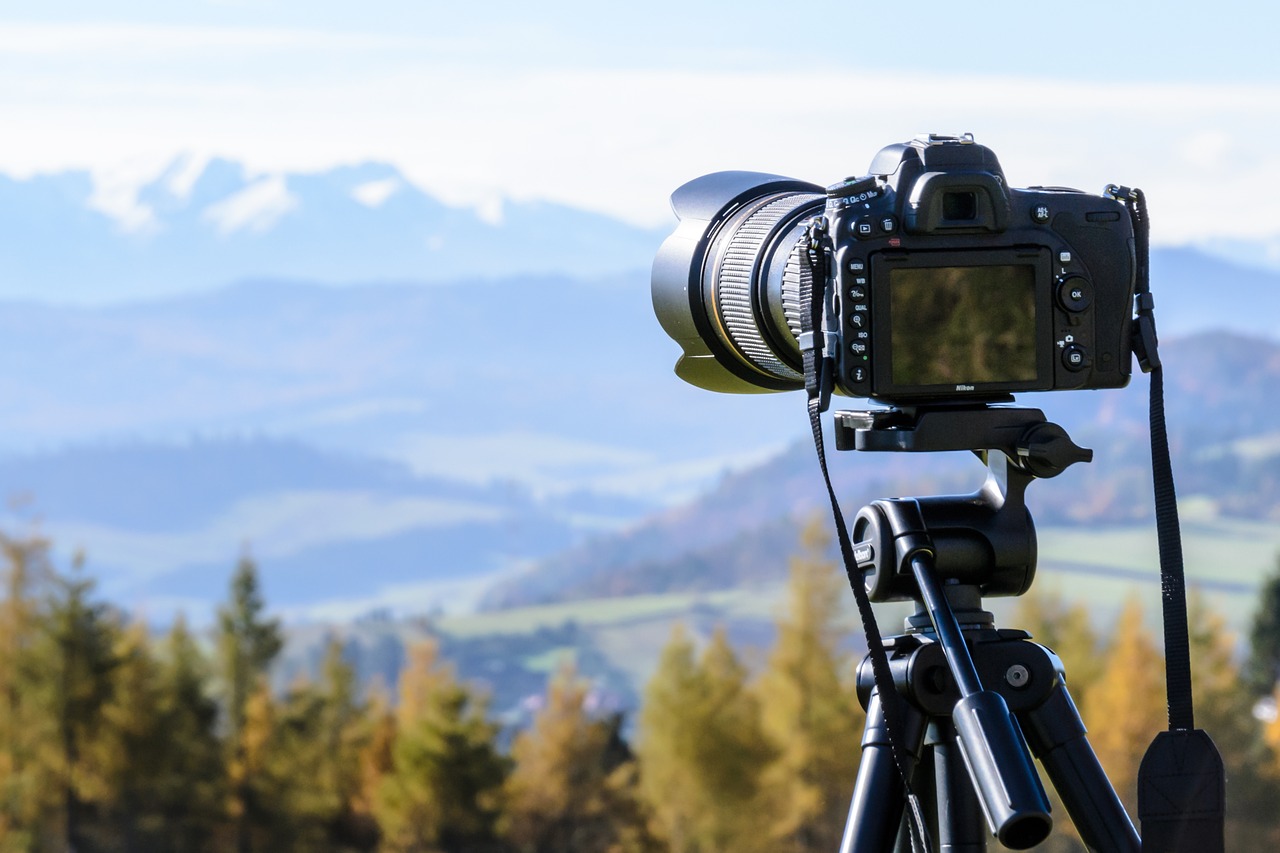
Note, however, that a smaller aperture will require longer shutter speeds to get sufficient light in your composition, or higher ISO settings, either of which may require you to use a tripod.

Learn and Travel with Steinberg Photography

If you’re looking to hone your skills or take a landscape photography adventure with professional photographers, Jim and Lori Steinberg of Steinberg Photography offer numerous exciting workshops and tours that are great for everyone from beginners to professionals.

See where we’re heading next!

Everything You Need to Know about Photographer Insurance

Whether you’re treating photography as a career or a pastime, you know it’s not cheap. Equipment is expensive, and as you strive to take better and better pictures, you’ll find the amount and the cost of equipment needed keeps growing. So let us introduce you to a concept called photographer insurance. 

As you’ll see, photographer insurance isn’t just about protecting tangible things, like your camera and computer. Many photographers need the same kinds of protection as any other business. Below are several different options photographer insurance options.

HISCOX

HISCOX, which offers policies for everything from kidnapping to satellite damage, has professional liability insurance, general liability insurance and business owners insurance, all for photographers. Together, these can provide protection for numerous situations, including:

– If you’ve been contracted for an event and your memory card fails and you lose all your pictures, and they want their money back

– A client or client’s customer trips over a piece of equipment you have out for a photo shoot and gets injured

– Litigation costs for defamation and libel suits

– Insurance for your equipment, like cameras, lenses, and storage devices

Policies begin at around $400 a year.

Hill & Usher

Hill & Usher, another insurance company that seems willing to protect anything and everything imaginable, has a special package for media professionals like photographers that includes safeguards for your photography gear, computer, portable electronic equipment, photography studio at home, as well as professional liability coverage. Deductibles range from a couple hundred to $1000 dollars. 

PhotoCare

One cannot discuss photographer insurance without mentioning the Professional Photographer’s Association’s PhotoCare, which provides up to $15,000 of photography equipment insurance as well as data loss and negligence protection. Unlike the other options on this list, you simply join the association and PhotoCare comes with your membership, along with all the other perks (a print and digital subscription to Professional Photographer magazine, online learning programs, and more) for $27.92 a month. That’s right, not $28. $27.92.

Geico, Progressive, Allstate

Another option, which may be the easiest if you can tack it on to your existing home or auto and pay just one bill, is a professional liability insurance or business owner’s policy from one of the big players like Geico, Progressive or Allstate. Though you won’t get the kind of specialization you get with above mentioned options, so it’s a tradeoff.

Learn and Travel with Steinberg Photography

Now that you’ve learned about photographer insurance, you’re ready to get out there and take some pictures! Have you ever considered honing your skills on a photography adventure? Now is a great time to go with professional photographers Jim and Lori Steinberg of Steinberg Photography. We offer numerous exciting workshops and tours that are great for photographers of all skill levels.

Thanks for reading!

1 14 15