All posts by admin

How to Take Photos of the Moon (for Halloween 2020)

We’ve all been there: standing in awe under a bright, glowing moon, our nearest celestial neighbor, our favorite object in the sky. You can’t help but take out your camera or phone and try to capture it, but all that shows up on the screen is an indistinct, blurry glow of white.

The moon looks so impressive to the eye, but with a camera with a wide-angle lens, it’s impossible to capture accurately. This year, there are two full moons in October, the 2nd being known as a blue moon, and it happens to fall on Halloween. So, how can you prepare to take a gorgeous photo of the moon on Halloween night?

With so many trick-or-treating events cancelled this year, it’s a great night to go set up your tripod and try to capture this moon event. Here are some tips:

Gear:

Camera: Stay away from your iPhone camera for this task. Its lens is too wide, and the moon always appears much smaller in it. Instead, rely on your DSLR camera where you have more adjustable settings.

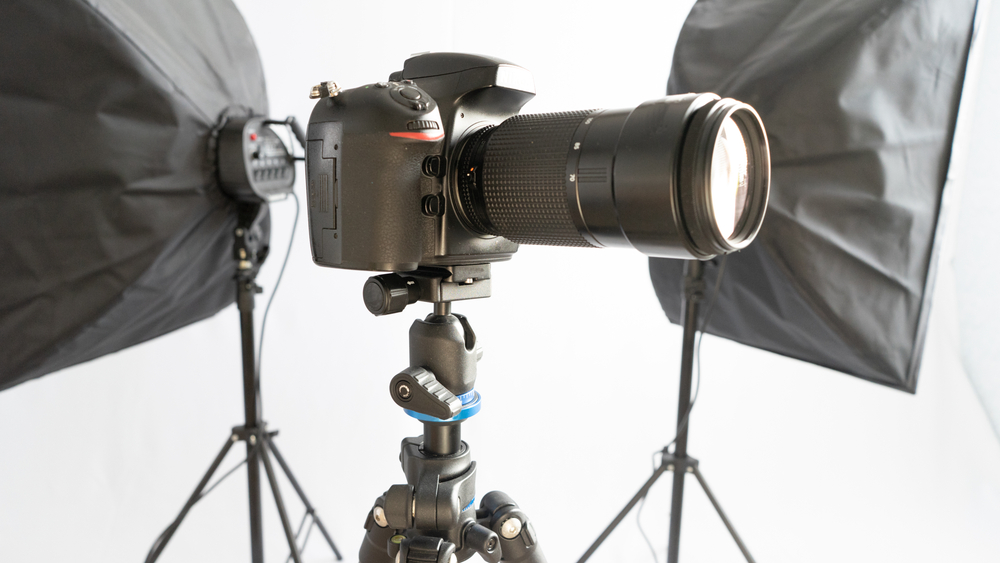
Tripod & shutter release cable: When capturing the moon, you want to eliminate as much noise and grain as possible. That means you want to avoid moving the camera at all costs. The best way to achieve this is with a tripod, so your camera remains unmoving. In addition, you can use a shutter release cable, so you are not touching the camera at all. A wireless remote shutter or self timer will also work to keep your camera absolutely steady.

Zoom lens: According to lightstalking.com, a Zoom lens of 200mm or longer is best for shooting the moon. I prefer something even bigger, say a 300-400mm if you have one.

Settings:

Put your camera into manual mode in order to get the best results. Here are a few suggestions to get you started, but you should rely on your knowledge of your own camera for best results.

ISO: 400 or lower to minimize noise and grain

Aperture: f/5.6 – f8  (generally the sharpest openings of most lenses).  As you’ll have time, play around to find your lens’s sweet spot.

Shutter speed: Anything below 8 seconds will effectively stop the movement o the moon.  After that the moon will once again appear blurry as it will have moved will your shutter is open.

Location:

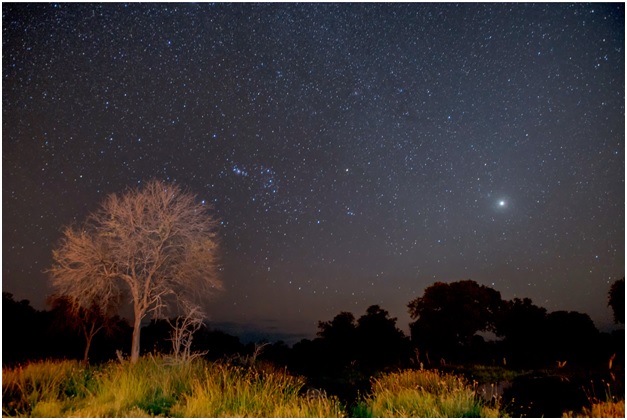
It can be interesting to take pictures of the moon rising over a city, but this type of photo presents its own challenges because there are competing types of light, of varying brightness. So, consider what time the moon will rise in your location. Though it’s interesting to see the moon in a dark night sky, it can be even more dynamic to capture the moon at twilight or as the light changes. This also gives you a better opportunity to play around with camera settings and get a photo of the moon with more definition.

You might also consider heading out of town, away from light pollution. This allows you more control over how bright you can capture the moon in your camera.

In my neck of the woods, Halloween night is generally very cold. Consider the weather and how to protect your camera in case of precipitation. Capturing the moon as it emerges from behind a cloud can make an interesting photo, but it’s not worth ruining your equipment if it rains or snows. But if the weather is bad, don’t forget your ghoulashes!

Composition:

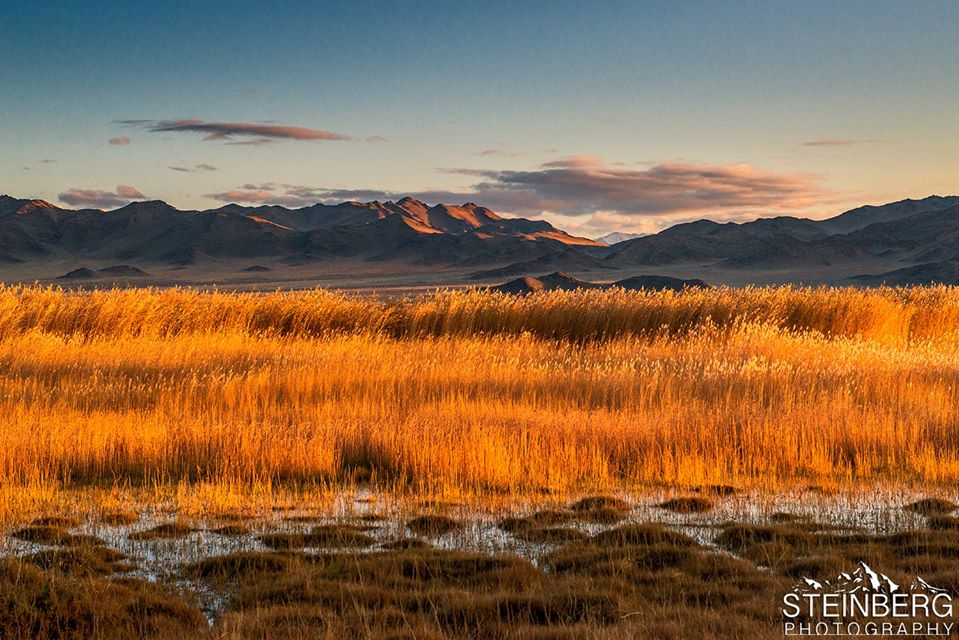
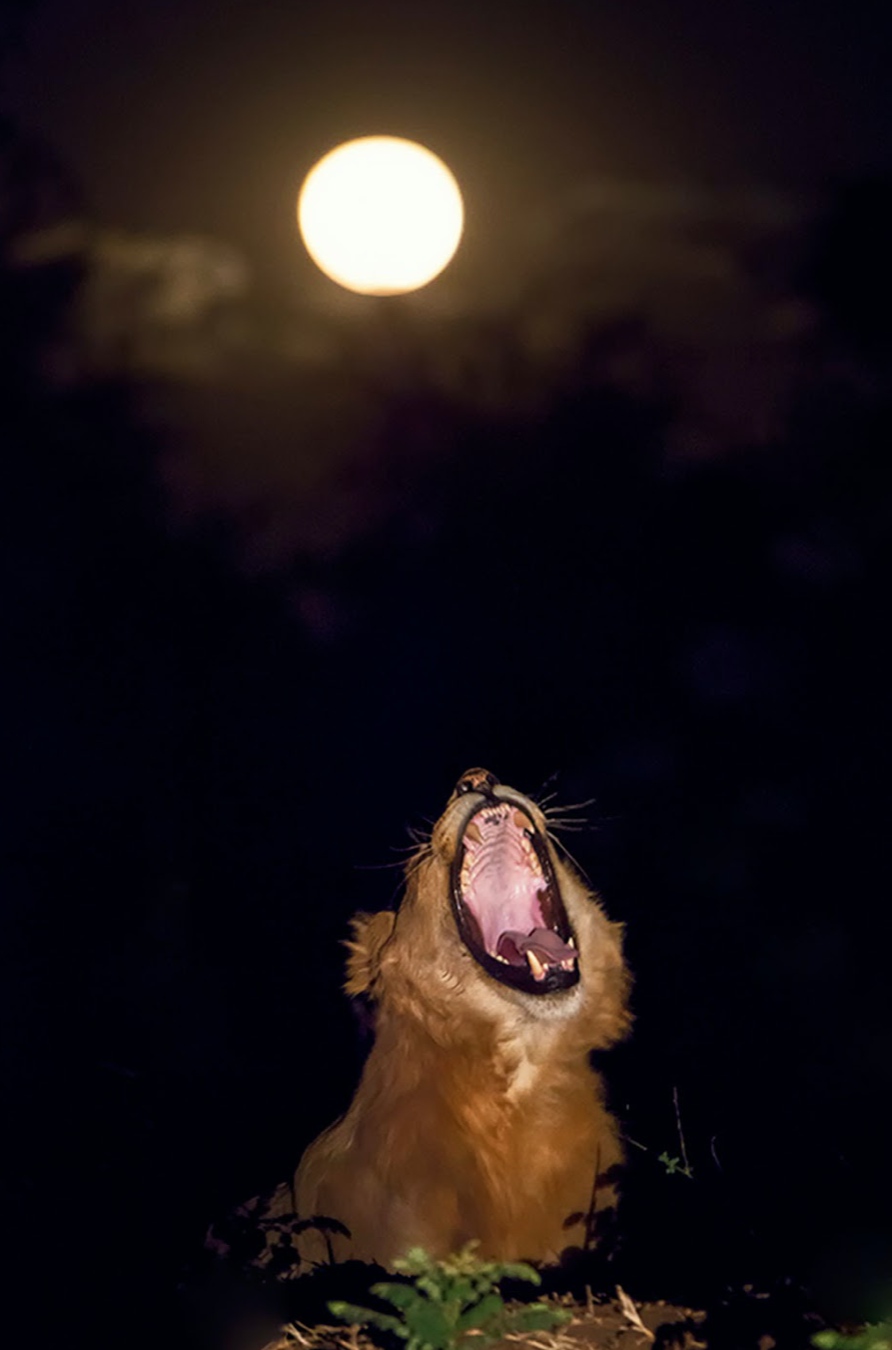
The moon is most interesting when it’s put into conversation with other objects, especially terrestrial objects. So get low to the ground, for example, and frame the moon between tall blades of hay (especially at a harvest time, such as October), or capture the moon between some fall leaves or trees.

You can use the space inside the frame to tell a story or create a sense of contrast. Challenge yourself with new compositions.

Black and White:

Finally, I recommend giving black and white photography a try. It’s one of the ways that you can capture more detail in the moon. Remember, you can brighten your photos in Photoshop, Lightroom or other digital darkrooms, but you cannot get back highlight details that are blown out. When it comes to taking photos of the moon, err on the dark side.

The “moon illusion” is the idea that the moon looks larger to human eyes than it actually appears. So there’s a chance that even with the right gear and lots of preparation, your moon photos won’t look as impressive as they look to your eye. Still, if you’re looking for a way to mark Halloween this year, it’s a great opportunity for photographers to get outside.

Turn Your Coronavirus Stimulus Check Into a Startup Photography Studio

A Note from Steinberg Photo:

Firstly, needless to say, the responsible thing to do with your stimulus check is to use it to pay your bills, or secret it away for some extra cushioning. Your and your family’s immediate needs should absolutely come first. But if you are in the fortunate position where your financial needs allow, we’ve put together a list of items your stimulus check can bankroll.


Best Wishes,


The Steinberg Photography Team


_______________________________________________________


Have you been longing to get into portrait photography? The time is now. Camera equipment isn’t cheap, but the $1,200 coronavirus stimulus check can bankroll your portrait photography startup and cover everything you’ll need to make it happen.


Camera


Your camera will take the biggest bite out of your budget. We recommend a digital single lens reflex (DSLR) camera with a rear LCD screen and a touch focus. Look for a crop-sensor camera with low light shooting capability, good auto-focusing speed and decent resolution.


One great pick is the $460 Canon Rebel T7 with an 18-55mm kit lens. Another good option is the $600 Nikon D5300 with an 18-55mm kit lens. The Nikon D5300 is available without the kit lens for $500.


Lens


If you don’t choose the Canon or the Nikon, a 50mm or 35mm DSLR lens would work well. The 50mm lens is good for portraits, and it costs about $130. It’s lightweight, boasts a wide fast aperture and creates sharp, clear photos. If you prefer auto-focusing, look into a Nikkor 50mm f/1.8G for about $220.


Reflectors and Speedlights


Speedlights are great, but they’re expensive. Reflectors maximize the impact of secondary light and only cost about $25. Just like speedlights, reflectors use ambient light to illuminate your subject’s face. The only difference is that speedlights give you more lighting options.


Many photographers use reflectors in conjunction with strobes. Strobes give portraits a unique distinction that you can’t get from reflectors alone. You should get reflectors in black, silver, gold and white. That way, you can create a variety of looks. The black reflector is great for creating shadows, and it also works as a backdrop.


You can even add a Yongnuo YN560-IV Speedlight for about $70. One speedlight is enough to get you started, and you won’t go over budget. So far, you’ve spent about $750.


Light Stand, A-clamps and Backdrops


A light stand gives you more control over your lighting. It helps you to create precisely the look you want. The black Impact Air-cushioned Light Stand is only $40.


A-clamps hold things in place. They’re like heavy-duty clothespins. They keep lights and reflectors steady and in position on the light stand while you complete your shots. They cost about $8.


Backdrops are the final item for your photography startup. They come in white, cream and black and have their own stands and carry bags. Backdrops sell for about $170.


All this gear adds up to about $1,000, and it includes everything you’ll need to start shooting. You’ll even have $200 left to play around with, or donate!

Choosing a Photography Workshop That Meets Your Needs

If you’re planning to take a photography workshop, it’s critical you find one that’s right for you. Since photography workshops can be expensive, you need to make sure the workshop and your goals are aligned.  Follow this guide to learn steps you can take to get the most from your upcoming photography workshop. You will then gain the skill and experience you need to reach the next level.


Find an Inspiring Instructor


Finding an inspiring instructor is one of the most important parts of choosing a workshop. What inspires one person might not inspire someone else, so only you can decide what path makes sense for your goals. It’s therefore important to speak with the instructor beforehand.

An inspiring instructor will connect with you on a human level and understand what you would like to achieve. For the best results, consider working with an instructor who shares similar passions and long-term goals. An instructor who relates to you and your vision will help you improve your skill and boost your love for photography, so make a call and chat with the instructor.


Ask for References from Past Participants


Not all photography instructors are the same. Thus, it’s a great idea to ask for references.

Some instructors care about their students more than others, and you want to work with someone who values the time they spend with you in the workshop. Seek references to get an idea of how well other students enjoyed past workshops with different instructors.

You want to know whether the instructor gives students singular attention in the workshop and whether the instructor can adjust his or her approach to meet the unique needs of each student. While you are doing due diligence, consider whether other students felt the instructor was down to earth and personable. This is key.


Find a Workshop That Matches Your Skills


Research the workshops you have in mind to see if they match your skills and goals. For example, you don’t want to take an advanced workshop if you are just getting started.

You also want to find a workshop that specializes in the type of photography that appeals to you the most. On the other hand, workshops that offer a general overview of each type are helpful if you have not yet chosen a specialty. If you are already great at making quality images, you might want to investigate workshops that focus on post-processing.


Choosing a Photography Workshop or Photo Trek


Make sure you know the difference between a photography workshop and a photo tour or trek. Workshops focus on teaching you everything you need to know about photography and how it works, and they include lectures and coursework. A photography tour/ trek provides some information, but its focus is on giving you the opportunity to make great photographs of different locations by putting you in the right place at the right time.


Learn and Travel with Steinberg Photography

Have you ever considered honing your skills with a photography workshop? Now is a great time to go with professional photographers Jim and Lori Steinberg of Steinberg Photography. We offer numerous exciting workshops and tours that are great for photographers of all skill levels.

Thanks for reading!

Improve Your Nighttime Photography with Five Easy Tips

Nighttime photography affords you a chance to capture stunning images quite different from your daytime options. The moon, the stars and the northern lights are just a few options. If you want to explore the cosmos with your camera, here are five ways to get started:


  1. Choose a Subject

    This can be challenging. It’s hard to find things to photograph in the dark. Camera settings are different at night, too. It’s best to select a subject before you start and choose the place where you want to photograph it.

  2. Experiment with Moonlight

    If you want to photograph the moon, you’ll have to consider its phases. Every phase will give you different lighting potentials, and all moon phases are equally photogenic. Full moons brighten the sky. They give you fewer dark shadows and a brilliantly lit landscape. To track the moon’s phases, check out an app called The Photographer’s Ephemeris. It can help you to plan where you want the moon to appear in your photos.

  3. Select a Location

    By familiarizing yourself with a location during daylight, you’ll have a better grip on what you want to photograph after dark. Daytime location scouting will also save you the trouble of being unable to see your surroundings after nightfall.

    When you choose a location in advance, you’ll have a better chance of creating the right composition. You can augment your photograph by combining it with other elements like trees, architecture, mountains, a waterfall or a body of water.

  4. Use a Tripod

    A tripod is a must to stabilize your camera and help you to create sharper and brighter images. If for some reason you cannot use a tripod, try placing the camera on a flat surface and use your timer or bulb setting, or better yet a remote release to keep the camera steady while you’re making your photo.

    Keeping the camera from moving is an essential part of nighttime photography. The tiniest movement can throw the image off. Even pressing the shutter button can move the camera slightly. Adding a remote trigger for the shutter button can keep your image from being disturbed, and if you have mirror lock-up, use that as well.

  5. Increase Your ISO

    ISO gauges the sensitivity of the image sensor. The lower the number, the less sensitive your camera will be to light and the finer the grain in the image. A higher ISO lets you use a faster shutter speed, allowing the camera sensor to take in more light and that helps to freeze movement.


To capture distinctive nighttime photos, slower shutter speeds or longer exposures may be necessary. However, longer exposures might not compliment the images you’re photographing. In that case, you’ll have to increase the ISO setting to help you shoot faster in lower light.

Raising the ISO to 3200 or 6400 will give you a finer image and a brighter exposure with a shorter shutter speed. However, the higher your ISO, the more digital noise is created. For evening photos, try to find a slightly slower shutter speed.

Shoot for a setting between 10 seconds to 4 hours and a medium ISO of between 1000 and 3200 depending on the effect you wish to capture. Working with meteors or the Milky Way will require a higher ISO and shutter times of between 7-30 seconds depending on much star movement you are willing to tolerate. Shooting the moon will require even shorter times, while star trails can take hours.


Bonus tip: While scouting your location try to find a flat place so when you come back in the evening you can bring a chair to set up for some comfort and relaxation during your shooting session. And speaking of comfort and relaxation, beverages are always welcome during a long evening of shooting. Additionally, bring a flashlight and comfortable clothes. In northern climes that means some warmer clothing and during the summer months, plenty of covering and bug juice to keep the evening bugs away.


Learn and Travel with Steinberg Photography


Now that you’ve learned about nighttime photography, you’re ready to get out there and create somewomderful pictures! Have you ever considered honing your skills on a photography adventure? Now is a great time to go with professional photographers Jim and Lori Steinberg of Steinberg photography. We offer numerous exciting workshops and tours that are great for photographers of all skill levels.
Thanks for reading!

Ten Ways to Make Smartphone Photos Look Professional

Smartphone cameras are turning everyone into a photographer. Learning about the photography features of your smartphone will help you to use your device to best advantage. Here are 10 ways to make your photos look professional:

1. Keep it Clean

Ensure that your camera lens is clean before you start to snap. Clean the lens with a soft cloth to prevent scratches.

2. Learn More About Framing

If you’re not sure how to frame a photo, your camera can help. Choosing “Grid” or “Grid Lines” in the camera app will create an overlay that will help you to compose your image. It will keep your shot parallel with any vertical or horizontal lines. It will also help to keep unwanted objects out of your photo.

3. Rethink Digital Zoom

Zooming in to capture a distant subject before taking a photo will give you grainy, cropped and resized images. The photo will also be affected by your hand movements. Zooming in can reduce resolution to the point where the final image looks nothing like the real thing. Avoid digital zoom. Use your camera’s telephoto lens if it has one.

4. Scope Out the Lighting

Employing the flash of an LED light won’t enhance your photo. It will give it a harsh quality. Instead, consider sunlight, indoor lighting, candlelight, moonlight or city lights after dark. Even the flashlight of another smartphone will usually deliver better results.

5. Beware of Cloud Storage

Although cloud storage allows you to snap away without overloading your phone, there’s a downside. Not all services preserve the resolution of your images, and you might be charged a fee if you store a lot of photos. Keeping photos in their proper format by paying for a premium service can be a worthwhile investment.

6. Use a Tripod

Tripods can prevent blurry images and off-kilter photos. Tripods are unmatched for time-lapse photography, long exposures and photos with low lighting. They come in pocket sizes and work well with any kind of smartphone.

7. Add a Shutter Button

Tapping the button to capture a shot disturbs the image. Shutter buttons eliminate this problem. They also help with night photography and long exposures.

8. Let AI Do It For You

You can instruct your Android phone to take a picture. It’s already listening and eager to help. Instruct your Google Assistant to take a selfie, and Google’s pixel smartphone will capture the perfect image at just the right time.

9. Explore Exposure

Exposure is an important element in a photo that can help you to capture a subject perfectly. To prevent dark shadows, tap the screen to lock focus on the subject. To get silhouettes, tap the sky, and your subject will be underexposed.

10. Experiment With Portrait Mode

Shooting in portrait mode produces a more appealing photo. This is especially true for photos of people. However, you need to have enough light.

Employing these tips can take your smartphone camera photos to a more refined level. If nothing else, you’ll have a good time.
Plagiarism Check

Learn and Travel with Steinberg Photography

Have you ever considered honing your skills with a photography workshop? Now is a great time to go with professional photographers Jim and Lori Steinberg of Steinberg Photography. We offer numerous exciting workshops and tours that are great for photographers of all skill levels.
Thanks for reading!

The Best Camera Settings for Outdoor Portraits

Regardless of the kind of photography you’re interested in, knowing how to make a good portrait is an essential skill.  As a landscape photographer, I’m generally more interested in working in the natural environment where light and atmospheric conditions affect the way I make my photographs. And that impacts how I approach my environmental portraiture. So I’d like to share with you my feelings on the best camera settings for outdoor portraits. Hope you find them useful! 

Overrule the Autofocus Option

When focusing your camera on a subject you may notice a cluster of focus points pop up in your viewfinder. This is your camera’s autofocus setting deciding which areas should be the focus of your photograph. Don’t let your camera do this, especially when taking portraits. Should your subject’s face not take up the majority of the space in the viewfinder, you don’t want your camera picking up on a passing leaf rather than your subject’s face. Your subject’s eyes should be the sharpest point of any portrait, regardless of location or any other factor.  

Use a Shallow Depth of Field

Before settling on an aperture, keep in mind the focal length of the lens. An ideal portrait lens would be in the 85-105 mm range. This allows you to use a somewhat smaller aperture and still have the depth of field you want, say f/8.  With a wider angle lens you will need to use an even wider aperture f/4-f5.6 in order to blur your background. Also remember to keep your subject as far away from the background as possible.

Shoot in Raw

As I’ve said previously, Shooting RAW is always the preferred option. The picture file will come out in RAW format rather than JPEG, meaning it will contain all the raw (unprocessed) image information captured on your camera’s sensor. That means more tonal gradation, a smoother transition between colors and a greater depth of color and tonality. It will also allow you to edit the image in post-processing without losing any quality.

Understand the ƒ16 rule

The sunny ƒ16 rule is a rule of thumb that when your aperture value is set to ƒ16, your shutter speed will be in the inverse of the current ISO speed. So if your camera is set to ISO 100, and your aperture value is ƒ16, your shutter speed will be 1/100th of a second.  Should you find yourself without a functioning meter on your camera this is a good way to get a generally usable image. However, for portraits, as we have discussed above, you will want to have considerably less depth of field than the f16 rule will give you. 

Or use the Histogram

A more accurate alternative to the ƒ16 rule is your histogram — that spiky graph on your camera’s rear LCD display or on your electronic viewfinder (EVF). It’s a tool that tells you if your image is overexposed or underexposed. Check out this blog to learn how to read and use a histogram.

Mind the Sun 

Even though you’re outside, you still want to mimic studio lighting to the best of your abilities. 

That means using the sun to your best advantage. Generally you’ll want to put the sun at between 45-90 degrees from the front of your subject to create a pleasing wrap-around light.  And rather than using direct sunlight which can be rather harsh, unless it’s early morning or just prior top sunset, either move under a shady object to get a softer, less contrasty light or move into the shade where the contrast is also less.  

Also using backlight (coming from behind your subject) can be very effective, especially if your subject has wonderful hair that could use some highlighting. Remember, however, that you will need to add light to your subject’s face in order not to underexpose it. 

Mind the Clouds

Even on a cloudy day when you can’t see the sun, light is still directional. Your DSLR sensor will register the light, but it is up to you to determine the direction. You may use a compass or your phone to determine where the sun is and put it to your side as you shoot. 

I also have a little trick I use on really cloudy days: Open the palm of your hand and bend your middle finger all the way down.  Now move your hand 360 degrees. You will find a small shadow appear on your palm when you have passed the sun. That is the direction of your light.  It is easy and foolproof, and always fun to show others.  

Lastly, whenever shooting outdoors, make sure to follow the rules of thumb for keeping your photography gear safe and dry! And when you’re doing portraits in a public place remember 2 things:

1) Be mindful and respectful of others around you, and

2) ALWAYS keep an eye on your equipment so it doesn’t grow legs and walk away

If you have any questions about the best camera settings for outdoor portraits, don’t hesitate to reach out to us and we’ll get back to you!

Learn and Travel with Steinberg Photography

Interested in honing your skills on a photography adventure with professional photographers Jim and Lori Steinberg of Steinberg Photography? We offer numerous exciting workshops and tours that are great for everyone from beginners to professionals.

See where we’re heading next!


How to Use a Natural Frame in Your Photography

Natural frames are everywhere and very useful. They can add depth, contrast, structure and even a sense of mystery to your photos. Why, then, do natural frames so often go unused by photographers?

Not all of us know what natural frames are, how to spot them, and how to make them even better. In this post, we’ll tell you what you need to know to get started using natural frames.

What is a Natural Frame?

A natural frame is an object you use to frame your subject. For example, a doorway is a common frame. You might include the doorway, or parts of it, in your photo of a bed in a bedroom, for example. In fact, depending on where you’re reading this, that’s an exercise you can try right now.

A door frame is far from the only natural frame you can find. In fact, in one way or another, anything you might take a photo of could be a frame for another subject. But here are some common natural frames to get you started:

  • Nature: The branch of a tree might frame your picture of a bird. You might use the horizon, or the edge of a lake to frame a boat or a frog. There are many natural framing opportunities in nature.

– Architecture: Doorways, pillars, windows, fences, and all manner of architectural features are great natural framing opportunities.

– Shadows/light: Lines of light and blobs of shadow can be transformed into great natural frames if you position your photo right.

– Other objects: As we mentioned, most other objects can be natural frames in the right circumstances. Try looking for circular objects to start—they’re easy to frame with.

How to Find Natural Frames

It may sound simple, but practicing looking for natural frames is the best way to find them more consistently. The next time you have your camera out, challenge yourself to find a few natural frames. Keep going, and keep returning to the idea of natural frames, especially when you find new places to take photos.

That, or you can look through the galleries of other photographers are get inspired by what they’re using as a natural frame. Check out our latest and greatest gallery to see if you spot some natural framing opportunities we took.

Playing with Natural Frames

So, you’ve found a natural frame. Great! Now, what should you do with it? As with composing any photo, you have a lot of choice in how you’ll incorporate a natural frame. Here are a few ways you can play with the concept:

– Focus: Try keeping the frame in sharp focus or soft focus.

– Background: Most frames are kept in the foreground, but they can work in the background too.

– Less is better: Try having your frame only cover one, two, or three sides of the photo, not all four.

Learn More Techniques from Jim and Lori

If you’re finding our blog useful, we think you’ll love joining us on our next Workshop or Photo Tour!

How to Start Your First Photo Blog

Sometimes, it takes a bit of guidance from another photographer to encourage young photographers to start a photo blog. Well, consider this your encouragement! Starting your first photo blog is daunting, of course, but don’t judge yourself too harshly. A photography blog can be an important tool in achieving your goals, whether it’s to get better behind the lens or to start making money with your photos. Here is our best advice on how you should start that blog to maximize your chances of success.

Know Why You’re Starting a Photo Blog

When you first start your photography blog, you’ll feel a rush of inspiration. But, at some point, that will fade. In the moments when you’re not feeling as inspired or dedicated, you need to know why you’ll push on. Also, when you make your decisions about what platform you host your blog through, you may need to know why you’re blogging.

Some reasons to start a photography blog are:

– Improve your skills, get more feedback

– Share your experiences and journey

– Help others improve

– Develop an audience

– Encourage sales

– Hone in on your style

Know Your Audience 

When you get stuck on topics to write about or new photography techniques to explore, you should turn back to your audience. Who are you trying to connect with, and what might they want to read or look at? Possible audiences for your photo blog might include:

– Businesses that buy photography

– Regular people that buy photography

– Fellow photographers

– Those who enjoy travel photography, or whatever you specialize in

– School admissions people

Sort Out Your Website Options

There are lots of website hosting platforms, but photographers tend to gravitate towards two main options: WordPress and Photoblog. You should consider this carefully and do some research. But the basic factors are that Photoblog is simpler to set up and has more built-in tools to help you grow an audience. WordPress is harder to set up but is infinitely more customizable and gives you a custom domain name.

Connect Your Social Media 

This is easier with Photoblog, but still entirely possible with WordPress. Start or connect social media accounts to your website. Link between the two and advertise your blog on your social media accounts. Blogging is becoming less prevalent these days, so you need social media to grow your audience.

Set Small, Achievable Goals  

Don’t expect your photo blog to be a huge success from the moment you start—or even a year later. Blogging is a long-term strategy. It’s best to set a posting schedule for yourself that is regular, but not so demanding that you’ll suffer from burnout. That way, you’ll keep actively blogging.

Join Us to Up Your Photo Blogging Game

Now that you have a photo blog, you need to get out there and start taking more pictures to fill it! If you’re looking for a unique experience, where you can get professional photography guidance and have unusual subject, join us on a Workshop or Photo Tour!


The Best Cloud Storage Options for Photographers

One of the most important considerations for photographers is where to store all of your photos. As a photographer at any level, it is in your best interest to keep an archive of your final work. As a professional, it is your obligation to keep a copy of the work you do for clients or anything you have published or printed. I should say that I do not believe there is any reason to save every frame you may shoot, but rather only the images you have or are planning to finish.

Unfortunately, the days of free cloud storage are over, and most of us have surpassed our limits of free storage. To make matters worse, images shot in RAW  and then finished take up a considerable amount of space (with today’s file sizes 1 gigabyte for a finished image is more the rule than the exception), so safely storing all of your images is going to require some kind of investment. 

This blog will help you find the best cloud storage option for you. 

What is the Cloud?

In case you’re not familiar with the term, it’s just tech talk for online storage. The benefits of online storage include:

Freeing up physical storage space

Access to your photos from anywhere with an internet connection

Ability to share photos with individuals or groups of people

The Best Cloud Storage Options for Photographers

The best option for you will depend on your needs and your budget, but we will look at three of the best overall options – and you can narrow them down to which one will adequately and affordably suit your needs.


Amazon Drive


If you’re an Amazon Prime customer you may not know that you already have storage included in your membership, but you do! Your Prime membership includes Prime Photo which supports RAW files and includes 1 TB of cloud storage through AWS (Amazon Web Services).

For non-members, you can purchase the service for $59.99 a year giving you access to your photos from anywhere you can access the app.

The one downside, it doesn’t allow you to view, tag, or organize your RAW files, but is good for finished images.


Backblaze


This option allows you to seamlessly integrate cloud backups into your workflow with a powerful file sync and backup service. Without having to actively process anything you can automatically secure all of your files.

All plans come with unlimited storage, making it extraordinarily affordable when you consider the personal plan is only $5 a month (less than you spend at your coffee shop in a day!).

It’s one slight drawback is that it doesn’t offer photo tagging. Some say it looks a little dated (the same is said about me) but does that really matter for the results you get?


Dropbox


Starting out at $16.58 per month for the professional plan, with storage capped out at 1 TB, this is certainly one of the more expensive options. But, it’s great because not only does it support your RAW image files, but they are viewable as a preview image once uploaded. This makes organization worlds easier than other options. Plus, you can create image presentations, password-protected galleries, and add captions and logos to your files.

Learn and Travel with Steinberg Photography

Interested in honing your skills on a photography adventure with professional photographers Jim and Lori Steinberg of Steinberg Photography?

Give us your contact information on our Workshops & Photo Tours page, and we’ll send you more info!

DSLR Camera Basics for Landscape Photography

Good landscape photography can transport you to a scene and make you feel like you’re really there. Though creativity and skill are requisite, much of it is knowing which buttons to push on your camera. This blog will give you a bare-bones introduction to the DSLR camera basics for landscape photography, and link to some related blogs we’ve written that go into greater depth. 

What about Aperture?

Aperture Priority Mode allows you to set the aperture manually so you can choose the camera’s depth of field and then the camera decides on the shutter speed. In most landscape images, the  aperture is generally fairly small, from f/11 to f/16, which means there is a large range of depth.

Think of a panoramic picture where there’s lots in the composition. If that’s what you want, that’s what you’ll get with a smaller aperture. 

To see what the depth of field looks like with three different aperture settings, check out this blog on aperture priority mode.

How about ISO?

Your camera’s ISO setting allows you to control the sensitivity of the DSLR sensor to light. The lower the ISO number, the less sensitive your camera is to light. Higher ISO numbers mean your sensor is more sensitive to light. 100 to 200 is good in most circumstances. Also, by using a lower ISO you reduce the amount of digital noise or grain that occurs in the image, especially with lower level and less expensive cameras.  

But remember, conditions where you’re shooting are the ultimate judge of what your ISO should be. As it’s getting a bit chilly out there, here’s a breakdown on how to take better pictures in the snow, a big part of which is getting ISO right. 

What about the Composition?

The composition refers to how elements are arranged in your picture. Because this is a blog covering DSLR camera basics, follow the rule of thirds, which says that the most visually appealing and engaging pictures are those that have the subject in either the left or right third or especially in one of the “power points,” where the lines intersect. But don’t be afraid to experiment with fifths and eighths as well, especially if you want to use negative space to emphasize something.  

What about Filters?

To take great outdoors pictures, the only three filters you’ll need are a warming filter, such as a skylight filter, a polarizing filter and a graduated neutral density filter. Find out what each allows you to do in our blog on the best camera lens filters for landscape photography.

Need to learn more DSLR camera basics? We’ve got plenty of articles in the Steinberg Photography blog, so make sure to click through a few. Thanks for stopping by.

Join Us for a Photography Adventure  

Improve your craft and have an outdoors adventure with landscape photographers Jim and Lori Steinberg. Photographers of all experience and skill levels welcome! 

Leave us your contact information on our Workshops & Photo Tours page, and we’ll send you more info! 

How do You Choose the Aperture for Landscape Shots?

Switching into aperture priority mode is a game changer. It’s like taking the training wheels off your bike. Rather than having your camera tell you what the right aperture is for the shot, you tell the camera. When you choose the aperture for landscape shots, you are deciding how much light will pass into the camera onto the film or onto your DSLR’s sensor and how much depth of field your image will have.

The aperture you choose or landscape, or portrait or any other scenario will determine the depth of field, which is the distance between the nearest and farthest objects that are in sharp focus in an image. 

Wide Aperture 

A wide aperture of f/2.8 to f/4 delivers a reduced depth of field. What’s right in front of the camera is in sharp focus and everything behind is blurry. This aperture setting is a great strategy for outdoor portraits, as we discuss in our blog about the best camera settings for outdoor portraits.

Medium Aperture

A medium aperture, from f/5.6 to f/8, will give you a slightly expanded depth of field. The foreground will be sharp and the background will be blurry, but not so blurry as with a wide aperture shot. A medium aperture is a good approach if you want to draw attention to something in the foreground but not so dramatically that it looks like you are taking a portrait. 

Small Aperture (Best Aperture for Landscape Pictures, Usually)

Most landscape pictures are shot with a small aperture, also called a narrow aperture, ranging from f/10 to f/16. Most or all of the scene will appear in sharp focus. To get a composition with the right amount of exposure, you’ll need to compensate with a long shutter speed or a higher ISO setting, both of which will mean you probably need to use a tripod or your image will end up blurry.

What the heck is ISO? Check out our blog on DSLR camera basics for a quick rundown. To see what the three aperture settings above look like, check out our blog on aperture priority mode

If you have any questions about choosing the best aperture for landscape pictures, feel free to reach out to us via our social media channels!

Learn Landscape Photography with Jim and Lori Steinberg

Interested in testing the waters of landscape photography with an award-winning photographer? 

Join other aspiring photographers on a photo adventure with Jim and Lori Steinberg of Steinberg Photography. You’ll learn how to set up the depth of field, composition, and yes, aperture for landscape pictures, and much more! To see where we are headed next, check out our Workshops and Photo Tours!

The Ghost Photography Craze

In the early 1860s, William Mumler, a young and enterprising Boston engraver that dabbled in photography, claimed to have captured the spirit of a deceased relative while developing a photograph. It unleashed one of the odder epochs in the relatively short history of photography: the age of ghost photography.

Mumler had stumbled into a phenomenal business opportunity, and much of it had to do with timing.

Spiritualism in the 1860s was mainstream. People across the country believed that the deceased could be summoned with séances, mediums and clairvoyants. Mary Todd Lincoln, a prominent spiritualist, was communicating with spirits in the White House.

At the same time, the American Civil War was raging, and grieving relatives of soldiers killed in battle, many of them quite young, were looking for anything that might comfort them. Mumler’s business boomed and soon he was doing nothing from morning to night but taking spirit photographs, as he called them.

But not everyone was happy with his sudden success.

Photography in the 1860s was still quite new, and the number of practitioners was still relatively small. That meant photographers were incredibly competitive. Jealous of Mumler’s success, numerous photographers and investigators visited his studio to investigate his methods and prove, they hoped, that he was a fraud.

Yet they were forced to concede that his results were legitimate. Soon Mumler was providing mail-order service. All you had to do was send him seven dollars and fifty cents and a description of the spirit you wished for him to summon.

Then it all came crashing down.

A passer-by of Mumler’s studio noticed something odd in one of his spirit photographs. The spirit was his wife, who has still alive and who had posed for Mumler years before he’d taken his supernatural turn.

Mumler fled Boston for New York, slipping into relative obscurity to escape prosecution in the later 1860s, though he briefly appeared to fulfil a request for a high-profile client: Mary Todd Lincoln. Mumler’s picture shows an ethereal President Lincoln resting his hands over the shoulders of the seated First Lady.

Learn Landscape Photography from the Pros

Learn the stratagems, ghostly and optherwise, of photography from an award-winning photographer! Join other aspiring photographers on a photo adventure with Jim and Lori Steinberg of Steinberg Photography.

To see where we are headed next, visit our Workshops and Photo Tours page!

10 Photography Questions You Were Too Afraid to Ask

Got a question you’re too afraid to ask? You’re not alone! Here are 10 of the most common photography questions answered by Jim and Lori.

  1. What is Aperture Priority (AV/V) Mode?

It allows you to control aperture while your camera selects the shutter speed based on the light available for the shot.

  1. What is Program (P) Mode?

    The camera will select the aperture and shutter speed automatically based on the amount of light passing through the lens. Basically, it’s automatic or “point and shoot.”

  2. What is Shutter Priority (SV/S) Mode?

It allows you to control the shutter speed while the camera automatically sets the aperture based on the amount of light available.

  1. What is Manual (M) Mode?

Manual means you are doing it all. You control the aperture, shutter speed.

  1. Is It Better to Buy a More Expensive Camera?

This is a question a lot of people ask. In general, the price of the camera can reflect the quality. However, a good camera won’t help a bad photographer, and a good photographer may not necessarily need all of the bells and whistles accompanying a heftier price tag. Like the human brain, we will likely only use 10% of the available capacity of the highest end cameras on the market today. 

Do your research. Look at various models and their specifications and reviews. Always hold one in-person. The ergonomics (how it feels in your hands) is critical. Look for a camera that works for your budget now and that you can upgrade and accessorize as you figure out what you need and afford later.  

  1. How Do You Take Good Bird Close-Ups?

Very carefully! Birds are skittish by nature and don’t pose for the camera. Your best bet is to be patient and sit quietly with a 400mm lens or longer. Mounting your camera to a tripod may help, make a quick wish, and wait for it. Wear neutral or colors that blend in with the environment, and don’t make any sudden movements. A portable blind may be helpful, but generally, once the birds understand you’re not as scary as you look, they’ll get back to business as usual, and you can take your shots. It may take a few tries, but you’ll get it. 

  1. When Setting Up the Flash Stand, Do I Shoot Through the Umbrella, or Use It to Bounce Light Back on the Subject?

It depends on the effect that you are going for. Shooting through the umbrella will give you big catchlights in the eyes. It’s similar to diffusing the quality of the flash with a softbox. Play around and see what works for your subject. 

  1. How Do I Attach My Umbrella to a Stand?

You’re going to want to get yourself “umbrella bracket adapters.” 

  1. Does the Brand Matter?

Yes! You don’t want to lose all of your work to a subpar compact flash card. Lexar and SanDisk are both well-established brands with reliable, quality memory cards that we use exclusively.

  1. Does Size Matter?

Some believe the bigger, the better. And it can be super convenient to be able to store everything in one place. However, if something happens to that card, you will be devastated when you lose everything. Using 32GB or 64GB cards will more than suffice. And don’t forget to back up! 

Join Us for a Photography Adventure 

Let’s explore Oman in Late Fall 2019 together! 

Give us your contact information on our Workshops & Photo Tours page, and we’ll send you more info!

Say cheese! When smiling in pictures became a thing

Appelsin! Ouistiti! Buncis!

These are just a few ways people around the world say say cheese! to get people to smile for pictures. Of course, those words don’t literally mean “cheese” in Norwegian, French or Indonesian. (It’s orange, marmoset and green beans.)

What matters is that they contain a close unrounded front vowel (/i:/) that’s nearly impossible to say without smiling. Which brings us to this question: When did people start smiling in pictures, and why?

When smiling in pictures was frowned upon

The first pictures were taken in the 1820s, but it wasn’t for 100 years, until the 1920s and 1930s that smiles became the standard expression in photographs. The typical explanation is that long exposure times on early cameras made smiling impractical. It’s a logical explanation, but there’s not actually much evidence to back it up.

In the earliest photographs, long exposure time certainly was the explanation. Photographers told their subjects to get comfortable and not move for up to a minute. But by the 1850s, camera technology had advanced to the point where exposure time was down to a few seconds — certainly long enough to hold a smile.

A few pictures from the period do show people smiling, like this one showing a positively cheesing soldier in the Mexican American War, but they are the exceptions.

Which leaves about 60 years unaccounted for.

This gave rise to the poor dental hygiene theory — that people didn’t smile in pictures because they didn’t want their crooked, mangled or missing teeth captured for eternity in the form of a photograph. Others have argued against this theory, pointing out that because lousy teeth were so common they were hardly something one would have thought to try and conceal.

The most convincing argument is made by Christina Kotchemidova, a professor of culture and communication at Spring Hill College, who wrote an article about the history of smiles in photography. Kodak, she says, the company that revolutionized photography by bringing it to the masses, also revolutionized how people thought they should appear in pictures.

It had a lot to do with Kodak’s advertising. Dating to as early as the 1890s, Kodak ads showed happy people using their cameras while doing fun things. Everyone was smiling in the ads, and people got the idea that that was what you were supposed to do when you were in a picture.

For more photo-history, check out our history of the camera in a flash.

Learn Landscape Photography from the Pros

Learn the tricks of landscape photography from an award-winning photographer! Join other aspiring photographers on a photo adventure with Jim and Lori Steinberg of Steinberg Photography.

To see where we are headed next, visit our Workshops and Photo Tours page!

Is the Rule of Thirds a Bunch of Mumbo Jumbo?

What is the Rule of Thirds? Picture drawing the lines for a game of tic-tac-toe on your viewfinder. Now your composition is divided into thirds both vertically and horizontally and you have an image divided into threes both vertically and horizontally.

The Rule of Thirds, one of the best known compositional strategies, says that the most visually appealing and engaging pictures are those that have the subject in either the left or right third or especially in one of the “power points,” where the lines intersect.

Imagine drawing a game of tic-tac-toe on the image below. You’ll notice that the two race cars are on two power points: where the bottom and left lines intersect and where the top and right line intersect.

Pictures that follow the Rule of Thirds convey tension and energy. They fulfill our natural desire for order, and provide a sense of balance that allows the eye to wander about the composition with ease.

Pictures with off-center compositions looks far more natural than those where the subject is right in the middle of the frame. Think of it like covering up your work and turning yourself into a fly on the wall.


Placing an object in either the left or right third of your composition provides an anchor, a focal point from which the eye can travel through the rest of the picture. Imagine the two pictures below if the tree or telephone poles were in the center of the frame. The image would feel split in half, divided.

It’s not really a rule, you know. The Rule of Thirds is just another tool in your toolbelt, another weapon in your arsenal, that can be used if and when it’s advantageous to do so. And when you forget to follow the Rule of Thirds while you’re shooting, you can always come back to the picture and play with the cropping to position it where you want.

Learn Landscape Photography from the Pros

Learn the tricks of landscape photography from an award-winning photographer! Join other aspiring photographers on a photo adventure with Jim and Lori Steinberg of Steinberg Photography.

To see where we are headed next, check out our Workshops and Photo Tours!


1 2 15