All posts by admin

10 Tips for Taking Stunning Autumn Pictures

August 1st marks the halfway point of summer, so it’s the perfect time to start planning your fall photography trip. Use these ten tips to diversify your portfolio or perfect your technique! 

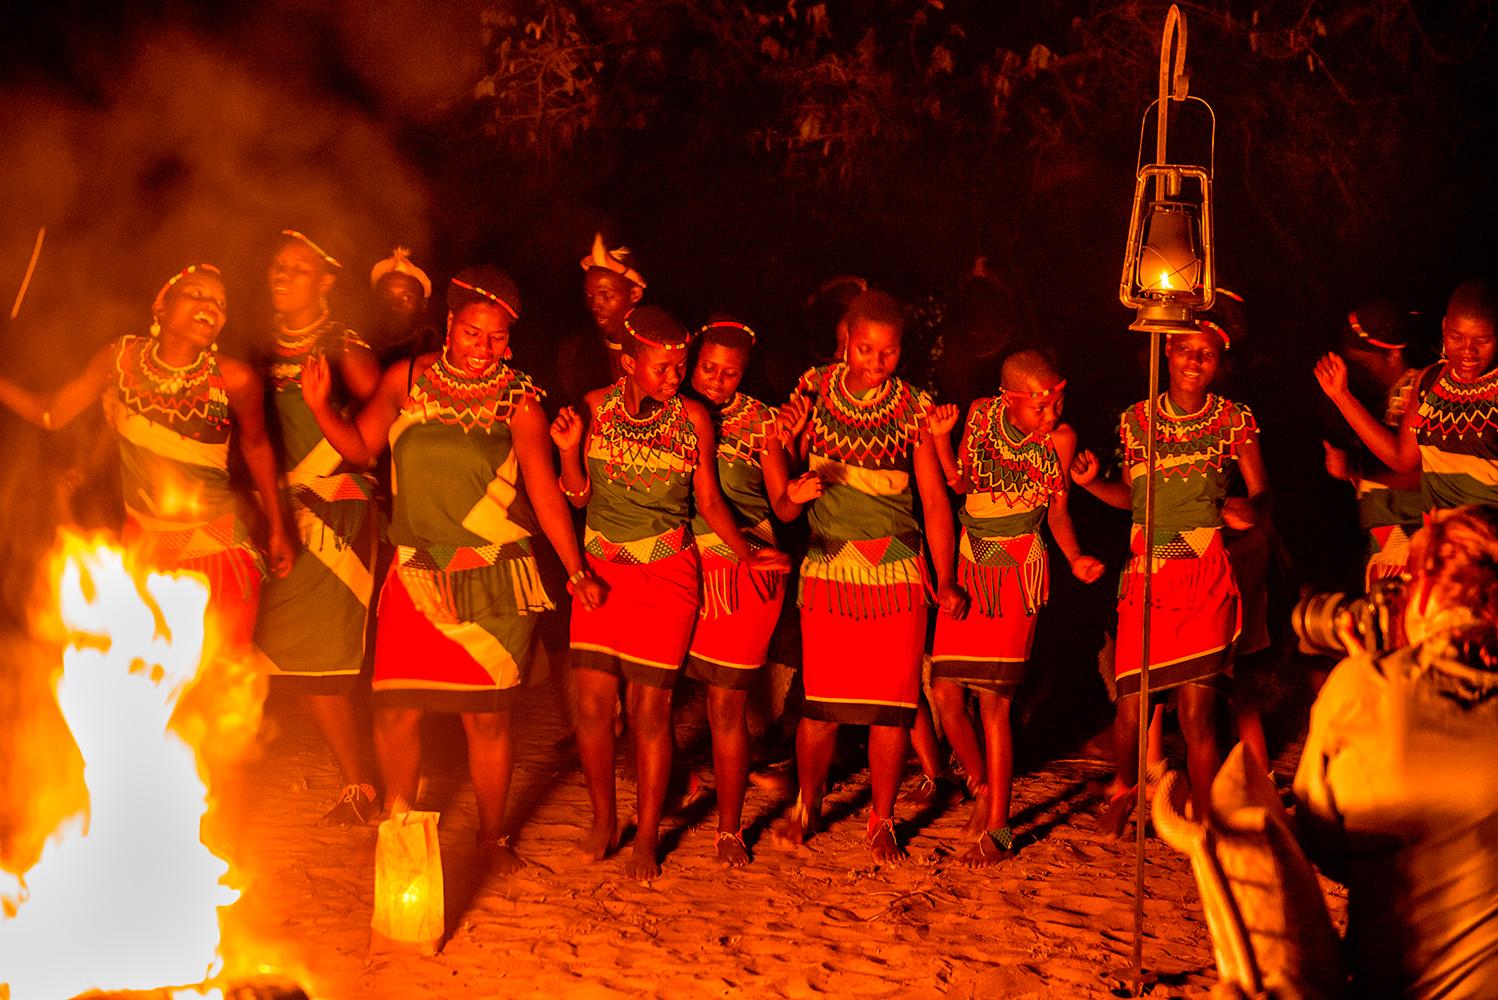
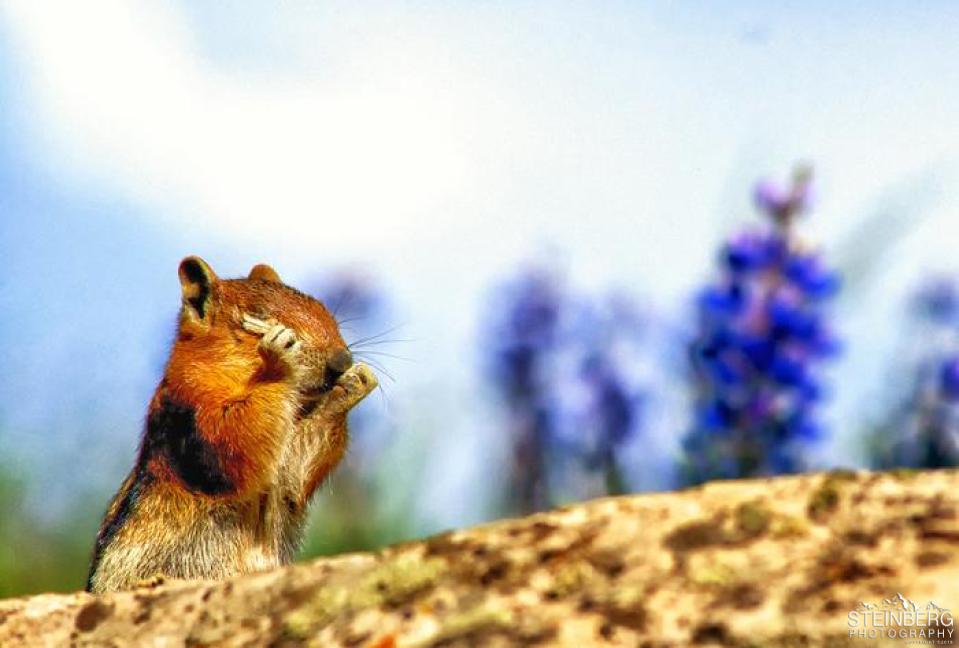
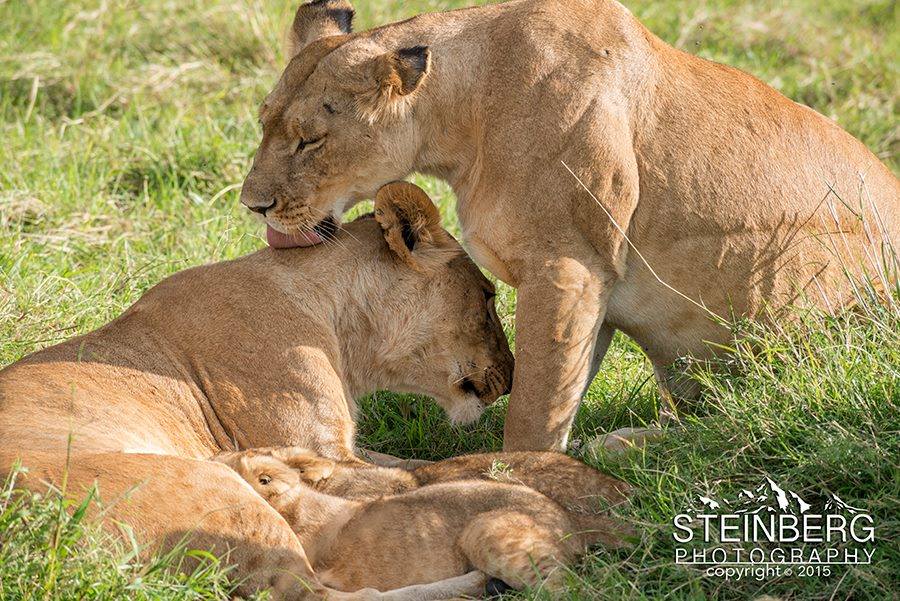
1. Capture Seasonal Creatures

To capture the best wildlife shots, learn the habits of the animal you’d like to shoot. Figure out when and where they are the most active or visible, and be there! For nocturnal creatures, consider setting up a camera trap.

For your safety and theirs, avoid getting too close by using a big telephoto lens of at least 300mm. When shooting skittish critters or in low light, a fast lens like an f/2.8 or f/4 will be your best bet.

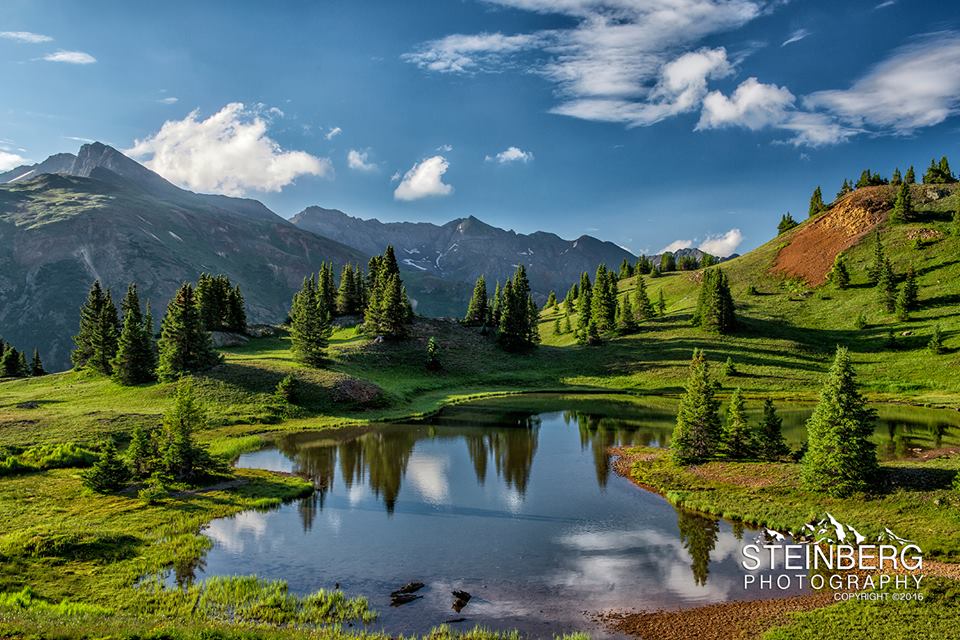
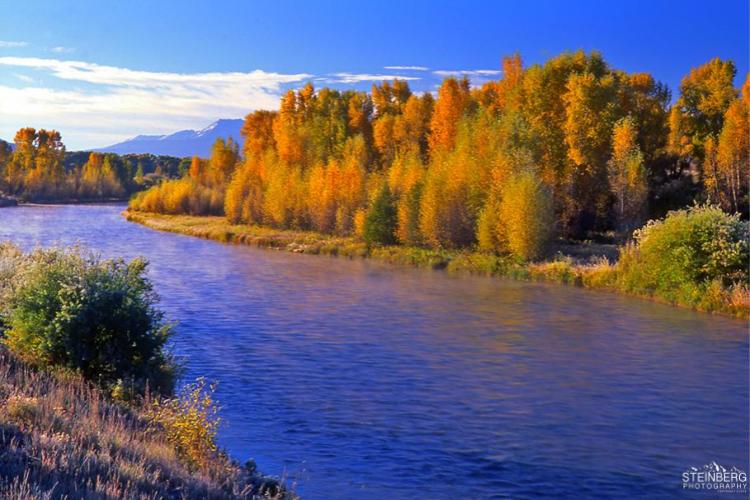
2. Love Lush Landscapes?

Fall is a great time to plan a photography road trip! I wrote about the best spots to see from West to East to help get you started. To capture lovely fall landscapes, consider shooting during “the golden hour,” which is right after sunrise or before sunset when the sun’s light is warmest.

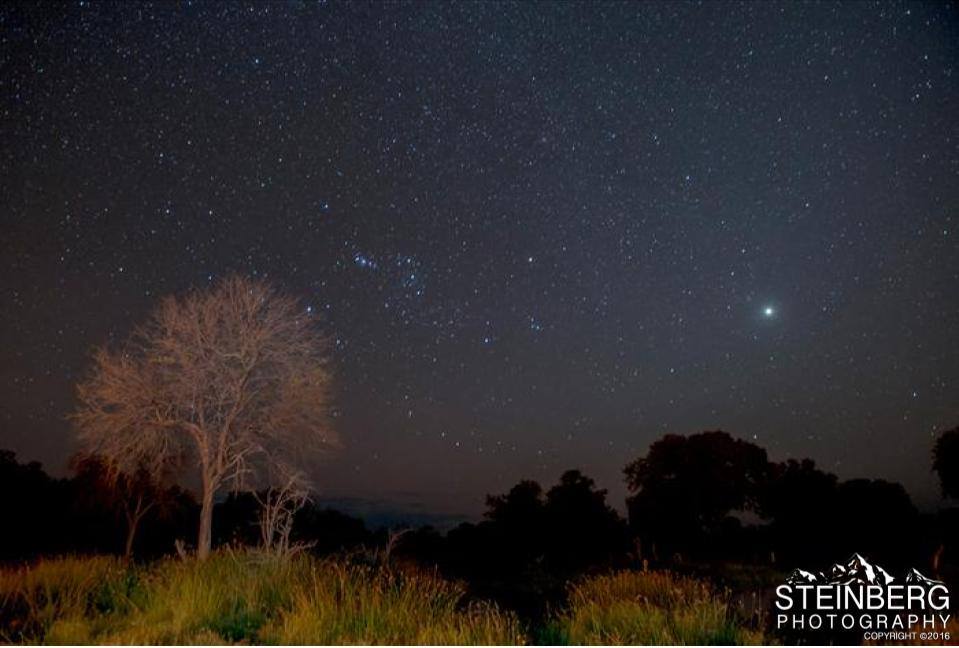
3. Don’t Miss the Mist

Also at sunrise, and due to autumn’s cool nights and warm days, there is often haunting yet beautiful mist that you don’t want to miss. It can add an alluring layer to your shots.

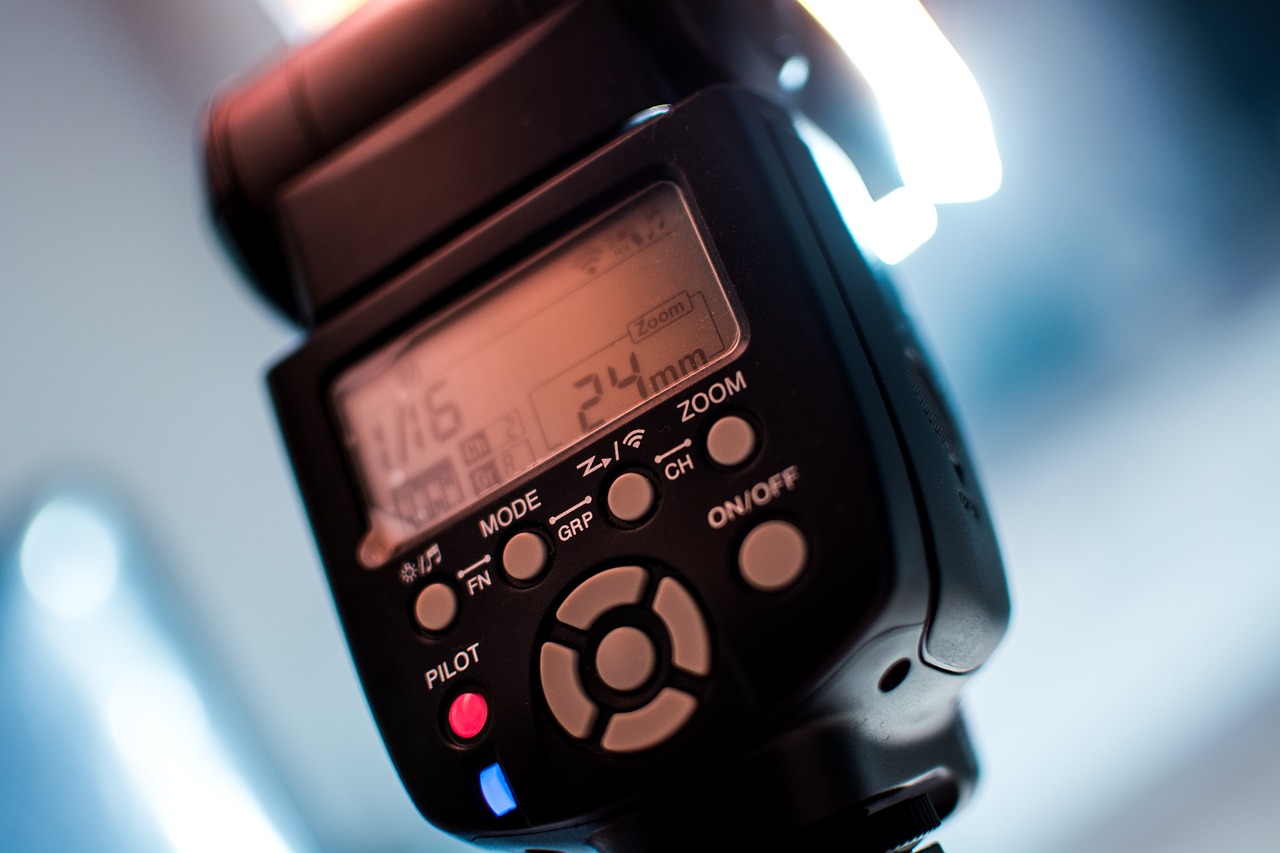
4. Perfect Your Portraits

Autumn is the perfect time to take family photos. You can utilize the low sun from late morning into early afternoon by facing your models into the sun. This position gives you well-lit shots without the need for flash or reflectors. Plus, the colors of nature add charm and warmth to photos.

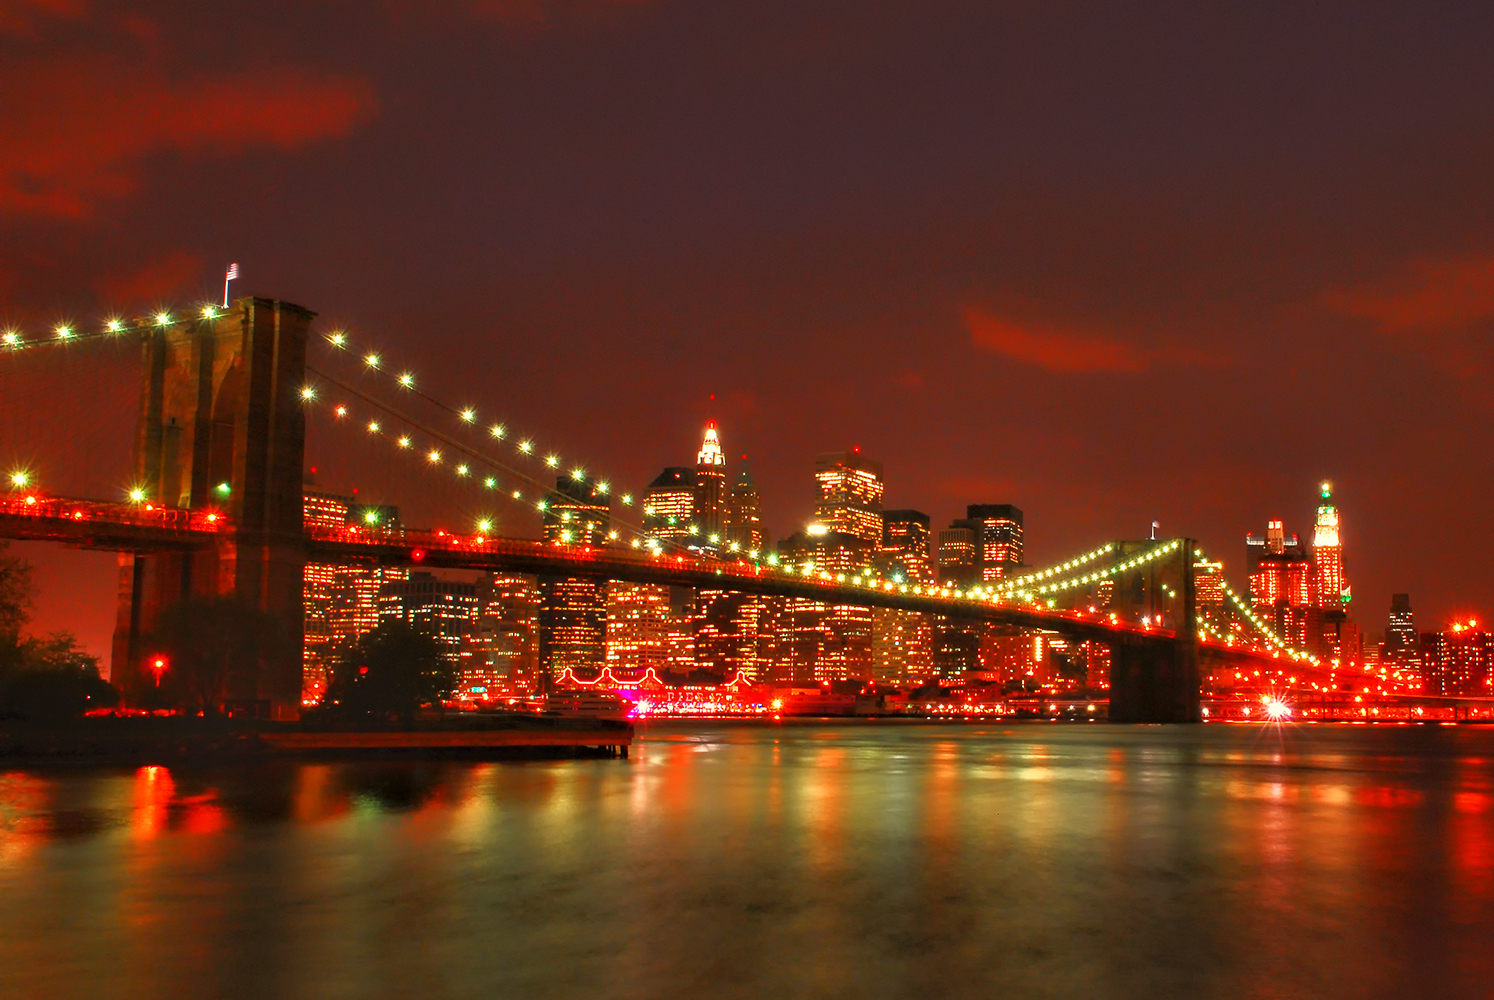
5. Take Advantage of Reflections

Get twice the pleasure from fall foliage views by catching reflections of flora and fauna in the water. Shooting from a high vantage point with your back to the sun will help you maximize the reflected colors. Make sure to head out on a calm day when the waters are still.
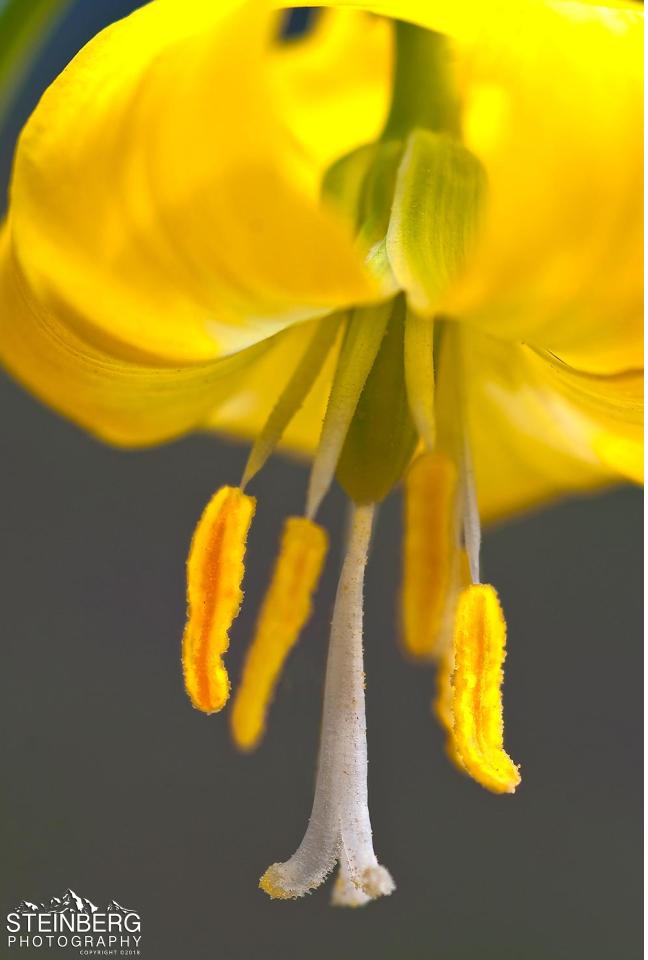
6. Get in Close

The leaves in autumn turn color and reveal the delicate design of veins, making them a great subject for close-up photography. A macro lens will capture larger-than-life detail.

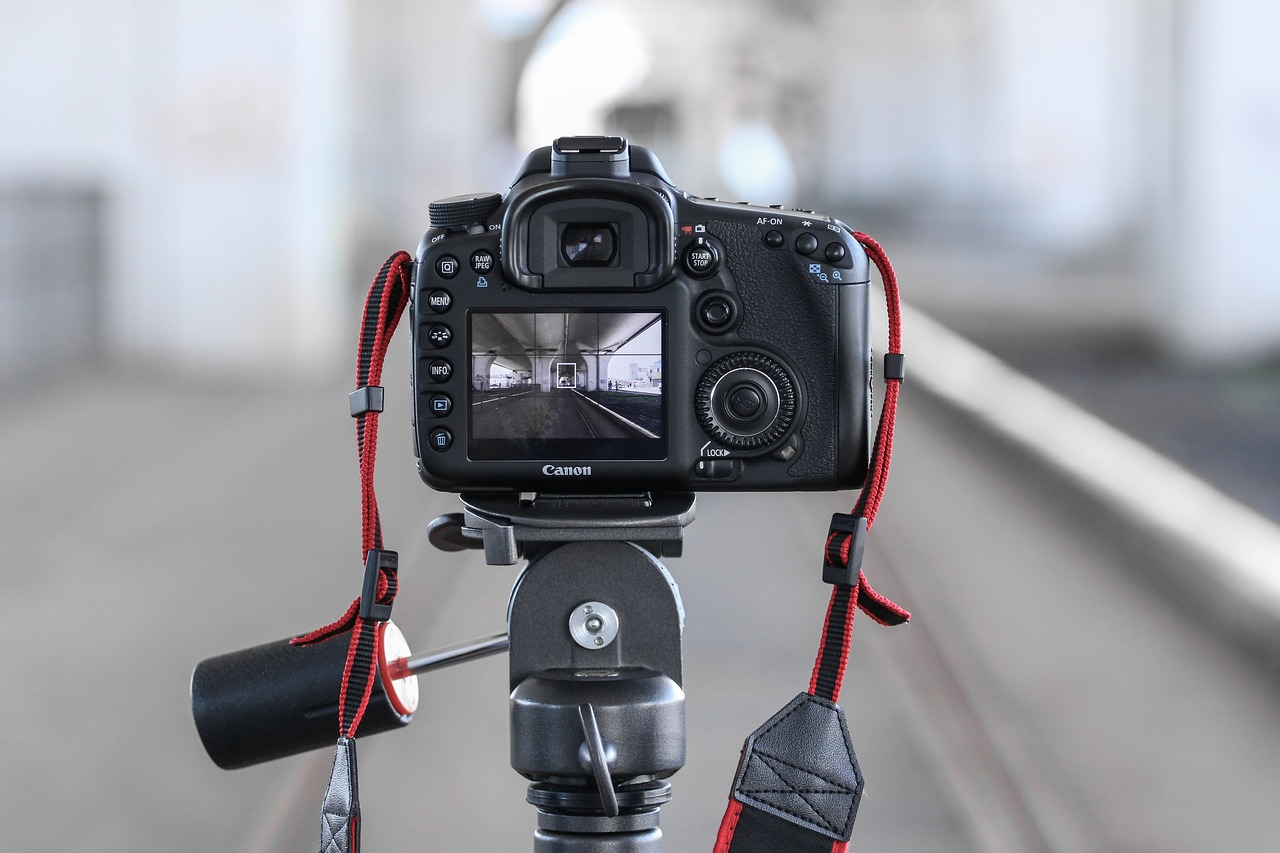
7. Set Up a Still Shot

Want to get your creative fix, but it’s getting a little too cold? Consider setting up a mini studio indoors. You can use a tripod and set your camera to live view in order to fine-tune your composition. Take this time to capture food, flowers, and seasonal décor.

8. Capture Fall Contre-jour

This French term means “against daylight.” So, use the sun’s rays to backlight your subject. This setup is strongest when shooting in the morning or afternoon, and make sure your subject at least partially blocks the sun. Use this technique to create distinct contrasts and focus on your subject.

9. Have Fun With Fireworks

Set up a tripod and a remote release before the display begins for best results. Stay upwind so that the smoke drifts away from the camera. You should also try to avoid spectators who may interfere with the shot or your equipment. Also, shoot wide and crop later if you need to.

10. Snag Stag Shots

Autumn brings with it a lot of stunning natural scenes, including rutting—a sight to see as stags lock antlers in competition for female attention. Keep your distance. This is an aggressive moment, so it’s best to use a long telephoto lens with a wide aperture. This setup will also help separate the deer from their background. Shooting into the light on an early misty morning and adjusting your exposure for a brighter sky will put the deer in silhouette.

Join Us for an Autumn Photography Adventure in 2019

Visit our Workshops & Photo Tours page to tell us you’re interested in visiting Oman this Fall, and we’ll send you more info!

Playing with Fire Photography

Fire comes in many shapes and sizes—from massive wildfires that race up hillsides at 20 miles per hour and burn hundreds of thousands of acres in a few days to the highly controlled fire used to inflate hot air baloons to the little flame at the end of a candle that’s being blown out at a birthday party.

What matters in fire photography and what’s important to the photographer isn’t the size of the flame but getting the correct mood and emotion that it creates.

The Challenge of Fire Photography

Fire photography is challenging, especially when shooting in ‘auto’ mode. If the camera exposes for the flame, then the background will likely be very dark due to the difference between the darker ambient light and the bright flame.

If you use your flash without adjusting its output, or your camera automatically uses it in a low-light setting, you’ll notice two things:

First, that the flash overpowers the glow of the flames as it illuminates the entire scene; and, Second, it will create harsh shadows as the camera will default to a faster shutter speed. This combination will take away any natural or spontaneous feel of the photo – likely the very reason you took the picture in the first place.

So how do you capture both scene and flame? How do you reproduce the all-important mood created by firelight?

A Few Fire Photography Techniques

Slow your shutter speed

Above all else, good fire photography is achieved by mastering  a combination of your shutter speed, aperture and ISO. As a general rule, the smaller the flame(s) the slower the shutter speed. This allows them to move and dance and help create a feeling. The slower the better, because your fire, in most situations, will be considerably dimmer than your background.  

If your scene has movement that you don’t want expressed in the picture, too slow of a shutter speed may make things look blurry. You can ameliorate this by using a higher ISO.

Now, if people are dancing around a fire as here, you may want to capture the swinging of their arms and legs. Blurriness can add to the scene. It’s up to you to decide the effect you want.


62mm lens – ISO 3200, f3.2 @ 1/40 sec

No flash

Aperture size matters

For the most control, you need to experiment with different shutter speed/f-stop combinations. Larger apertures (f/2, f/2.8) let in more light and allow you to use longer shutter speeds.

They also change the effect of the flames. To try this out yourself, look at a fire with your eyes wide open, then squint and see the difference. This is the same difference a smaller lens opening has versus a larger one.


24mm lens – ISO 400, f6.3/ @ 4 seconds.

Fill flash at -2

Flash

Controllable fill flash can also be of extraordinary help in making your fire photos come to life with added dimension. Using it at a (-) setting and mixing it with a slow shutter speed can accomplish great things around the campire.  And don’t forget the tripod

Remember that every scene has countless variables that need to be taken into account—the level of movement, how far away your subject is from the flame, how much you wish to light the background, how intense the flame is, etc.

The great thing about digital cameras is you can check how your exposure settings worked and delete and adjust as necessary. After all, they’re only electrons.


36mm lens: ISO 800, f5/ at 1.6 sec.

Fill flash at -1

34mm lens – ISO 500, f9 @ 1.6 sec.

Fill flash -2

Learn Landscape Photography from the Pros

Learn the tricks of landscape photography from an award-winning photographer! Join other aspiring photographers on a photo adventure with Jim and Lori Steinberg of Steinberg Photography.

To see where we are headed next, check out our Workshops and Photo Tours!

5 Keys to Photographing the Night Sky

Our species has marveled at the night sky for as long as we’ve been around. Every ancient civilization, no matter where they were located or what they believed, looked to the stars, the constellations, the moon, and meteor showers to make sense of the world.

And it makes sense. Almost nothing is more spectacular than the night sky. So how do you do it justice in your pictures? Here are five keys to photographing the night sky like a pro.

Get the right gear

Unfortunately, there’s a limit to what point-and-shoot cameras can achieve when photographing the night sky. And they can’t achieve much.

You’ll need a DSLR, ideally one with a f/2.8 or faster lens. With regard to the lens, the wider the better.

A tripod is also an essential piece of gear. And don’t skimp. It shouldn’t wobble if you touch it. If you want to go beyond 30-second exposures (which is the limit most cameras will allow you to do with their built-in timer), a tripod with a cable release will be essential. As you become more experienced, you may want to consider a tripod with a cable release and a built-in timer.

Get the timing right

The cosmos are how we keep time, so it should be no surprise that one of the keys to photographing the night sky is knowing how it changes with the seasons.

One great tool, which will tell you everything from when the moon will rise and set, when the next full moon is, and when and where you can catch a “supermoon,” is an app called the Photographer’s Ephemeris, which is available on all major platforms. Other good apps include, PhotoPills and Go Sky Watch.

Other astronomy software can tell you where any celestial object will be in the sky from any point on earth. Want to capture a shooting star? That’s all about timing too.

(You can check out a schedule of meteor showers in our star photography blog.)

Short-term timing, like time of day, is also important. Early evening and dusk are great times to photograph the moon because there’s still some light in the landscape to balance with the moon’s glow.

Escape light pollution

What else is important for photographing the night sky? Darkness of course! With ever-increasing amounts of light pollution, true darkness is in short supply.

The International Dark-Sky Association (IDSA) is the recognized authority on light pollution and is the leading organization combating light pollution worldwide.

To find great places to shoot the night sky, check out the IDSA’s 100 “dark sky places.” Find out if one is near you in their Dark Sky Interactive Map or get the Dark Sky Finder app.

Dial up the ISO

Milky Way – Mara River, Maasai Mara National Reserve, Kenya

In-camera low-light sensitivity has made photographing the night sky easier than ever before as cameras’ capabilities just keep getting better and better. Only ten years ago, ISO 1600 was considered state of the art. Now ISO 6400 and above is considered the norm in high-end cameras.

To have the Milky Way appear like a rich cloud of milk dumped into coffee, you need to push the limits of your ISO. Try a 20-second exposure with a f/4 stop at ISO 4000.

Milky Way – Rub al Khali, The Empty Quarter, Oman

You need to remember that the stars are constantly moving, though it does not seem so to the naked eye. As a result, shorter exposures will give you sharper stars. Experiment with different exposure times to determine which effect you like most.

Much more than a 40 second exposure and the stars will appear to have moved, which they have. At more than 60 seconds they will start to streak across your composition. And the shorter your lens, the shorter your exposure time will need to be.

When using high ISO, you’re going to get a good amount of noise. Use a noise reduction software in your camera, if available, as well as in post-production.

Do it justice with white balance

What color is the night sky? Your instinct may be to say it’s black or a deep purple, but you may be surprised to find that its actually reddish or pinkish, especially if you’re using a longer exposure. To get a color that more closely resembles what we associate with the night sky, use white balance setting to enhance the blue end of the light spectrum.

Using the tungsten white balance setting instead of daylight mode will reduce the Kelvin temperature recorded and give you a cooler image from the start. Shoot in raw so you have maximum control to adjust the warmth of your pictures in post-production.

Learn Landscape Photography from the Pros

Interested in learning the tricks of landscape photography in the field with an award-winning landscape photographer! Join other aspiring photographers on a photo adventure with Jim and Lori Steinberg of Steinberg Photography.

To see where we are headed next, check out our Workshops and Photo Tours!

A Year in Colorado 2019 Calendar

Pre-order your copy of Jim Steinberg’s A Year in Colorado 2019 Calendar today. It’s a great gift for nature lovers and Coloradans—or yourself. The holidays are right around the corner!

How to Read and Use a Histogram

You’ve seen a histogram before—that spiky graph on your camera’s rear LCD display or on your electronic viewfinder (EVF). Traditionally reserved to higher-end digital cameras, histograms are now found even in base-level cameras. You may even have one on your phone.

So what is a histogram, and why would you want to use one? Basically it’s a tool that tells you if your image is overexposed or underexposed. It’s one of the best and easiest ways to accurately judge the exposure of your image.

Most beginning photographers take a picture and then look at the reproduced image on the camera’s LCD or EVF of their camera to judge the exposure. The problem is that both of these displays have adjustable brightness. The image may appear darker or brighter than it really is on the LCD or EVF for the same reason a computer screen looks dark in bright sunlight, and bright in a dark room.

Few novice photographer use it, but those who are truly dedicated to their craft learn how to read their histogram and put the information in it to use. This blog will provide a crash course.

Reading the Histogram Graph

The histogram is a graph. The horizontal axis shows you the tonal distribution (dark to light). The vertical axis shows you the number of pixels in a particular tone.

Generally speaking, you want a histogram graph that resembles a bell curve. If your image is too bright or too dark, you’ll lose details. Remember, at times this may be intentional.

Sometimes uneven distribution is OK. Some pictures are not evenly exposed by design, like when you’re shooting a snow scene or when you’re taking a picture of something against a white background. The same is true when you’re shooting a dark object, like a silhouette.

There’s no ‘correct’ histogram reading. The important thing is that you know what you want your image to look like. Don’t just examine the histogram on pictures that turn out great. Examine it when your pictures are overexposed or underexposed so you know what to look for while shooting.

Once you get good at reading the histogram, you’ll know instinctively when to try a different shutter speed, increase or decrease the ISO, adjust the exposure compensation, or switch to a smaller or larger aperture.

Now, having said all that, for those who have a camera with a “highlight indicator”  in the playback options, I suggest turning that on for an easy way to get correct exposure: When the highlights are overexposed, they will be blinking at you when you view the LCD/EVF screen. We refer to these as “blinkies). When you see these “blinkies” you need to lower the exposure, which means smaller aperture or higher shutter speed.

Learn Photography Skills from the Pros!

Want to learn how to create and sell a landscape photography calendar? Need help with a photography pricing guide? Our blog is full of business tips for aspiring photographers.

If you’re looking to hone your skills or take a landscape photography adventure with professional photographers, Jim and Lori Steinberg of Steinberg Photography offer numerous exciting workshops and tours that are great for everyone from beginners to professionals. See where we’re heading next!

8 Jaw-Dropping Colorado Photography Locations

It should be no surprise that there are so many amazingly gorgeous Colorado photography locations: Colorado is spanish for colored. During spring the foothills are filled with wildflowers which then move up into the mountains for summer. There are snow-covered mountains, deserts, deep canyons and raging rivers.

We take it all in from our home in Steamboat Springs, and love to share our pictures with the world. Here are 8 jaw-dropping Colorado photography locations not to be missed next time you are in the “The Centennial State.”

Chimney Rock National Monument

Southwestern Colorado’s Chimney Rock is home to the namesake rock, a 315-foot tall edifice, as well as numerous Pueblo II (900-1150 AD) archaeological sites. The monument lies in 4,726 acres of the San Juan National Forest. Dark night skies allow for great star photography and viewing. Cross-country skiing and snowshoeing, horseback riding, and hiking are also popular.

  • Garden of the Gods

Just outside of Colorado Springs, Garden of the Gods is one of the state’s most popular attractions. Its gravity-defying spires, towers of reddish and white sandstone and shale formations, and 15 miles of hiking trails are a popular draw for wildlife enthusiasts, outdoors lovers, geologists, photographers alike.

  • Black Canyon in Gunnison National Park

Some of the steepest cliffs, oldest rock, and most dramatic chasm on the continent can be found in Black Canyon, a 48-miles long gouge into the surface of the earth carved over two million years by the Gunnison River. The name comes from the depth of the canyon. Some areas only receive 30 minutes of sunlight a day. Hike along either rim of the canyon or hike down to the river or take your car on one of the scenic drives.

Pawnee Buttes

In northeast Weld County, Colorado, 13 miles south of the Wyoming border in the Pawnee National Grasslands is the Pawnee Buttes Trailhead. The two 300-foot buttes are accessible on a 1.5-mile trail. The first is on public land, but the second butte is on private land and can be accessed as long as no sign is posted indicating otherwise. With hawks and falcons nesting on the rocky cliffs surrounding the area, it’s great location for wildlife photography though some areas are closed through June to protect the fledglings.

Indian Peaks Wilderness

Contiguous with the southern border of Rocky Mountain National Park, the Indian Peaks Wilderness features seven different peaks over 13,000 feet. Brainard Lake is one of the most popular destinations, especially during the busy months of July and August. The 76,711-acre wilderness is quite isolated and wild, and permits are required for larger groups.

Glenwood Canyon

Interstate 70 follows the Colorado River and cuts through the Glenwood Canyon, 16-miles long with 1,300-foot high walls carved by the Colorado River over the course of 3 million years. Besides making photos here, there’s ample opportunity to hike, canoe, whitewater raft, or bike or just take in the amazing scenery!

Hanging Lake

Hanging Lake a turquoise-colored lake located high atop the cliffs of the Glenwood Canyon is a geologic wonder accessible via a rigorous hiking trail with a 1000’ elevation gain over 1.2 miles.

Bridal Veil Falls

Bridal Veil Falls, at 365-feet, is the tallest free-falling waterfall in Colorado. It’s a 1.8-mile hike wikth an 1650’ elevation gain from a large parking area at the edge of Telluride to the top of the falls, where you can take stunning pictures of the dramatic box canyon below. Water flow is highest in May and June.

Colorado Photography Expeditions with Steinberg Photography

Want to take in the best Colorado has to offer? Join other aspiring photographers on a photo adventure with Jim and Lori Steinberg of Steinberg Photography. To see where we are headed next, check out our Workshops and Photo Tours!


4 Simple Photography Marketing Tips to Multiply Your Business

You love taking pictures, and now you’re ready to start getting paid for it. That means finding customers willing to pay you for your work. Here are 10 photography marketing tips that will help you generate a pool of interested clients that you can pick and choose from.

Remember, the more leads you have the more likely you are to find someone that’s willing to pay you what you what you deserve. Here are four simple photography marketing tips to get started. 

Get a Google Business page

When someone types a location and a business type into Google — like Colorado landscape photographer — those businesses that have signed up for a Google Business Listing show up first, ahead of the organic listings. Create a Google business page. They are free.

Blog, a lot

Blogs are the lifeblood of any website, and a key part of any digital marketing effort. Your website will generate more traffic and more highly qualified traffic if you have an active blog. If you put enough work into it, and your writing chops are up to par, you can even develop a loyal readership. A key thing to consider before you start blogging is who are you blogging to? Who is your intended readership? Answer that question and you’ll know what kind of content to produce.

Create an email list

The next step to take once you’ve got a good blog going is creating an email list. Many professional photographers spend years working without doing email marketing only to realize they should have been collecting email addresses from day 1. Where do you get the email addresses from, and what do you offer them in return? Get addresses as you network, as you build professional relationships. Start a newsletter that features your work and lets people stay up to date with where you are and what you’re taking pictures of. Start small and grow!

Get referrals like your life depends on it

OK — not like your life depends on it. You don’t want to be too pushy. Simply create an incentive for your customers to refer you to their friends and business associates. That way you don’t have to ask or beg them or remind them to pass your name along. Word of mouth advertising is one of the most effective means of advertising because it passes the “social proof” test — it’s a recommendation coming from a customer, not from the company itself. One way to provide an incentive for referrals is to offer free prints or a free class if you teach workshops (another great marketing technique) to clients that pass your name along to X number of people.

Learn Photography Marketing and Professional Photography Skills

Want to learn how to create and sell a landscape photography calendar? Need help with a photography pricing guide?

Our blog is full of business tips for aspiring professional photographers. If you’re looking to hone your skills or take a landscape photography adventure with professional photographers, Jim and Lori Steinberg of Steinberg Photography offer workshops and tours to help photographers improve their skills. These sessions are suitable for everyone from beginners to professionals.

The Best 3 Camera Lens Filters for Landscape Photography

Lens filters are camera accessories that block or enhance certain wavelengths of light to alter the final image. They are helpful when shooting landscapes in any light, and are essential when shooting in difficult lighting conditions. They can help to enhance colors, minimize glare and reflections, and eliminate haze caused by ultraviolet light, in addition to other functions.

Despite the many available post-production tools, camera lens filters remain an essential tool for photographers of all skill levels. Remember: the more we can do in the camera, the less we have to deal with in post-production.

With dozens of different kinds of lens filters, how do you determine which ones are the most important for a beginning landscape photographer? Which three filters will give you the most bang for your buck?

Graduated Neutral Density Filters

A camera does not see the full range of light as well as the human eye. It can’t see very bright areas and very dark ones (known as the range of contrast) simultaneously—unless it has the advantage of a neutral density filter.

Graduated neutral density filters decrease the brightest areas of the scene without impacting the darkest areas of the scene. They’re called “neutral” because they don’t affect the colors of the photo, just the amount of light that reaches your camera’s sensor.

Ideal for landscape photography, a graduated neutral density filter can do justice to a vista where the sky is bright relative to the ground. It lets in less light at the top of the lens than the bottom, evening out the exposure. Also remember that you should continue to expose for the highlights in order not to over-expose them.

Warming Filters

Good lighting is the key to good landscape photography. On cloudy days, landscapes may appear flat, dull and uninspired. Warming filters raise the apparent Kelvin temperature to give the scene a warmer tonality that counteracts the blue hues of the clouds. When shooting at altitude, they counteract what appears to be the ‘coolness’ of the higher elevation.

81A, 81B, and 81C warming filters, the so-called “81” series, are the most popular filters of this kind. But if you’re only going to carry one, make it a skylight filter for a good compromise.

Polarizing Filter

We saved the best for last. If you’re going to have just one filter for landscape photography, make it a polarizing filter. Polarizing filters increase saturation in your pictures, resulting in richer, more vibrant colors.

Polarizing filters are great for landscape photography. Blue skies appear bluer. Green foliage appear greener. They reduce reflections and eliminate the distracting white sheen on waxy leaves and wet rocks, known as spectral reflections.

The end result is more balanced, lifelike images with deeper, richer colors. The effects of the polarizing filter can be adjusted by rotating the filter. Also, be cautious when using a polarizer with a wide angle lens, particularly wider than 28º, as the polarizer may not cover the entire angle of view and result in even polarization.

Learn Landscape Photography from the Pros

Interested in learning the tricks of landscape photography in the field with an award-winning landscape photographer! Join other aspiring photographers on a photo adventure with Jim and Lori Steinberg of Steinberg Photography.

To see where we are headed next, check out our Workshops and Photo Tours!

A Year in Colorado 2019 Calendar

Pre-order your copy of Jim Steinberg’s A Year in Colorado 2019 Calendar today. It’s a great gift for nature lovers and Coloradans—or yourself. The holidays are right around the corner!

5 Common Mistakes in Wildlife Photography

Wildlife photography is a genre of photography dedicated to documenting wildlife in its natural habitat. From adorable chipmunks to ferocious tigers, wildlife photography can take many forms. It can also take many wrong turns, which can lead to poor images and frustration.

As landscape photographers that not only sell prints and stock photography, but also guide novice to experienced photographers on exciting workshops and photo tours, our goal is to help people who love taking pictures make the best pictures they can. Toward that end, we thought we would tell you five things not to do in wildlife photography.

Not Getting Close Enough to Your Subject

You’re on a safari and you see a pack of lions up the road. You take a picture and check it out on the back of the camera only to see a few yellow-brown dots in a sea of yellow-brown grass. All you need to do is move a bit closer, right? Wrong. One of the prime directives in wildlife photography is to not stress the animals, so in many wildlife photography situations, what you need to do is wait for the wildlife to come to you, otherwise you may stress and scare them away. When considering what you want in your picture, decide what you want in your frame and wait until you have the opportunity to get it. The better the lens and camera, the better the zoom, which will afford you more opportunities to get that perfect shot.

A Distracting Depth of Field

When your camera is shooting on automatic, it decides the shutter speed and aperture for you. This is fine in some situations, but to get truly stunning wildlife photography pictures you probably need to choose these settings yourself. Small aperture pictures will increase the depth of field around your subject, allowing objects and colors in the background to look sharp and compete with your subject. Wider apertures, which also have a faster shutter speed, will allow you to narrow the depth of field, focus on the animal itself, and capture the animal clearly while creating more of a palette feel in the background.

Getting too Close

This mistake can take two forms: safety-related and camera-related. For safety, our advice is pretty obvious: don’t get so close to an animal that you put yourself in danger. No picture is worth your life or your limbs. Camera-wise, we are accustomed to being too far away from our subjects, and when we have the opportunity to shoot a close-up we tend to overdo it. If you want a portrait of the animal’s head, that’s one thing, but it is often better if an animal happens to walk right into your frame, try zooming out a little bit so you can put the animal in a larger perspective.

Poor Timing

Animals are naturally unruly subjects. They aren’t exactly willing participants. Wildlife photography, like all other genres of photography, is about timing. There are thousands of opportunities to take a bad picture and just a few to take a good one. Your job as a photographer is to take advantage of those few moments that will deliver a great picture. You do this by applying equal parts patience and perseverance. Don’t get frustrated if it takes you all day to get that perfect shot. This is what it takes! To further increase your odds of getting a great photograph, shoot at hours of the day that will give you ideal lighting: early morning and late afternoon. And remember when someone says, “Wow, that was a lucky shot!” that luck is merely the confluence of preparation and opportunity, so be prepared when the opportunity presents itself.

Learn Wildlife Photography from the Pros

Want to see how it’s done? Check out some stunning wildlife photography images in our galleries, which are sortable by categories like Animals and On Safari. Want to learn how to do it yourself from wildlife photographers Jim and Lori Steinberg? See where we’re headed next!

Dipping Your Toes into Underwater Photography

Looking for a basic guide to underwater photography? You’ve come to the right spot. Lakes and oceans are different worlds, but most of the photography terms and techniques you’re already aware of still apply. Here’s a few tips to help you dip your toes into underwater photography.

  • Get Comfortable Underwater

Photography is about patience. Underwater photography is all about feeling comfortable in the environment so you can be patient. Obviously this means being able to swim well. Experience scuba diving is also a plus, as it offers many advantages over snorkeling. You can spend more time closer to marine life for longer periods of time. Constantly surfacing and diving also tends to scare away marine life. That being said, the areas close to the surface have the best natural light so if you only know how to snorkel you can still accomplish a lot without much specialized equipment!

  • Understand Your Subject

Photography etiquette demands that you know, understand and respect your subject. Nowhere is this more true than in underwater photography. You need to know what areas are safe to shoot in, what animals are safe and how to react if you encounter an “unsafe” animal. Know how your depth affects colors. Reds, for instance, are filtered out first as you dive.

  • Choose the Right Gear

Choosing the right gear is a matter of being safe and having the correct photography gear. In terms of cameras, you have two basic options: a DSLR in an underwater housing with external strobes (what the pros use) or a point-and-shoot camera in a waterproof case. If you’re snorkeling and just starting out, the former option is likely to suffice. Even cell phone cameras can capture stunning underwater pictures. If you’re spending lots of money on scuba gear, travel, etc. then it may make sense to spend more on gear so you get the most bang for your buck.

  • Understand Your Camera Settings

Speaking of DSLRs, they come with more settings which in turn give you more control. Here are some basic settings that are likely to improve your underwater photography pictures:

– Keep your white balance in daylight mode, especially if you are using a flash.

– Set your ISO to between 100 to 200 (the deeper you go, the higher the ISO should be).

– Set your aperture to between f8 and f16.

– Your shutter speed should be between 1/125th or 1/250th if you want a clear shot or 1/15th or lower if you want to convey motion.

Landscape Photography Workshops, Prints and More

Looking to turn your hobby into a profitable career? Need beautiful landscape photography prints? Steinberg Photography can help. We give photographers at all levels the tools and experiences they need to take the next step. Visit our homepage to learn more about our landscape photography workshops, guided adventures, and wide selection of products.

How to Take Better Action Photos

Do you want to take better action photos but aren’t sure where to start? We’ve got you covered! It’s easier than you might think once you get the hang of it, and it’s oh-so rewarding when you distill all of the action in a single photo. 

Whatever movement you’re looking to capture, from sporting events to live performances, there are a few things you can do to help ensure you snag the best possible shot. 

Know Your Camera

Understanding your camera and its functions is a key element to capturing great action shots. Regardless of what camera you are using, it will have the ability to get the shot you want if you can control things such as:

– Focus

– Continuous focus tracking

– Setting the focus to the right spot

– Setting your camera to take multiple frames per second

– Shutter speed and aperture

Understand the Action

No matter what you are trying to capture—a bird in flight, your child’s dance recital, or a white-water rafting adventure—being able to anticipate when and where the action will take place will help you capture the perfect moment. Having an understanding of the action and being familiar with your surroundings will help you be in the right place at the right time. 

For example, if you were trying to take the photo above, watching a few people go down the river before shooting would help you gauge where you should be. You might notice that every time a raft hits a certain spot, things get interesting…This level of familiarity makes it easy to anticipate when and where your best shots lie. Remember: luck happens when preparation meets opportunity. 

Make What’s Important Stand Out by Controlling the Background 

Controlling the shutter speed allows you to control the level of blur in the background. Using your aperture priority, you will decrease the speed by lowering the f-stop. That gives you more blur. 

In the picture below, a focused background adds to the excitement of the photograph because you can clearly see the spectators also enjoying the action.

Why Blur the Background?

You may want to separate the subject from the background, making the subject the main focus of the shot. In some situations, the background may distract the viewer. So, blurring the background with a panning motion will make your subject stand out. 

Use Continuous Focus

When you understand your equipment, you know your camera’s lag time. That is the time it takes from when you push the button to when the picture is taken. So, you can calculate precisely when you need to shoot. 

If you start focusing on your subject before they are in the right spot and continue tracking them after the shot, you may catch unexpected action. Using continuous focus will keep you ready to shoot as soon as the action happens.

Join Us for an Autumn Photography Adventure in 2019

Check out our Workshops & Photo Tours page to tell us if you’re interested in visiting Oman this Fall, and we’ll send you more info!

What is Macro Photography?

Macro photography is the close-up photographing of small objects, often insects and flowers. It provides the photographer with a way to examine, in minute detail, small objects and the patterns and textures on them that would otherwise escape notice. Before the rise of digital photography, macro photography involved more time and effort than it does today.

Macro photography is considered any image that captures a subject that is at least 1/10th of the original size of the object being photographed, but generally are images with subjects shot in life-size, or close to a 1:1 ratio.  Many people get the terms “macro” and “micro” confused, and it is easy to understand why. The two terms are very different, with “macro” meaning big and “micro” meaning small. This confusion is not helped by the major camera manufacturers, like Nikon, who refer to a lens as “micro.” Canon will refer to the same size lens as “macro.” To simplify your thinking on this subject, think about it in this manner: if the subject you are photographing is small and you want to make it look large, you end up with a “macro” view of a “micro” subject.

Macro Photography on Compact Cameras

Today, macro photography is much easier. Many compact cameras have point-and-shoot macro modes that can pull out some fairly impressive close-ups. Typically, a camera’s macro photography capability is measured by how close you can shoot an object while still being able to focus as well as the number of pixels in the image. The minimum distance from the lens that the camera can focus should be listed on the camera’s specifications. Newer cameras can achieve focus even when the subject is just an inch or so from the lens.

Macro Photography on DSLRs

On DSLR cameras, macro photography doesn’t depend on the camera. What matters is the lens. To shoot macro photography on a DSLR camera, make sure you select the right lens. (I use the Nikkor 105º Micro which I find gives outstanding resolution.) The lens will list technical specifications, such as a minimum focusing distance and a macro ratio. Unlike compact cameras, DSLR cameras provide much more flexibility not only in terms of depth of field and exposure when shooting in macro, but other factors such as the ability to add additional lighting, higher resolution and the use of “live view” to view your images in real time as they will appear.  And in macro photography, the number of pixels really does matter – the more the merrier.

Learn Landscape Photography with Steinberg Photography

Looking to learn the craft of landscape photography or just get into the great outdoors for a wild adventure? Jim and Lori Steinberg of Steinberg Photography are here to help. We run photo tours to exotic locations for photographers of all skill levels. Follow us on Facebook and Instagram to see where we’ve been and check out our schedule to see where we’re headed next!

Underappreciated Places to Take Pictures in the World’s Most Photographed Cities

Can you guess the world’s most photographed cities? When you combine big data and smartphones, you don’t have to guess. More information about what people are taking pictures of is available now than ever before.

In just two minutes, more pictures are taken across the world than were taken during the entire 19th Century. Thanks to Panoramio, a geo-location photo-sharing site owned by Google, we can easily see what the world’s most photographed cities are and  where people are taking pictures in those most photographed cities.

Many billions of pictures are taken at the same locations by travelers every year. But what do the locals — those in the know — take pictures of? Looking at the data, we can share with you incredibly photogenic locations that very well may be more photogenic than the spots your guidebook tells you to visit. We hope you enjoy!

Number 10: Budapest, Hungary

One of the largest cities in the European Union, Budapest is home to numerous world-renowned cultural institutions. One of the most famous is the Museum of Fine Arts, which has over 100,000 pieces. The most photographed spot in this amazing city? St. Stephen’s Basilica, the tomb of St. Stephen, Hungary’s first Catholic king.

Number 9: Buenos Aires, Argentina

One of only two cities in the Americas on this list, Buenos Aires is the large, cosmopolitan capital of Argentina. A home to massive waves of European immigrants over the years, the city is sometimes described as one of the most European in the Western Hemisphere. Caminito — an alley filled with colorful shops, homes, and apartments, and garnished with tango dancers and street artists — is the most photographed location in Buenos Aires, according to Google data.

Number 8: Florence, Italy

Capital city of Italy’s Tuscany region, Florence is well-known as a hub of Renaissance art and architecture and is sometimes called the largest “outdoor art museum” in the world. While there’s no shortage of amazing sights to capture with your camera, the most photographed location is the Piazzale Michelangelo, which provides a stunning panoramic view of the city.

Number 7: Monte Carlo, Monaco

Appearing prominently in two James Bond movies, Monte Carlo’s most photographed location is the Hotel de Paris, a perfect location from which to view some of the world’s flashiest cars and most smartly dressed socialites.

Number 6: Venice, Italy

The most photographed location in Venice — variously called The City of Canals, The Floating City, and the City of Masks — is the Ponte dell’Accademia, a picturesque bridge that crosses the Grand Canal and provides a lovely view of the many-named Italian city.

Number 5: Istanbul, Turkey

Istanbul, once known as Constantinople, and before that as Byzantium, is full of history. Perhaps its most famous structure is the Hagia Sophia, followed closely by the Blue Mosque. Another spot you shouldn’t miss? Kiz Kulesi, or the Maiden’s Tower, which sits in the middle of the Bosphorus strait and provides an excellent vantage point to photograph Istanbul.

Number 4: Paris, France

It’s no surprise that Paris, the City of Lights, is one of the most photographed cities in the world. Surprising is the fact that the most photographed spot is not the Eiffel Tower, but the neon lights of the Moulin Rouge, the cabaret that gave birth to the can-can. Can can can you do that can-can?

Number 3: Barcelona, Spain

Barcelona, capital of Spain’s semi-autonomous Catalonia region, is the third most photographed city in the world. Perhaps best known for the breathtaking, trippy, postmodern Sagrada Familia cathedral designed by Antonio Gaudí, Barcelona’s most photographed spot is actually another project of Gaudi’s: Park Güell, a park composed of funky gardens and modernist architectural elements.

Number 2: Rome, Italy

With its thousands of years of history, gorgeous architecture, and pristine climate, perhaps it’s no surprise that Rome would rank this high on the list. What is surprising? According to the Google photo service, to Coliseum is not the most photographed spot in Rome. The Trinità dei Monti is. It’s a Roman Catholic church that sits regally above the Spanish steps and the Piazza di Spagna.

Number 1: New York, United States

The Big Apple isn’t just one of the most photographed cities in the world, it is the most photographed.  The most photographed spot in NYC may surprise you. It’s not the Statue of Liberty, Times Square or the Empire State Building, but the Solomon R. Guggenheim museum, housed in an iconic building designed by Frank Lloyd Wright. The entire building is one continuous spiral.

About Steinberg Photography

Interested in testing the waters of landscape photography with an award-winning photographer? Join other aspiring photographers on a photo adventure with Jim and Lori Steinberg of Steinberg Photography. To see where we are headed next, check out our Workshops and Photo Tours!

Photography Tips: When to use the Flash

The flash. It’s one of the most familiar tools on a camera, yet it can be one of the most difficult to use effectively. If you’ve ever experimented with it, you know it can to be too heavy handed or not provide enough light on the subject. It can create highlights and shadows that obscure details.

However, when used correctly, flash can be used to augment ambient light and enhance the scene without overpowering the picture. Here are a few tips.

Mind the background

Always, but especially when using the flash, be sure to pay attention to what’s behind your subject before clicking the shutter. When directly behind the subject, reflective surfaces like windows, metal, and mirrors always result in the flash being directly reflected back into the camera and parts of your image being overexposed.

To avoid this, position yourself at a 45º angle to the reflective surface. Remember, angle of incidence equals angle of reflection. Also, move away from your background. This will do two things: 1) soften the background as it will be well back of the plane of focus and 2) allow the intensity of the flash to fall off so less of it will reach the background. The result? A a softer, more pleasing light.

Combine flash with available light

Especially if you’re capturing a low-light scene, like inside a jazz bar or below a jungle canopy, make sure to use the available ambient light in combination with your flash. This will ensure you have enough light to capture the entire scene without sacrificing its colors and mood.

Diffuse the flash

Even if your camera has only one flash setting, you’re not stuck with just one kind of flash. You can diffuse the light from your camera by bouncing the light into a photogenic umbrella or low ceiling or by diffusing it with a piece of tissue paper placed in front of the flash. Both of these techniques will reduce the intensity of the light and thus soften the shadows in your composition.

Freeze the action

The flash blur effect is achieved by choosing a slow shutter speed and using the flash to freeze the action. The background will appear blurred while your subject will be in clear focus. This is only possible with cameras that have a rear-sync function.

Learn Landscape Photography from the Pros

Interested in learning the tricks of landscape photography in the field with an award-winning landscape photographer! Join other aspiring photographers on a photo adventure with Jim and Lori Steinberg of Steinberg Photography.

To see where we are headed next, check out our Workshops and Photo Tours!

A Year in Colorado 2019 Calendar

Pre-order your copy of Jim Steinberg’s A Year in Colorado 2019 Calendar today. It’s a great gift for nature lovers and Coloradans—or yourself. The holidays are right around the corner!

Safety Tips for Travel Photographers

At Steinberg Photography, we take experienced and novice photographers all over the globe on guided photography tours. We go to some of the most gorgeous, wild places on earth (this fall we’re heading back to Oman!). Underpinning all our adventures is safety.

Unfortunately, part of the nature of being a travel photographer is that you are in unfamiliar locations. And that means taking on a certain amount of risk. We mention risk not to deter you from travel photography, but to encourage you to be mindful. Following a few safety precautions and being aware of the perils that can ruin your trip is often enough to keep you from harm.

Protect Your Equipment

Your equipment is highly valuable. When traveling by plane, carry it with you onboard as much as possible. That is both to prevent damage and theft. Invest in a hard case that will fit in the overhead bins. Be prepared to pack your tripod in your checked luggage as most airlines will not allow it as a carry-on.  If you must check your equipment, use one of the baggage wrapping services available at some airports in the States and most overseas. This makes your bag as tamper proof as is possible.

Once you arrive at your destination, keep your equipment and valuables on you. If you take a taxi, don’t store anything of value in the trunk. 

When you arrive at your hotel, use the safe. Test it first to make sure you can get back into it once it’s closed! If you want to leave the room without your equipment, keeping as much locked in the safe as possible is additional protection from potential thieves. Also, unless you need to have your passport and additional money, these too should be stored in the safe. 

When you go out, take only the equipment and money you will need for the next excursion. 

Once out, never leave your equipment unattended. In some places it is advisable to never even let go of your camera bag!

Get Insurance

Even the best-laid plans can go awry. Make sure that you will be covered in the event that your camera is lost, stolen, or damaged during your trip. The cost is worth your peace of mind when should the worst happen, you can at least replace what was physically lost. Travelling to some of the more “off the beaten path” locations can prove tricky with many insurers, so check your policy to make sure you’re covered.  Having trouble finding insurance for Africa of other locations? Check with USAA as they cover equipment world-wide.

Know the Lay of the Land

Before heading anywhere, it’s a good idea to do a bit of research beforehand. Get a sense of the area you’re visiting, and if some areas are safer than others. Avoid the areas that are known for being less safe. Check out travel warnings and make sure you heed them and be sure to enroll in the State Department’s STEP (Smart Traveler Enrollment Program) program. Have a map of the area you are visiting in case you get disorientated as well. 

Understand Local Culture and Customs

You should always respect local culture and customs; failing to do so could land you in unnecessary hot water. You may want to consult with locals before taking their photograph to make sure that you aren’t disobeying unwritten (or written) laws. 

Be Aware of Your Surroundings

As a tourist toting around expensive equipment, you are somewhat vulnerable. Try to maintain an awareness of your surroundings. Carry your equipment in front of you as opposed to on your back or shoulders, and consider investing in slash-resistant camera straps. Be mindful of purse snatchers on motorcycles riding too close to the sidewalk or pickpockets distracting you in busy streets, train stations or other public places where there are masses of people.   

Join Us for a Photography Adventure in 2019

  • Southern Colorado High Country – July (2 spots left!)
  • Oman – Late Fall 2019

Visit our Workshops & Photo Tours page to tell us which trip you’re interested in, and we’ll send you more info!

How a photojournalist helped put a stop to child labor in the United States

Lewis Hine (1874 – 1940), a sociologist and photographer, is credited as being among the first and most effective photojournalists. His primary subject was child labor, which was commonplace in the early 1900s. 


“I wanted to show the things that had to be corrected,” Hine said.

His photographs were fuel for the labor leaders and suffragists battling to bring about social reforms to protect children. His pictures put a face to the poorest and most vulnerable segments of American society. The children were largely drawn from the surging population of newly arrived immigrants coming through Ellis Island in New York, who had no choice but to put their children to work.


In the coal mines, textile mills, cigar factories, canneries and meatpacking houses, accident rates were high. The work was dangerous and the children were often exposed to abuse. Factory owners, obviously, did not want to part with their cheap source of labor, and they pushed back against Hine. Everyone knew that child labor was widespread, but most people didn’t want to think about it or acknowledge it. Hine, in shining a light on the practice, also put a spotlight on himself and what he was trying to accomplish.


Eventually, Hine was banned from factories. He was followed by private eyes. Threats were made against his life by factory police and foremen. Rather than give up, Hine started visiting workplaces in disguise — as a fire inspector, a bible salesman, a postcard vendor. In the end, his photographs were instrumental in changing child labor laws in the United States. If you liked this blog, you may also enjoy: Pictures with Purpose: Environmentalism and Activism Meet Photography

Established & Aspiring Photographers Welcome!

Looking to improve your craft and have an outdoors adventure with landscape photographer Jim Steinberg?Join a Steinberg Photography workshop or photo tour and get the experiences, the pictures, and the guidance you need to create a calendar or coffee table book. Whatever your goals, we would love to help! Learn more by visiting the Steinberg Photography homepage.

All photos courtesy of the Library of Congress