All posts by admin

Proper Storage and Protection of Your Photography Prints

Want to learn how to store your photography prints? You’re in the right place.
Photographs are important whether they are mementos, keepsakes or important moments that need to be preserved, but without proper storage, they can easily be lost forever. Fortunately, whether you have actual, physical photography prints or keep everything in a digital format, there are some simple techniques you can utilize to help ensure that your photographs and family heirlooms remain well-preserved for many generations. Here’s what you need to know.

How-To: Storage for Digital Photographs

Many people erroneously assume that once captured their digital images will last forever. The reality is that you must be proactive to make this happen. The first step is to have at least two copies of all of your important digital photos. You can keep one on your hard drive, but always place your second copy on removable media and store it in a fireproof safe or away from the place you keep the original image.

Check your digital files annually and make new copies at least once every five years. This will help you avoid file corruption that could destroy your images. Cloud storage is another ideal way to back up your photos. It’s important to choose a cloud provider in a different state for better protection from data loss caused by a natural disaster. Think of it like NASA where everything can, should be and is redundant.

How-To: Storage for Physical Photography Prints

Archival quality paper and ink is your best bet for photographic prints. You’ll also want to ensure that you use acid free materials. For example, you can safely store prints in acid free photo albums or storage boxes. Acid free mats should be used inside of frames, and make sure to choose glass or acrylic that offers UV protection. You should always keep prints out of direct sunlight and more than 4 feet away from fluorescent lighting to avoid ink fading.

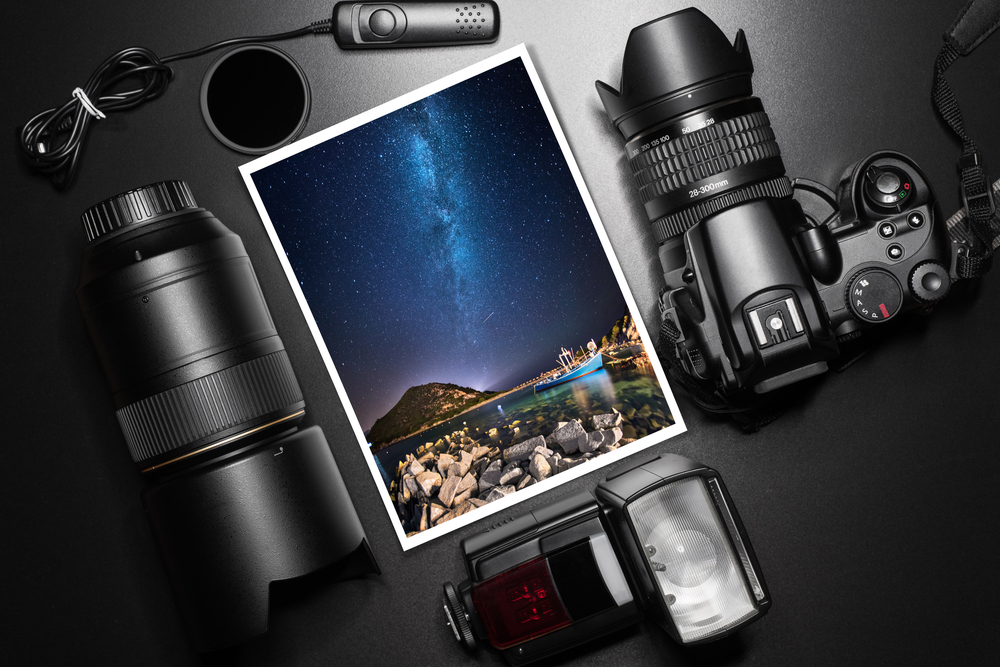
Next Step? Learn How to Take Storage-Worthy Landscape Photographs

Do you want to transition from taking snapshots to capturing stunning landscape photos? Steinberg Photography offers workshops and photo tours with professional photographer Jim Steinberg. Visit our homepage to learn more about taking storage-worthy landscape photographs!

How to Create and Sell a Landscape Photography Calendar

Creating a landscape photography calendar may be easier than you think, but it does require some planning. In other words, if building your own calendar is something you’ve always dreamed of, it’s time to get started right now for 2018. The good news is that you don’t need to have previous calendar experience. Instead, all it takes is a good eye, the desire to learn and some free time.

Choosing the Theme

Before you do anything else, you’ll need to decide on the exact theme of your calendar. For example, perhaps all of your images will feature local mountains or lakes. Either way, as soon as the theme is locked in, you can start gathering the necessary photographs.

Shooting Your Images

A major mistake hobbyists make is waiting until the last couple of months of the year to begin working on a calendar. This doesn’t give you enough time to capture different seasons, and rushing will prevent you from producing your best work. Begin going out monthly a year in advance so that you can capture your theme in the current seasonal setting. Make sure that you’re shooting raw image files to give yourself the best opportunity for greatness during the editing and processing stages.

Designing the Calendar

After you narrow down your 12-13 best applicable images, choose one that is a good representation of what the rest of the calendar will look like. This will become your cover image. In selecting a cover shot, always keep in mind the concept of “shelf appeal.” That is, does the image read well from a distance? To determine if it does, look at the image from 5-6 feet away. If it reads well and is bright and perky, then go with it. From there, go through each month and keep the specific seasons in mind as you select images. Be sure that the photos are clear, have a strong focal point and that your theme is always well-represented. Steer clear of a lot of colors or other graphics in the dates section so that your photos stand out and the calendar remains fully functional.

Selling the Calendar

You can create your own calendar through a simple program such as MS Publisher. Alternatively, there are numerous print-on-demand services that have easy to use templates. Be sure to mention the calendar to your family, friends and coworkers. You should also advertise it on your social media pages using your cover shot to draw appeal from buyers.

Do you still need a 2017 calendar? It’s not too late to get a great example of a landscape photography calendar from professional photographer Jim Steinberg!

Embark on an Adventurous Photography Workshop with Jim Steinberg

Steinberg Photography enables photographers of all skill levels to learn from a professional during workshops and photo tours. Want to sell your own landscape photography calendar? Get more details from our homepage!

A Beginner’s Guide to Landscape Photography Memory Cards

Taking dynamic landscape photos requires a keen photographic eye and the right gear. If you’re looking to master landscape photography, memory cards are a vital piece of the equation and are often overlooked. That’s why today we are going to focus on them to help you get the best possible results. Keep in mind that you’ll also want to choose your camera body, lenses and filters accordingly.

The Unique Requirements of Landscape Photography Memory Cards

It is highly recommended to shoot landscape images in the raw format so that you will have full editing control. Raw allows you to avoid data compression, but this also requires a lot of memory. Therefore, you need to maximize your storage capacity for landscape photography. Without the right card type, you’ll spend more time swapping cards than filling them with beautiful photos.

Photography Memory Card Types

DSLR cameras are typically compatible with SD memory cards while many are equipped to take CFC (compact flash cards). These cards come in a variety of styles, including SD, SDHC and SDXC. There are pros and cons to all of these types, but the SD option is the least functional for capturing raw images because it can only hold 2 GB of data. This would be fine for JPEG snapshots, but it’s going to be cumbersome for landscape photos.

SDHC cards offer a significant storage increase, which makes them suitable for most hobbyists. However, if you are serious about taking your photography to the next level and prefer to keep everything on one memory card, you may wish to upgrade to the SDXC. We do advise against using only one card for an important shoot because any corruption or accidental damage could destroy every photo. Ultimately, our recommendation is for multiple SDHC cards instead of using SD or SDHX.

Learn More with Landscape Photography Workshops

Now that you’ve learned about the best landscape photography memory cards, it’s time to get some great pictures. Steinberg Photography offers workshops and photo tours that are taught by landscape photographer Jim Steinberg. Everyone from beginners to professionals are welcome. Learn more by visiting our homepage!

8 Marketing Tips for Photographers

In this day and age, it is impossible to avoid marketing as a photographer. Don’t worry, it’s not as scary as it sounds, and a little bit of effort can go a long way. 

I’m going to share with you eight marketing tips for photographers that you can start implementing right away to get yourself and your work out there. 

  1. Get Your Own Website

Having a strong social media presence is great! But your work needs a place to call home, and you need a place to showcase yourself and your products or services. Plus, you can divert all of the leads you get through social media platforms like Instagram, Facebook, and Snapchat to contact you through your website. 

  1. Build and Engage With Your Email List

One of the most tried, tested, and true forms of marketing is email. When someone subscribes to your list, they are already interested in you and your product or service. Capitalize on that by keeping them engaged with regular email newsletters, with updates, offers, contests, interesting articles, and more. 

  1. Find Your Audience

It doesn’t make sense to market to lovers of landscape photography if you plan to focus on portraits. You want to be preaching to the choir, so to speak. Your audience already shares interests with you and are primed to hear your message. 

  1. Let’s Give ’em Something to Talk About

Word of mouth is still a powerful marketing tool, and even more so in the age of social media where that word could be a tweet or a post about you. Your reputation will be built on the service you provide, so give our followers and clients something good to say about you, and they will! 

  1. Use Your Real Name

It’s tempting to hide behind a wall of anonymity online, and if you fail, nobody really knows it was you. But, you’re not going to fail. You’ve learned a lot, there are helpful tips everywhere, and your work will turn out great! Use your real name so that people can find and interact with you easily and then talk about your work.  

  1. Just Be You! 

While you’re at it, using your real name, be your authentic self in all that you do. Being genuine will attract the right clients to you and keep them coming back. Your talent is only half the reason that people will choose your services; you are the other half. Connect authentically with people is wonderful, and that’s what art is meant to do. So, don’t sell yourself short—be you and your audience will respond. (That’s not so hard now is it?!) 

  1. Your Prices Are Part of Your Marketing Strategy

How to price your work or services is another beast, and you can see an in-depth explanation here! But whatever you decide is part of your marketing strategy. Your prices should reflect not only your level of experience but also the level of service you will provide. 

  1. Provide Value and the Money Will Follow

Don’t be afraid to put your work out there. You want people to discover and return to you. Providing valuable and useful content is a smart way to build trust. For example, a helpful blog post goes a long way towards brand recognition and client loyalty. Think about the things your audience wants to use, learn, or know. Provide the sample artwork, articles, or how-to videos that can help them identify and engage with you more regularly.  

Join Us for an Autumn Photography Adventure in 2019

Visit our Workshops & Photo Tours page to tell us you’re interested in visiting Oman this Fall, and we’ll send you more info!

Inspiration for Your Next Shoot: Top 5 Landscape Photographers of All Time

The idea that photography is just “taking a picture of what’s in front of you” is one of the most frustrating misconceptions in the field. Experienced landscape photographers know that creating a true-to-their-vision image requires just as much stylistic judgment and artistic acumen as any other medium, whether it be watercolor, clay, or the written word. If you’re struggling to get a handle on your personal aesthetic, try researching the work of these all-time greats. The innovation and inspiration their work has contributed to the landscape just may spark the shoot of a lifetime.

Ansel Adams

The undisputed father of landscape photography, Ansel Adams spent the majority of his 82 years crafting images that transcend time and genre. Adams’ spectacular, haunting portrayals of the American West (particularly Yosemite National Park) have attained iconic status. More importantly to the craft and practice, he pioneered the Zone System of evaluating optimal exposure for black & white outdoor images. The exceptional clarity and scope that resulted from his experimentation has been a boon to generations of photographers afterward — as well as the environmental conservation movement that helped create the Kings Canyon and Sequoia National Parks with the first of what is now known as the Landscape as propaganda images.

Eliot Porter

In contrast to Adams’ dramatic vistas, Harvard-trained physician Eliot Porter chose to focus on the quiet beauty of close-up natural details and was the first to develop what we now call The Intimate Landscape. Porter was much quicker to adopt color technique into his work than other contemporaries, producing thousands of richly-hued prints that brought the full palette of nature’s glory to contemporary viewers. Perhaps the most evocative example of his work is the book The Place No One Knew, a poignant visual essay on Utah’s Glen Canyon before it was filled by the Lake Powell reservoir.

David Muench

Much as Ansel Adams became the defining icon of black-and-white landscape photography, David Muench established color film as a medium fully capable of capturing stunning natural beauty. He established the now-common technique of using a prominent foreground element to draw the eye into a distant background, imbuing his images with an extraordinary depth. David is the son of Josef, one of the first landscape photographers to put Arizona on the map with his extensive work for Arizona Highways magazine, and whose son, Marc still carries on the family tradition now in its third generation.

Robert Glenn Ketchum

More contemporary than the other figures on this list, Ketchum is working today as possibly the most significant conservationist in today’s photography landscape. Many of his images have been used to support and promote American environmental legislation, particularly his stunning portfolio of aerial shots that depict the grandeur — and fragility — of Alaska’s imperiled ecosystem. Robert’s aesthetic and sense of design belie the depth that his work brings to today’s conservation movement.

Galen Rowell

Combining a keen aesthetic eye with exemplary journalistic writing, Galen Rowell and his wife Barbara created a legacy that has influenced countless photographic genres from adventure shots to natural landscapes. With his climbing images Galen was the first of what we today think of as “adventure photographers”. Of particular interest is his skillful and innovative use of graduated neutral-density filters, which have subsequently become an indispensable tool in camera bags across the world.

Take Your Landscape Photography to the Next Level

Improve your craft and have an outdoors adventure with a Steinberg Photography workshop or photo tour led by landscape photographers Jim and Lori Steinberg. Photographers of all experience and skill levels welcome! Learn more by visiting the Steinberg Photography homepage.

A Steinberg Photography workshop or private teaching session is the perfect gift experience for the photographer on your gift list this year.

Capturing the Season — Winter Landscape Photography Best Practices

Want some best practices for winter landscape photography? While some best practices for landscape photography hold true across the calendar, each season presents a unique set of opportunities and challenges for shooting. Whether you’re capturing a glorious snow-capped mountain range or a deep pine forest hung with icicles, make sure to follow a few simple rules for a safe and successful wintertime shoot. If you have any more questions about winter landscape photography, don’t hesitate to reach out!

Meter according to what’s in front of you

Automatic metering systems are a convenient timesaver, but need special adjustments in winter conditions. Since they are calibrated to base the exposure on the image’s neutral grey point (the 18% gray card), a vast field of white may throw off the reading and cause shots to be underexposed. In this case, it’s a simple task to increase the settings one F-stop, positively compensating for the snow. (Extremely bright snowy scenes may need an additional nudge, but beware of going further — three or more extra stops usually results in blowouts and detail loss. Most digital cameras will have an “Exposure Warning” or “highlight display” setting, which triggers a blinking light in any overexposed highlight sections of the LCD screen.) For advanced users, manual spot metering — checking and rechecking the sky or the main subject desired exposure against the snow’s — can present an extremely effective (if somewhat more time-consuming) solution.

Polarize — but not too much

The polarizing filter is the outdoor photographer’s indispensable sidekick, helping to balance shots, add definition to cloudscapes, and bring out the gloriously saturated colors of the natural landscape. Bear in mind that the sun appears at a lower angle than normal during wintertime, making it easy to accidentally over-polarize a shot. This results in the sky taking on an unnaturally gloomy, supersaturated appearance — fine if an intentional stylistic choice, but generally not a desirable outcome. Taking several frames with differentiated polarization settings will result in an array of final products to choose from or edit together. Graduated neutral-density filters also offer good results when it comes to equalizing exposure between many different parts (and lighting levels) of a single scene.

Care for your equipment

Finally, it’s important to remember that your equipment is as susceptible to different climates as you are. Even top-of-the-line batteries drain more quickly in cold temperatures, with lithium ion generally being the best choice down to 32° F (0° C). Always carry an extra battery and keep it in an inside pocket to pick up your body warmth. Do not pack alkaline batteries for a cold-weather shoot, unless absolutely necessary, and then be sure to carry plenty of extras as their poor performance requires plenty of spares.

Also of concern is water seeping into the equipment. Keeping the camera clear of snow is important, obviously, but what many photographers fail to realize is that entering a warm indoor climate with a dry but cold camera can cause the ambient moisture to condense inside the sensitive electronic sections. To prevent the problem, try placing all equipment in a sealed waterproof bag such as a Ziploc, and allowing it to gently come up to room temperature before transporting inside. If a little moisture ends up inside anyway, disassemble the body and carefully warm with a hairdryer on the lowest setting.

What do you like best about winter shooting?

One of the reasons I love winter shooting is the low angle of declination of the sun that allows for many more hours of golden light as the sun is never too far above the horizon. This creates those lovely long shadows for much of the day, instead of a few hours in the morning and evening. Let us know what you like best about winter photography.

Winter Landscape Photography Workshops with Jim Steinberg

If you are interested in taking a winter landscape photography workshop with a renowned landscape photographer, look no further than Steinberg Photography. We run photography workshops and lead photography expeditions that are open to photographers and hobbyists at any level. We also offer beautiful calendars and prints from Jim’s breathtaking collection. To learn more, please visit our homepage!

Landscape Photography: Doing Justice to the Real Thing

It’s an oft-heard refrain after taking a photograph of a stunning vista: “It just doesn’t do justice to the real thing.” Many photographers have grown accustomed to producing less-than-inspiring shots, even when the subject at hand is nothing short of breathtaking. Of course, the flip side of the coin is that we’ve all seen amazing photographs that seem to transport us to the place the photographer pointed his or her lens.

The art of landscape photography, in a way, is all about bridging the gap between the real thing and the reproduction — doing justice to the real thing – making something that lives in 3 dimensions come to life in only 2 dimensions. For landscape photographers, this is an even more important element of the work.

Achieving a Sense of Depth in Landscape Photography

The fascinating thing about vistas is their incredible depth. And this sense of depth is usually what’s “lost” in improperly devised landscape photographs. Depth can only be perceived by juxtaposing the foreground and background. Use a wide-angle lens and an aperture of f/16 or smaller, or better yet, use hyper-focal focus so the foreground and background are both sharp and in focus and the viewer has a sense of the scale of whatever you’re shooting – mountain peaks, river valleys, a waterfall, etc. It’s advisable to use a tripod to steady and level your camera, as smaller apertures require slower shutter speeds.

Set the Stage

When dealing with dramatic panoramas, many photographers get overwhelmed and don’t focus enough on the basic rules of good landscape photography – such as what the subject and focal point of the composition are. The rule of thirds can help you avoid distraction and get all the pieces in the right place. Mentally divide your viewfinder into thirds with two vertical lines, making for a total of 9 boxes. To achieve the sense of scale we mentioned in the previous paragraph, consider placing prominent objects in the foreground (trees, boulders, rocks, etc.) to either the left or right third of the frame. A picture with a powerful background image in the center, such as a brilliant cloud or mountain peak, and an interesting foreground object will make for a more pleasing experience as the viewer’s eye naturally wanders around the picture. But continue to stay open to using large swaths of negative space to help create a sense of space and depth. Doing with will often lead you to other ratios such as fifths and eights and can create an entirely different sense of space and place.

Established & Aspiring Photographers Welcome!

Looking to improve your craft and have an outdoors adventure with landscape photographer Jim Steinberg?Join a Steinberg Photography workshop or photo tour and get the experiences, the pictures, and the guidance you need to create a calendar or coffee table book. Whatever your goals, we would love to help!

Learn more by visiting the Steinberg Photography homepage.

Your Fall Photography Road Trip: West to East

All across the United States, from Oregon in the Pacific Northwest to the ancient mountains of Appalachia, deciduous trees greet the coming winter with a jaw-dropping display of color. Though the opportunities to photograph fall foliage are plentiful, as a photographer, it’s all about timing.

Below is your itinerary for a fall photography road trip that will let you to see some of the most beautiful parks and forests in the country just as they reach their crescendo of fall color.

Your Fall Photography Road Trip

  • 1. Oregon – Columbia River Gorge

The largest river in the Pacific Northwest region, the Columbia River winds through some of the most majestic and rugged scenery in the country. In mid-October, you can see Oregon ash, cottonwoods, and big-leaf maples turn from brilliant yellow to orange.

  • 2. Montana – Glacier National Park

Though many trees in this 1,583-sq.-mi. wilderness area turn colors in early autumn, from mid-September to early October, you can still catch the larch trees in bloom as they turn a blinding lightning yellow from mid to late-October.

  • 3. Michigan – Upper Peninsula

The best nature opportunities in the Midwest can be found in the 4 million acres of state forests in Michigan – the largest state forest system in Eastern US. Perhaps the most beautiful and wild region is Michigan’s Upper Peninsula, which sits between the Great Lakes and the Canadian border. Densely forested, the “UP” (as they call it) explodes with color as hardwood forests of tamarack, sycamore, maple, birch and ash ready for winter. Also of note is Sleeping Bear National Lakeshore, which is on the north coast of Michigan proper.

  • 4. Missouri – Ozark Mountains

The other natural spectacle of the Midwest, Missouri’s Ozark Mountains. Dominated by white oak, these forests give off a brilliant burst of scarlet and mahogany during the last two weeks of October.

  • 5. North Carolina/Tennessee – Great Smoky Mountains National Park

One of the most beautiful regions along the historic Appalachian Trail, and one of the best fall photography locations, is Great Smoky Mountains National Park. For one thing, it gives photographers plenty of time to take in the fall colors. Peak season is early October through early November. The forest’s hickories, sweetgums, and scarlet oaks give off a gorgeous mixture of purple, crimson, orange and gold.

  • 6. New York – Catskill Mountains

New York’s maple-dominated Catskill Mountains offer photographers a stunning spectacle in mid- to late-October. The forest’s maple trees turn a rich crimson-orange at lower elevations, while at higher elevations, spindly birch trees turn from yellow to bright red and squat beech trees turn a rich orange.

Landscape Photography Tours and Workshops with Jim Steinberg

If you’re interested in learning the art of landscape photography from expert Jim Steinberg, please visit our homepage for more information!

Aspect Ratios and Landscape Photography: What You Need to Know

Composition is one of the prime fundamental building blocks of any photograph, and for a good reason. How an image is composed is likely the first and most basic thing a viewer perceives about it — and no matter how beautiful the subject, careless or sloppy treatment can turn what would have been a beautifully glorious photo into an uninspiring and mediocre one.


Aspect ratios, or width-height proportion of an image’s shape, are a significant compositional consideration. There are a number of common aspect ratios (it’s possible to define a custom ratio for an individual photograph, but this can make framing a challenge) and one each has its benefits and drawbacks, depending on your personal style and the subject matter.


1:1 (Square)


Striking, solid and impactful, a square photo immediately commands attention. Since the width and height are equal, it can effectively display horizontal or vertical subject matter: the viewer’s eye is guided solely by the image’s content rather than the frame. Squares are well suited to minimalistic subject matter such as snowy fields or macro-enlarged rocks.


Horizontal Rectangles


As evidenced by their common name of “landscape mode,” horizontal aspect ratios (those wider than they are tall) are usually more favored by outdoor photographers.


3:4, the default aspect ratio setting of many digital cameras in the DX format, is a versatile and easy-to-use format. It is only slightly wider than it is tall, allowing for excellent detail in foreground fields and leading lines — natural parallels such as tree shadows or field rows — while also leaving space for scenic backdrops.


The standard camera default for full frame 35mm cameras is 2:3. It is half again wider than it is tall, and allows for capturing a great deal of information, but also requires the photographer to pay very close attention to the details of composition as it is too easy to forget about all the foreground or background detail.


Widescreen panoramas can come in a variety of ratios, most commonly 1:2 or 1:3. Long and narrow, they’re ideal for the dramatic, sweeping vistas that landscape photographers love: rows of sun-drenched mountains, towering beach waves, or dunes stretching into the horizon. They are also good when you can’t quite figure out what to do with all that foreground detail.


Vertical Rectangles


Capturing landscape or nature subjects with a “portrait” (vertical) format can be more challenging. Nature’s angles more typically run parallel to the horizon, which means flipping a “landscape” image on its side may have an awkward look or feel and may seem unsuited for the subject matter. To overcome this, try making sure you use your vertical lines in the same fashion you would if the shot were horizontal with a strong reliance on using your corners. You may find shorter, wider rectangles like a 5:4 format are a better choice: they have enough room to accurately portray the subject without an unbalanced amount of sky intruding on the frame, and can also be used for visual interest in close-up macro shots.


Ready to take your outdoor shots to the next level? Join renowned landscape photographer Jim Steinberg for guided hikes, workshops, one-on-one critique and more. Visit the homepage to sign up today!

Advanced Landscape Photography — Four Must-Have Filters

Many beginning photographers think that physical lens filters are outdated in the age of digital photography, preferring instead to correct raw shots with Photoshop or Lightroom. However, this assumption couldn’t be further from the truth. Landscape photography is all about capturing nuance and subtlety in huge, sweeping subject matter: filters enable your camera to pick up fine detail that can’t be replicated, no matter how sophisticated your post-process technique. . Additionally, with every new layer we add in the digital darkroom, the image becomes slightly more degraded. Before your next outdoor shoot, make sure that these three filters are in your camera bag:

1. Polarizing Filters

Polarizing filters are the single most essential tool for landscape photography, and their wide range of function makes them a versatile choice for other subjects as well. Polarizers effectively block certain types of light while letting others in, allowing for much finer control over color and contrast.

As with almost all filters, polarizers screw onto the camera’s body directly in front of the lens: as the filter is rotated, it absorbs and adjusts for different kinds of light. For example, it can compensate for the glare of sunlight on a stream by blocking light that is directly angled back into the lens (known as spectral reflections), while allowing in the surrounding ambient light for a crystal-clear image of the stones beneath the water’s surface. They are also good for situations where leaves can be highly reflective. They work particularly well when the sun is at an angle, rather than directly in front of or behind the subject. A cautionary note: when using a wide angle lens, particularly wider than 28ø, beware of vignetting as the coverage of the lens may exceed that of the polarizer creating uneven skies.

2. Neutral Density Filters — Standard

Capturing the motion of flowing water or rustling leaves requires a slow shutter speed, but in daylight conditions it may not be enough to just tweak the ISO and F-stops as the shot still runs the risk of overexposure and detail loss. A neutral density filter uniformly decreases the actual amount of light allowed into the camera’s lens, allowing for a long exposure that comes out perfectly balanced. This effect is particularly useful in shady or wooded areas to capture dappled sunlight in proportion with leafy shadows. For those feeling a bit more flush and wishing to having precise control, try a single variable 9 stop ND filter for the greatest flexibility.

3. Neutral Density Filters — Graduated

Blown-out skies are a common problem for photographers seeking to capture outdoor scenes. Graduated neutral density filters will be gray on the top and fade to transparent at the bottom, balancing out sky and subject. They come in a variety of strengths, most commonly .03, .06 and .09 (corresponding respectively to a 1, 2 or 3 stop reduction at the image’s darkest point). These can be stacked on top of each other for a cumulative effect, but remember that the more you stack on the front of the lens, the less sharp the image.

4. Skylight Filter

So often we find ourselves photographing in early morning or in the evening when the light is particularly cool, so a skylight filter will come in handy to warm the ambient color (Kelvin) temperature and give a softer, warmer light.

Landscape Photography Workshops, Prints and More

Looking to turn your hobby into a profitable career? Need beautiful landscape photography prints? Steinberg Photography can help. We give photographers at all levels the tools and experiences they need to take the next step. Visit our homepage to learn more about our landscape photography workshops, guided adventures, private instruction and wide selection of prints.

A Month of Animal Migration – Is Your Camera Ready?

As the heat of summer begins to cool and the late evening light begins to fade, you may be wondering, “When does the NFL season start?” The plants, animals and insects all around us, meanwhile, are taking note of the same changes and making preparations that will help them survive through the winter.


As a landscape photographer, you know that every season has something special to offer your lens. What you may not know is that the shoulder areas between the seasons can be equally, if not more rewarding.


Here’s a few things to look for during the month of September.


Large Mammals


In preparation for the lean winter months, large mammals travel down from the high country in the late summer and early fall into the Front Range, valleys and parks to fatten up in low meadows and grasslands. In the Rockies, September is the prime month to see Elk as they gather in herds as large as a few hundred individuals. Where there’s prey, you’ll find predators, and fall and winter are also the best times to find coyotes and other predators in open areas looking for a bite to eat.


Monarch Butterflies


Every fall, the magical migration of the monarch butterfly begins. Traveling from theUS and southern Canada during late summer or autumn, monarch butterflies fly thousands of miles south, reaching as far as Mexico City in the mountain sanctuaries of central Mexico. You can find them during summer and early fall anywhere where milkweed is in abundance – typically in fields, meadows and parks – where they lay their eggs.


Migratory Birds


There are four primary routes taken by migratory birds during the fall as they head from Canada and the US south to the West Indies, Central America, and South America for winter:


  • The Atlantic Route off the East Coast through the Bahamas, Cuba, Puerto Rico, and the Lesser Antilles to the South American coast
  • The Great Lakes-Mississippi Valley Route, which is free of mountains and provides a corridor to the Gulf Coast or the highlands of central Mexico
  • The Great Plains-Rocky Mountains Route, which takes the migrants from Canada and the Dakotas to the Gulf Coast in Texas or further south into central Mexico
  • The Pacific Coast Route, which sees Ross’ geese, ducks and various arctic birds travel from the Yukon River Delta in Alaska and the lakes of northern Canada to central California.


Of special note are Bobolinks, beautiful songbird migrants that could fit in the palm of your hand that travel some 12,500 miles to and from the US and Canada to southern South America every year. In North America, they can be found in large fields, hayfields, and meadows in a wide band straddling the Canada-US border, including all the Great Lakes, from the Atlantic coast as far west as Oregon and Washington State.


Established & Aspiring Photographers Welcome!


Looking to improve your craft and have an outdoors adventure with landscape photographer Jim Steinberg?Join a Steinberg Photography workshop or photo tour and get the experiences, the pictures, and the guidance you need to create a calendar or coffee table book. Whatever your goals, we would love to help!


Learn more by visiting the Steinberg Photography homepage.

Boost Your Skills with a Landscape Photography Workshop

Many highly accomplished professional photographers begin as self-taught artists, exploring the possibilities of their medium without formal instruction. Others start their careers with the rigorous practice and structure of a full-fledged academic program of study. If you’re looking to boost your skills and take your images to the next level, a landscape photography workshop is the perfect solution: practical, affordable, and skills-oriented.

Photography Workshop Perk #1: Skills

The first and most obvious bonus to a dedicated landscape photography workshop is the focus on technical proficiency. Skilled instructors who have been working in the field for years are invaluable resources for tips, techniques and approaches that you may never have discovered independently. Structured direction also encourages the practice of photographing regularly: the external pressure of an assignment deadline can function as the kick in the pants that’s needed when you’re tempted to spend a lazy Sunday indoors instead of outside honing your craft. Finally, workshops offer the opportunity to put theory into practice. Learning about lens focusing techniques or composition rules in the classroom is a solid foundation, but true understanding of these concepts only comes with getting out and using them in a live situation. After all, what happens in the field can be quite different from what is discussed in the classroom.

Photography Workshop Perk #2: Peer Feedback

Want to refine your signature style? Have the vision for what you want, but can’t quite achieve it? Critical review from outside eyes will help you learn to spot problem areas, correct weak skill proficiencies, and address bad habits before they become ingrained. Learning to take constructive criticism is an invaluable skill for life in general, and artistic practice in particular. Additionally, the unique challenges of landscape shooting become easier when approached in a team: instead of trekking through dense terrain or a rocky ridge alone, instructors and fellow workshoppers are there to provide support and point out the best routes. Additionally, good critiques provide many opportunities to not only see how your work might be different, but also how your fellow participants have approached the same opportunities with different results.

Photography Workshop Perk #2: New Connections

Finally, one often-overlooked bonus to photography workshops is the connections forged by a shared passion. This is not just a great way to make personal friendships, but also to create a professional network if you’re looking to turn your hobby into a business. As a freelance-heavy, independent creative field, personal referrals can make a big difference to a burgeoning photography practice. A small, formally structured group is the perfect opportunity to both hone your skillset and create lasting relationships.

If you’re passionate about photography and love the great outdoors, there’s no better place to start perfecting your craft, meeting like-minded people, and building a network of fellow landscape photography enthusiasts than one of Steinberg Photography’s workshops or photo tours. Check out our calendar to see where we’re headed next!

Why Photographers Should Stay Away from the Comparison Game

There’s one destructive hobby that many photographers share: comparing the quality of their work or income to their peers. Have you ever mentally roughed yourself up because you were convinced you didn’t measure up to another photographer? Ever tell yourself that you’re not talented enough or creative enough to hack it?

You are not alone. In fact, you’re in a popular club with booming membership.

Peer comparison is an enticing trap to fall into because it may appear to be a positive habit at first. After all, learning from those more experienced than you and taking inspiration from great works is an important part of getting better at almost any profession. Comparing yourself to other photographers starts doing more harm than good as soon as it becomes excessive or you use it as an excuse to put yourself down.

At their worst, excessive comparisons will lead to intense frustration and drive you to the point of wanting to give up. Even if the problem never gets out of hand, it will at least take some of the passion and excitement out of photography.
Are you caught in the comparison game? Here are a few thoughts to keep in mind the next time you get the urge to fall into a self-doubt spiral.

Remind Yourself that Success Takes Time

It’s easy to look at a successful photographer and assume that they got where they are overnight. The reality is that, in many cases, someone has more skill only because they have been practicing their trade longer than you have. They may have slaved away countless hours trying and failing to perfect a signature style before they hit on the breakthrough that changed everything.

Accept that you need to build your business from the ground up. Don’t assume that others found a shortcut, and don’t think one is in waiting for you around the bend. Success will come with time, dedication, practice, and a little bit of luck.

Give Yourself Some Credit

If you feel yourself getting too drawn into someone else’s work, in a negative way, it may be time for you to stop and cherish some of your achievements. Look back at your work, not to criticize, but to remember the milestones you’ve passed and the progress you’ve made. This process can be rejuvenating, and it just might inspire you to set some new goals and milestones that keep you looking ahead to the future.

Be proud of what you’ve already accomplished, and think about where you plan to take your career. That’s always a better way to spend a day than getting sucked into the comparison game on social media.

Photography Workshops with Landscape Photographer Jim Steinberg

For aspiring and experienced photographers, nothing is more valuable than spending time with your peers to learn about and improve your craft. If you’re interested in joining fellow photographers for a workshop or guided photography tour with Jim Steinberg, visit our homepage or contact us today!

Populating the Frame: Using People in Landscape Photography

Amongst the many talented photographers producing art today, there are disagreements on what makes a quality photograph. Some people use a light touch when processing their shots, while others create their final products by manipulating the original subjects into something else entirely.

Another topic of great debate involves the presence of people in landscape photography. Some photographers believe the view should speak for itself, while others choose to use a human element. There is no right or wrong answer, however; skilled photographers create masterpieces either way. Read on to learn when, how and why to populate your frame with people in your landscape shot.

Scale

Size is difficult to capture. A huge mountain range, an endless ocean, a deep cavern–the size of these natural wonders can appear lackluster on a screen. Including people in landscape pictures gives the viewer a reference point so they understand the scale of the subject, somewhat similar to how scientist place a ruler next to collected specimens in a snapshot taken for data.

A classic example would be a photograph of a large mountain range in the distance with a person’s profile silhouetted against it. The viewer now has perspective for how far the camera is from the person and the mountain range, and will be awed by how dwarfed the person is by the mountain in the background.

Repetition and Contrast

Repetition, in photography as well as music, is appealing to the senses. In photography, repetition takes the form of a visual motif or pattern. Repetition, like straight lines, occurs somewhat sporadically in nature, but it is everywhere in civilization. If you’re thinking about populating your frame, consider taking a shot where the people are highlighted by repetition, such as a line of hikers hunched over their walking sticks, a group of Boy Scouts in identical uniforms, etc. Some of the best and most famous photographs present viewers with glaring contradictions. Try meshing the wild of nature with the orderliness of human beings in a few shots and see how it looks.

Call of the Wild

On the other side of the coin, we human beings are a part of nature, and skilled landscape photographers also capture moments where people blend into the landscape. These photographs send a completely different, and no less true, message than the ones we described above. It all depends on what suits your fancy, how it looks in the frame, and the point you’re trying to make.

Learn the Craft with Landscape Photographer Jim Steinberg

If you’re interested in learning the art of landscape photography from expert Jim Steinberg, please visit our homepage for more information!

Pictures with Purpose: Environmentalism and Activism Meet Photography

Conservation photography is unique within the photography industry because it focuses exclusively on the clash between man and the natural world. The beauty of nature is juxtaposed against the wheels of progress; as National Geographic photographer Joel Sartore puts it, “The typical nature photograph shows a butterfly on a pretty flower. The conservation photograph shows the same thing, but with a bulldozer coming at it in the background.” Though we tend to think of nature as something permanent, conservation photography is dedicated to capturing the ephemeral nature that is at risk for destruction.


Picture power


Conservation photography is necessarily a politicized field. Yosemite Valley was designated as a national park back in 1864 in large part because of the work of one Carleton Watkins, whose dramatic photographs of Half Dome and other famous landmarks inspired Congress to preserve it. Conservation photography is at once a work of art and a rallying cry, galvanizing those who identify with its message to protect its subject. The work of Watkins and others in the field gives hope to people like Cristina Mittermeier, founder of the International League of Conservation Photographers: “One of the really wonderful things about this kind of photography is that it really can change the course of history. If you make pictures that are compelling enough, that tell good stories, those pictures can really influence the way that policy is written.”


The fight ahead


The worst offenders of habitat and wildlife destruction are almost always related to large industries. Petrochemical firms are an easy and favorite target, as evinced by the famous pictures of oil-covered birds in Alaska after the Exxon Valdez spill of 1989. Visceral images that reveal the true cost of high-polluting companies can effect great change, but not without a fight; as the war on climate change increasingly dominates the environmentalist movement oil companies have beefed up their public relations apparatus in order to combat their anti-environmental stigma.


The best photographs do more than please the eye: they evoke an emotional response and can even inspire great change, just like Watkins’ did over 150 years ago. Conservation photography doesn’t shy away from this twofold mandate, but embraces it.


Steinberg Photography can teach you how to capture the beauty of nature while simultaneously advocating for its preservation. Visit our homepage today to learn more about our workshops and exotic guided tours! On July 24th, we’ll be heading out the Rockies to experience a kaleidoscope of color in Colorado’s high-country. Learn more about Colors of the Rockies today!

1 4 5 6 15