All posts by admin

And the Winner Is…

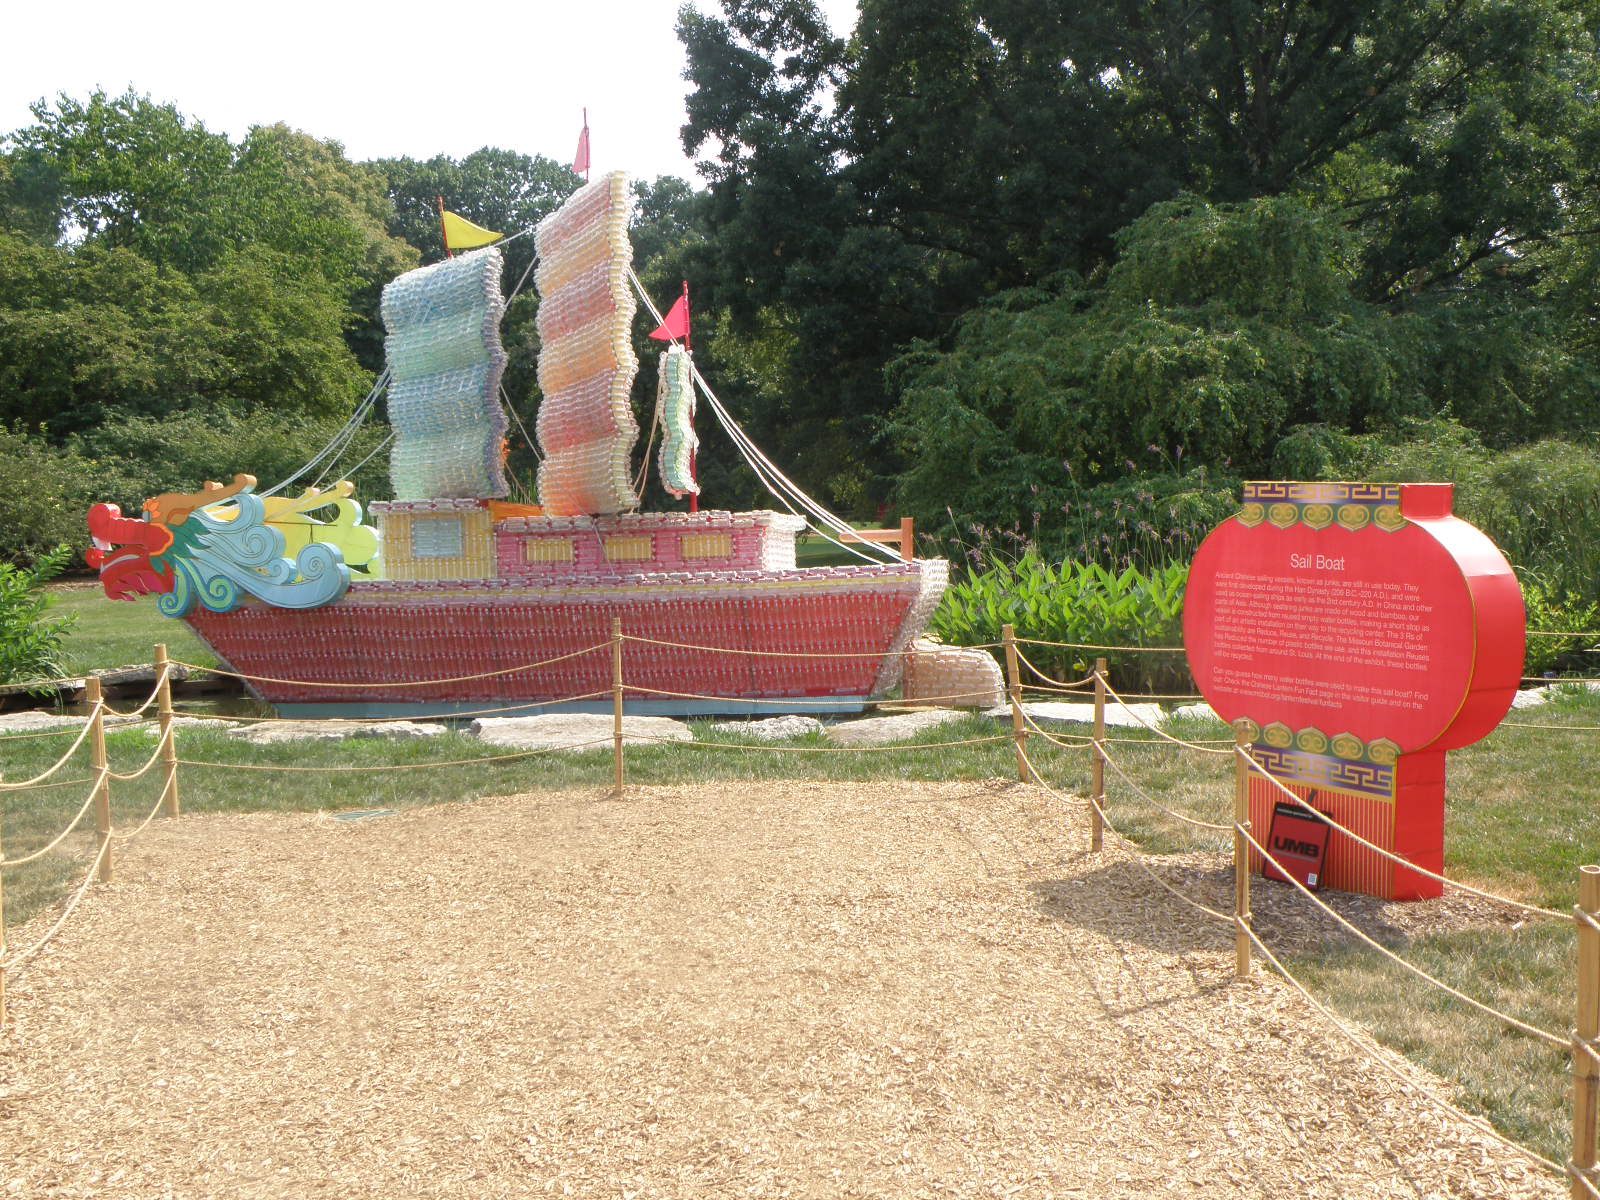
The July Newsletter – Competition Corner winner is Jim Casey of Savannah, Georgia. Shot at the St. Louis Public Gardens, this interesting landscape photograph captures a boat made entirely out of recycled, plastic water bottles held together with fishing line.

The use of side back light really makes the color pop on the plastic water bottle sails, giving the image wonderful depth. Jim also chose an interesting framing, encompassing the full display with the information plaque in the foreground.

OLYMPUS DIGITAL CAMERA

We love seeing your work. To be featured in an upcoming blog or to enter upcoming contests subscribe to our newsletter.

Strategies That Can Help You to Effectively Photograph Landscapes – Light

Great landscapes are made up of 3 elements: light, composition and subject, or as I prefer to think of them: form and color.  Let’s take a look at some of these in a strategic manner as a way of managing your photography. This blog will examine light.


Certainly we all know that the most optimal times for making landscapes are just before and after sunrise and just before and after sunset. Doe this mean we cannot create interesting and exciting landscapes during other times? Certainly not! However, we must learn when the light is truly usable and then understand how to manage it. Around sunrise and sunset the light is warmer as the sun is closer to the horizon and disperses and diffracts the longer cooler rays of light leaving us with the warm tones we all love so well.


However, we can still continue to shoot throughout the day when we have clouds overhead or even intermittent clouds to break the sun. During these times using the best directional lighting is critical to making fine images. Though we can use front light during the sunrise/sunset golden hours, the flatness it creates becomes much more of a problem during the remaining daylight hours When photographing a subject with the light directly behind us it will hit the subject and bounce directly back into the camera lens creating undesirable contrast and flattening the subject by eliminating any dimension. During these times sidelight or backlight are more preferable. Sidelight will add depth and dimension to your subject while backlight will create strong highlights and often a wonderful rim light that can be a fine additive to the image.


new

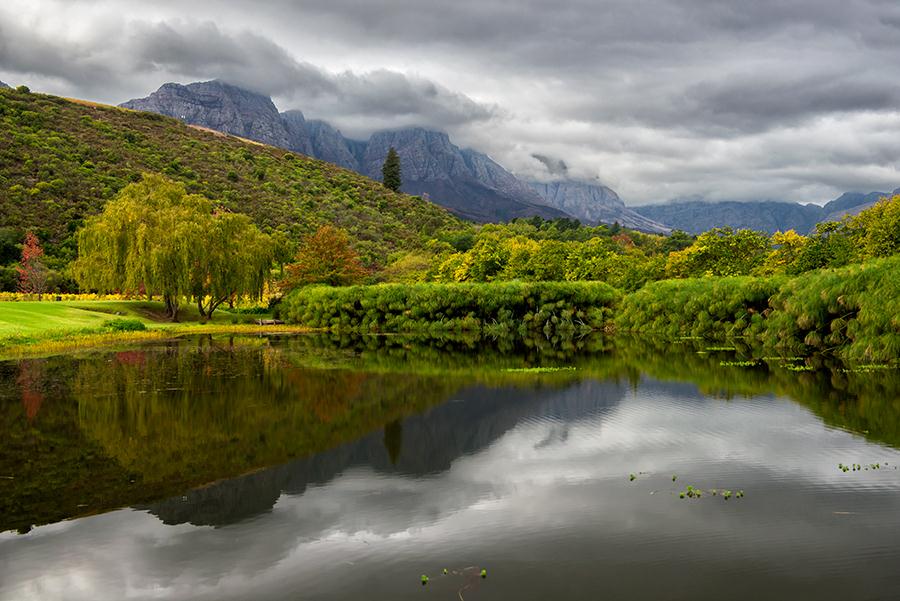
When using sidelight during the day I strongly believe in the power of the polarizer. It can add depth to your color and spark some contrast particularly in the sky to help “pop” the image. With water or plants that are wet the sun reflecting off them will create specular highlights (those little white specks you see in images). Are they good or bad? Depends on your artistic esthetic, so you decide. If you want to eliminate them then by all means use your polarizer.


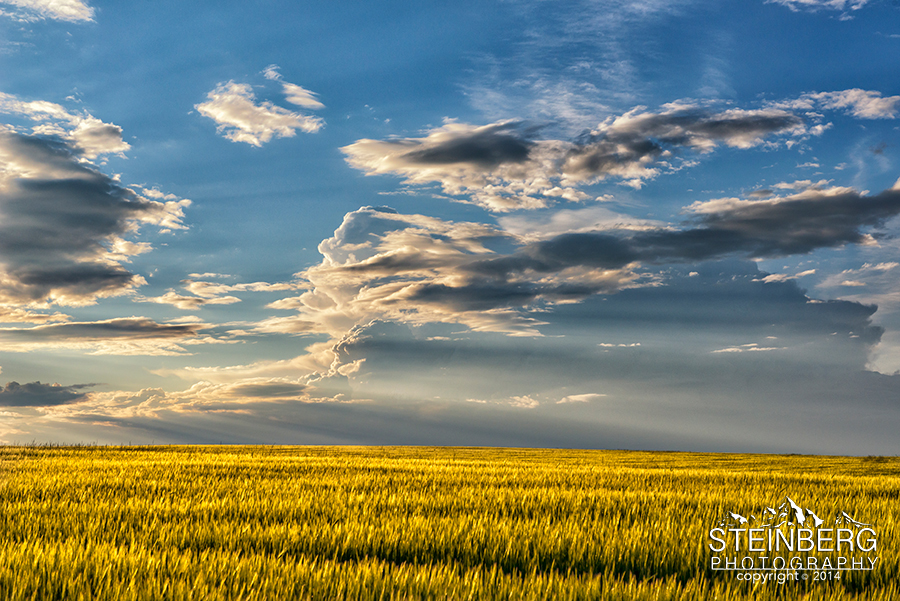
Though paying attention to the histogram is important, I think that the highlight indicator available on most cameras these days is a much more critical indicator of good exposure. Unlike film, when digital highlights are recorded as overexposed there is almost nothing to be done with them to bring them back. When photographing skies with clouds this is critical as without the appropriate detail the clouds become washed out losing their structure and becoming a major distraction for any landscape and consequently eliminating the possibility of making great landscapes.


new1

When you find yourself out photographing during cloudy days I use one of two strategies: if the clouds have character include them as a part of your composition. If they are flat, dull and lifeless, then try and minimize them or eliminate them. At the same time, always remember that these same clouds that we decry as making our photography more difficult also allow us to make wonderful images of plants, forests and other objects that will really come to life in the soft light of a cloudy day.


Light: it’s what we have, so use it well and wisely.


Do You Adore Landscape Photography? If so, Read on!

Whether it’s a career or a hobby, landscape photography is challenging, invigorating, and can be deeply gratifying. It requires technical expertise, creativity, a unique way of seeing the world a sense of play and both mental and physical acuity. Moreover, it can take you to some of the most beautiful destinations on the planet. Also, given how inexpensive many digital cameras are, it’s simple to get started as a photographer.


However, before you set out to explore the world and make photographs of it, ask yourself if this is truly the right path for you. For whom would you be creating these images? After all, there’s currently a glut of photographers, and consequently, this art form is full of repetition and banality.


Specifically, it’s wise to make sure that you’re not entering this area for one of the following reasons.


1. You’re Searching for Perfection


Some photographers become consumed by the idea of the perfect shot. They crave ideal lighting conditions and may only shoot when they think they have them. They need their animal subjects to pose just so. They have in mind an image that may or may not be there. In short, they have complete and very precise visions, and may get frustrated if any of their conditions are not met or their final product fails to meet those standards in even the slightest ways. In pursuit of their “vision”, they all too often fail to see what is right before their eyes and frequently miss other wonderful opportunities before their cameras. Their eyes may be open, but their minds are closed.

Obviously, striving for excellence is commendable. But seeking perfection at all costs is usually self-defeating. It can rob an artist’s work of joy and spontaneity. Plus, if you’re traveling the world, you might as well enjoy it. Instead of just laboring for faultless creations, then, it makes sense to spend time hiking, swimming, or taking part in whatever types of recreation you like.


2. You’re Looking for Something Completely New


Some photographers believe that they should avoid places that are photographic icons; and thus, they attempt to reach the remotest spots possible. However, without the appropriate gear and training being far from civilization can be difficult and hazardous, as well as expensive. Not to mention, some oft-photographed locales are especially fun to visit: Hawaii, for example. Why cheat yourself out of such thrilling trips if the images being made are primarily for you? In addition, even the most familiar landscape can be imbued with a fresh perspective.


3. You Desire Attention and Popularity


These days, some photographers are consumed by the size of their social media followings and by the number of positive responses that they receive from online “friends”. This compulsion can greatly hinder creativity. That is, some people will only take photos that they think others will like instead of heeding their intuition or making images that they like. As a result, many people stop taking chances. Clichés start to appear everywhere, and the entire field is diminished.


In short, the only sound reason to pursue landscape photography is that you adore it and can’t imagine yourself not doing it. If you’re committed to inventive — if not perfect — work, you’ll satisfy your artistic spirit, and you’ll earn real fans who are excited by your vision and originality!

Four Ways to Engage and Create Spectacular Landscape Photography

To make landscape photography more interesting, adding depth is important. Although this sounds tricky, there are some easy tips that help create depth within photos so that viewers enjoy feelings of realism. Onlookers will experience a true sense of the pictures and feel as though they were the ones capturing the shots.


Wider is Better

A wide-angle lens is a photographer’s best friend. It helps accentuate the foreground so that your picture has more depth and transports the viewer into the photo. Since it creates a dramatic perspective, a good quality wide-angle lens is a must-have for anyone practicing landscape photography.


Stand Tall

To exaggerate the foreground, it is common for a wide-angle picture to be shot from a low perspective. However, this stance minimizes the midground and results in a picture that fails to bridge the impressive foreground and striking background. Standing tall achieves the height necessary to stretch the midground and bring a connection that emphasizes the depth of the scene. It is a smart way to draw a viewer into a photo.


Elongate the Scene

Another way to add depth to a picture is with a telephoto lens. Although it is usually used to bring flatness to a scene or isolate a subject, it is a great tool that produces a natural frame. With a juxtaposed subject, a viewer will gain the feeling of looking beyond the foreground and will be able to concentrate on the background scene.


Use Layering Techniques

In nature, objects grow less distinct in the distance. Thanks to this optical phenomenon, it is important to establish a composition that emphasizes layers and patterns within a picture. For example, capturing a mountain scene with different ranges creates a layering effect with nice depth. The same outcome can be achieved at the beach with the ocean and distant shorelines. Controlling this type of overlap increases depth in an image.


Another way to intensify this effect is by uncovering a scene with plenty of atmosphere that makes the background seem to fade into the distance. Fog, smoke, and misty drizzle are excellent natural elements that help this work.


Pictures that have a good sense of depth are powerful and dynamic. The above tips will help a photographer turn a two-dimensional photo into a realistic scene that appears as amazing as it looks in person. Providing depth helps pictures come alive and brings great interest to all viewers.


Photography as Foreign Language

Like learning any new language, photography is a process. It’s filled with foreign terms and uncomfortable structuring that can prove frustrating. But in the end, you will dazzle others with your fluency in a language most only dare to fantasize about—and that’s the true beauty of photography.


Imagery influences our daily lives and speaking its language opens you up to endless possibilities. If you speak with a scientist about a certain image, it will be just as insightful as a conversation about the same image with an experienced photographer. Flex your photographic vocabulary, speak with dynamic individuals and further your craft one syllable at a time.


The medium of photography is also similar to a foreign language because it’s flexible enough for interpretation. An American’s understanding of an Italian phrase is different from a Florentine’s, but neither is wrong, just interpretive. You want your images to be embraced similarly so they take on a 3-D aspect. Even the simplest images should never be one-dimensional.


To learn the language of photography, there are no better teachers that award-winning photographers Jim & Lori Steinberg. They capture nature’s wonders all over the world. To learn new tricks, check out our workshops here and connect with us on Facebook to see more photographs.

Photography and Fair Use

Last spring, artist Richard Prince used photographer Patrick Cariou’s images in his artwork. To much disbelief, this was not considered infringement. The United States Court of Appeals reasoned that as long as the work was transformed, it did not violate copyright.

“Technological advances, shifting artistic values and dizzying spikes in art prices have turned the world of visual arts into a boxing ring for intellectual-property rights disputes. Photographers, in particular, are complaining not only that their work is being stolen by other artists, but also that their ability to create new work related to their originals is also being compromised,” stated this New York Times article on the subject.


As a photographer, it’s important to understand your rights, as well as what constitutes as fair use. According to the U.S. Copyright Office, section 107 of the copyright law contains a list of different purposes in which the reproduction of a work may be considered fair. Such purposes include criticism, comment, news reporting, teaching, scholarship, and research. Section 107 also notes four factors that a court considers in determining whether or not a work is constituted as fair use. The first factor is the purpose and character of the use, including whether such use is of commercial nature or is for nonprofit educational purposes. The second factor is the nature of the copyrighted work. The third is the amount and substantiality of the portion used in relation to the copyrighted work as a whole, and the fourth factor is the effect of the use upon the potential market for, or value of, the copyrighted work.


Whether you are starting out in the world of photography or a seasoned professional, it’s important to know your rights, and the rights of others. Award-winning photographers Jim & Lori Steinberg capture nature’s wonders all over the world. To learn new tricks, check out our workshops here and connect with us on Facebook to see more photographs.


The Photography Files

To become a photographer, you need a sense of heightened awareness that pushes your skills in order to produce excellent images. Before you press the shutter, visualize the type of image you want. To help with this, I suggest creating a Photography File. It’s a great exercise for training the eye to see, and helps develop your awareness as a photographer.

As you see images in your daily life that grab your attention, whether it’s in newspapers, magazines, or on the Internet, cut them out and add them to your own personal file of images. Every time you clip an image, you should ask yourself the following questions:

Why does this image grab my attention?

How did the photographer create that effect?

How did the photographer draw me into the story?


Think about both the technical and expressive tools that you see in the photographs that appeal to you and try to use those elements during your own photographic experiences. You’ll be amazed at the transformation you undergo and start to uncover the deeper levels of photography. Share your progress with us on Twitter, Facebook or Instagram and link to Steinberg Photography with #PhotographyFile. Award-winning photographers Jim & Lori Steinberg capture nature’s wonders all over the world. To learn new tricks, check out our workshops here and connect with us on Facebook to see more photographs.

How to Score a Goal in Sports Photography

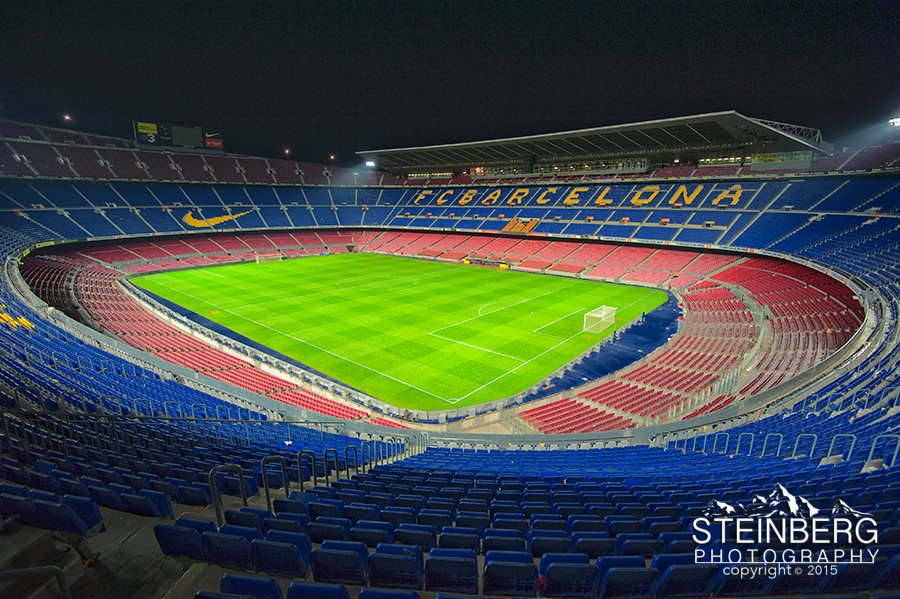
One of the great cathedrals of football, the Nou Camp, built in 1957, is home to Futbol Club Barcelona. It is also the largest stadium in Europe, attracting sports photography enthusiasts from all over the world. If you’re a sports fan and aspiring to become more accomplished in sports photography, here are some insider tips to take with you into the spring sports season.


Create a Feel

Sporting events are about so much more than just what happens on the pitch. It is everything from the fans singing on the way to the stadium to the lone guard standing sentinel in an empty Camp Nou. Capture the feel for the event, not just what happens between the lines.

Futbol Club Barcelona

Shoot Angles

To create that larger-than-life feel, try capturing the action from a low angle with a long lens that brings the action right into the viewer’s face. This will make any image more exciting and allow the viewer to feel that he or she is a part of the action. If you can’t get that low angle, try and capture moments that are significant to the game such as here where Lionel Messi is going through the goalkeeper for yet another goal. Without the low angle, I chose to give a larger perspective that shows the true one-on-one nature of this match-up.


Get Ready for a Foul

If you’ve seen any comedic film where a foul ball hits an actor in the head, you’ll appreciate this tip. Don’t be caught off-guard and try to capture a play before it’s over. You always have to be ready for the action before it happens. Practicing this can be the difference between photographing high school sports and photographing for Sports Illustrated.


Smell the Sweat

When the situation allows, instead of shooting from the stands, get close to the action! Sports are as much about emotions as they are about skill, so it’s important to capture the emotional reactions of players in your images.  Some of the greatest sports shots ever made relate as much to the reaction of the player(s), coaches, officials or fans. Be aware of everything that is happening around you in order to capture the entire feel of the event.


Study the Play-by-Play

The more you know about a particular sport, athlete and rules, the better your images will be. You will develop an intuition when it comes to anticipating action, capturing emotion and shooting from the best angles. As with all types of photography, think, think, think, and practice, practice, practice.


If you have any stellar sports photos, share them with us on Facebook, where you can also see the latest photographs from award-winning photographers Jim & Lori Steinberg. Want to sharpen your skills pre or post trip? Check out our workshops here and practice, practice, practice!

A Guide to Photographing the Milky Way

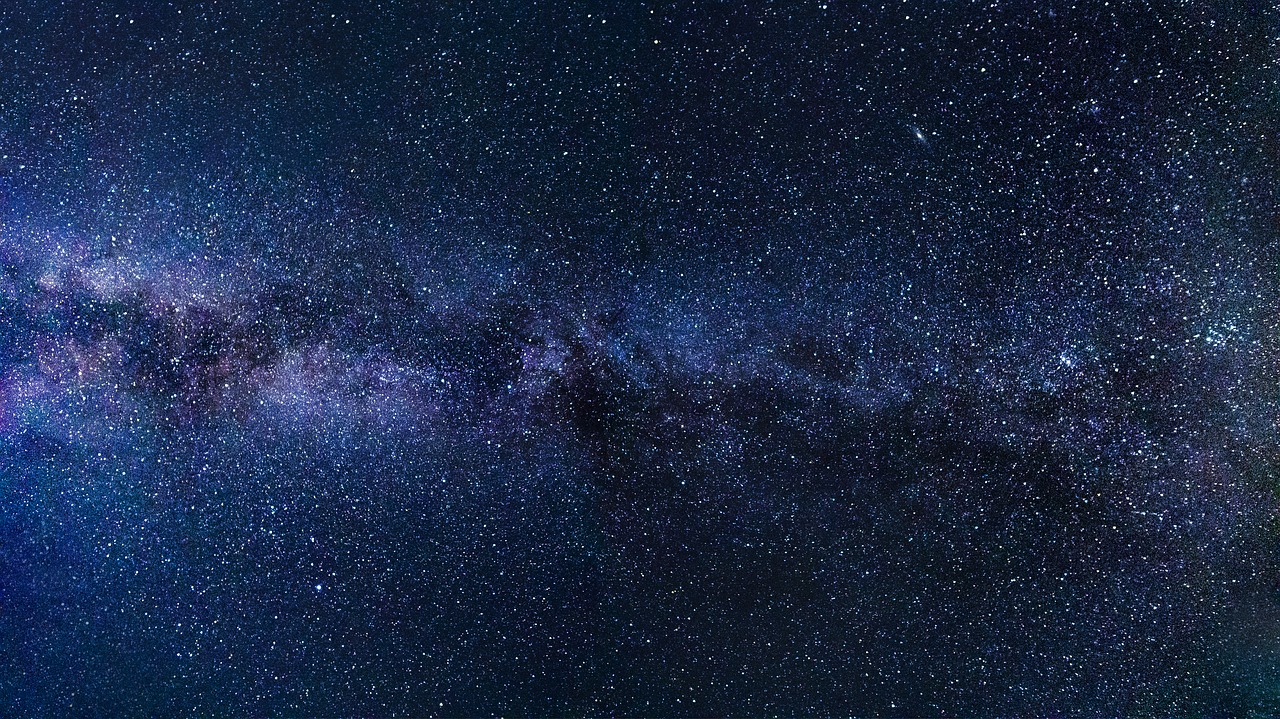
If you live in the Northern Hemisphere, the time to capture the Milky Way is right now! The best views begin in March and extend until October.

It may seem intimidating to the beginner, but with this guide, we’ll take the mystery out of the night sky— with clear instructions that will have you excited to get out there and try it for yourself.

Equipment Needed

Camera

While the camera that you use is not necessarily important, there are certain functions you will need it to have. Manual mode is needed so that you can manually adjust ISO, aperture, and shutter speed. You’ll also want a camera lens with a minimum f/4 aperture (the smaller, the better). That’s all that you really need to get started.

However, if you are able to get a full frame camera, you will have a better image quality as the sensor can gather more light. The addition of a 14-24mm wide angle lens with a minimum f/2.8 will take your images to the next level.

Tripod

A tripod is almost as necessary as a camera for this endeavor. In order to catch the Milky Way, your camera will need to remain perfectly still, and you will not be able to do that without the aid of a tripod.

Shutter Release/Intervalometer

This mechanism reduces the camera movements and vibrations when you press the shutter, and it allows for exposures longer than 30 seconds.

When to Shoot

You want to shoot when the weather is clear and the sky is at its darkest. The best time for this is during the new moon, along with the week before and the week following it. The closer to the actual new moon, the darker it will be.

Where to Shoot

Location

You want to shoot where it is dark, away from the light pollution of cities. You can use an online tool like Dark Site Finder to find the darkest areas near you.

Sky

We know the best time to photograph the Milky Way is from March to October, but you will also need to know where it will be in the sky. You can use an app like Photo Pills to help you find it.

How to Focus at Night

With your camera set up on your tripod, set your focus ring as close to the infinity symbol as you can. In “live view,” point your camera at the brightest object you can see in the sky and zoom all the way in. Finally, adjust your focus ring until the dot of light is as small as possible.

Camera Settings

The most important element here is using your camera settings to allow as much light as possible into the shot.

Aperture/F-Stop

It seems counter intuitive, but the smaller your f-stop, the larger your aperture. To catch the stars, you want the widest possible aperture. Therefore, you want to be at the lowest possible f-stop for your camera. If the quality is not great, move up one at a time until it is.

Shutter Speed

You need a delicate balance between a long exposure time (allowing your sensor to collect more lights) and the movement of the earth, which will cause your stars to have trails. The longer your focal length, the shorter your exposures can be.

ISO

This is the last setting you will adjust. Start at about 1600 and take a test shot. If it’s too dark, increase the ISO until the Milky Way becomes clearly visible.

Learn and Travel with Steinberg Photography

Do you want to take your skills to the next level? Professional photographers Jim and Lori Steinberg of Steinberg Photography offer numerous exciting workshops and tours for everyone from beginners to professionals.

Happy Spring, Happy Trails

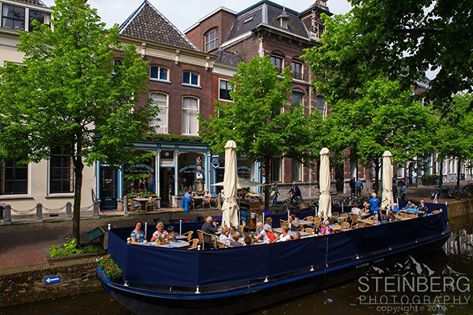
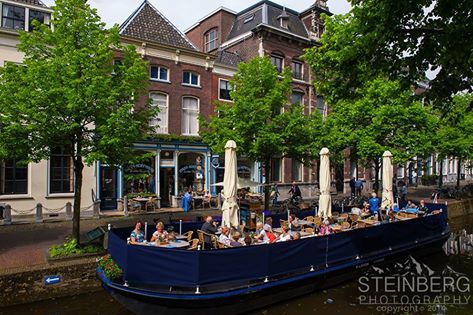
After a weekend full of Passover Seders, Easter egg hunts, family brunches and dinners, we wanted to share a special image captured in Delft, Netherlands. Located in South Holland, this dreamy town offers picturesque canals, bustling streets and European charm at its best. Spring is the best time of year to visit, as the subtle breeze follows you in and out of narrow alleys and nature blossoms all around, reinvigorated by the sun’s return.


A relaxing meal on a tethered barge on the canals is the perfect way to experience Delft’s stunning architecture and vibrant scenery. It’s also a great opportunity to practice your photography skills. Below, we share some of our handy photography tips for travelers.


Seize the Moment

When traveling, you never know where an alley will lead or what could happen at any given moment, so when faced with a decision on which direction to go, don’t be trepidatious about going down that alley or road that appears less traveled. You never know what you will find there. And always be prepared with your camera at the ready and your senses on alert at all times Keep your eyes and mind open.


Make it Count

Tourists generally snap photos of everything they see while traveling, only to return home to delete 80 percent of their images. This is even truer today as digital makes it so much easier to create as many images as you want at no additional cost. After all, electrons are free. To ensure that you capture the moments that count, pause before you click to ask yourself why you think the scene or image is unique or important. Ask yourself, “Does this photograph tell a story?” or “How is this image important to telling the story of this place?” This will help quell the urge to take photos of every single historic statue you come across and return home with unique shots of your trip.


Become a Jack-of-All-Trades

When traveling, you encounter a variety of different situations. One morning, you might capture a man sipping his daily coffee at a café, while the afternoon might be filled with hiking in the countryside. One of the beauties of travel is that you’re exposed to a multitude of activities in a short period of time. Use your trip as a reason to exercise and practice your photographic skills. This is a great time to stretch yourself and use different photographic muscles. If you are most comfortable with portraiture then make sure to do more landscape. Practice action shots of people riding on bikes; try some nighttime photography. This is great time to try something new to help tell your story. After reviewing you images upon your return home, you’ll know exactly which areas you need to hone in on to further sharpen your skills.


Steinberg Photography hopes you had an enjoyable Passover and Easter and that wherever you are it is finally Spring! If you’re traveling this spring season, share your pictures with us on Facebook, where you can also see the latest photographs from award-winning photographers Jim & Lori Steinberg. Want to sharpen your skills pre or post trip? Check out our workshops here and practice, practice, practice!

Happy Easter, Happy Trails

After a weekend full of Easter egg hunts, family brunches and dinners, we wanted to share a special image captured in Delft, Netherlands. Located in South Holland, this dreamy town offers picturesque canals, bustling streets and European charm. Spring is the best time of year to visit, as the subtle breeze follows you in and out of narrow alleys and nature blossoms all around, reinvigorated by the sun’s return.

A relaxing boat tour throughout the canals is the perfect way to experience Delft’s stunning architecture and vibrant scenery. It’s also a great opportunity to practice your photography skills. Below, we share some of our most handy photography tips for travelers.

Seize the Moment

When traveling, you never know where an alley will lead or what could happen at any given moment. It’s important to be prepared with your camera at the ready and your eyes open.

Make it Count

Tourists generally snap photographs of everything they see whilst traveling, only to return and delete 80 percent of their photographs. To ensure that you capture the moments that count, pause before you click to ask yourself why you think the scene or image is unique. This will help quell the urge to take photos of every single historic statue you come across and return home with a truly unique snapshot of your trip.

Become a Jack-of-All-Trades

When traveling, you encounter a variety of different situations. One morning, you might capture a man sipping his daily coffee at a café while the afternoon might be filled by a hike. The beauty of travel is that you’re exposed to a multitude of activities in a short period of time. Use your trip as an excuse to exercise and practice your photography muscles with portrait, landscape, action, daytime and nighttime photography. When you return home, you’ll know exactly which areas you need to focus on in sharpening your skills.

Steinberg Photography hopes you had an enjoyable Easter! If you’re traveling this spring season, share your pictures with us on Facebook, where you can also see the latest photographs from award-winning photographers Jim & Lori Steinberg. Want to sharpen your skills pre or post trip? Check out our workshops here and practice, practice, practice!

Spring Blooms in Colorado’s Dumont Lake

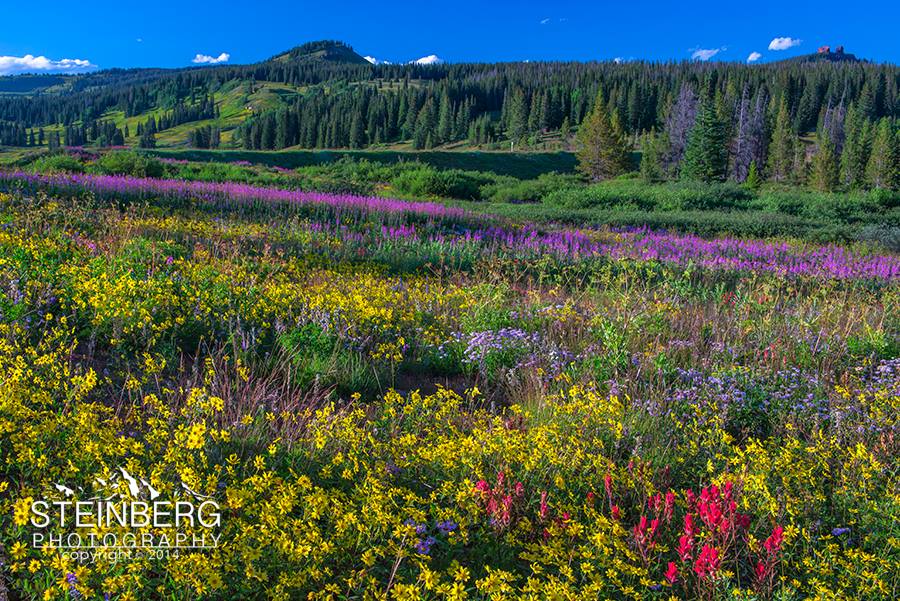
After such a long winter and now a few days into spring we thought it called for a colorful post with flowers and green mountain meadows, wouldn’t you agree? The divine floral fantasy in the fields around Dumont Lake is a dream location for any wildflower enthusiast, photographer or not. It is located 22 miles southeast of Steamboat Springs just off US 40 near the base of Rabbit Ears Peak (in the right upper back of this image).

There is also a campground with 22 sites, and a multitude of activities to enjoy, including fly-fishing, hiking, backpacking, mountain biking, and naturally, photographing. With incredible views of the Snowy and Never Summer mountains to the East and the Gore Range to the South, the area straddles the Continental Divide.

Spring and Summer are perfect seasons to shoot landscapes with flowers. Even if you can’t make it to Colorado’s Dumont Lake, there are plenty of parks and public gardens nationwide to visit. Here are some tips to help your flower photography skills blossom.

Use a Wide-Angle Lens

If you want to not only capture flowers but also put them in a context with their surroundings, a wide-angle lens is the perfect tool. The larger angle of view gives the viewer a greater context and allows the photographer to increase the depth of field to keep the image sharp from foreground to background, if desired.

Shoot Manually

While it’s easy to trust our cameras, shooting manually is the best way for you to take complete control. This way, you can affect the results by choosing the aperture and shutter combination to create the effect you want. To ensure the image is properly exposed, check your histogram and then alter your settings accordingly. Flowers can be tricky in that they may cause your camera to underexpose if it’s not in manual exposure mode.

Get Down and Dirty

Outdoor photography requires creative thinking and a willingness to contort your body for the perfect shot. With flower photography, we’ve been known to wriggle in the dirt like worms. Trust us, it’s worth it. Become one with your surroundings and capture images in unique ways.

Are you ready for spring photography? Share your best springtime photos with us on Facebook. Award-winning photographers Jim & Lori Steinberg capture nature’s wonders all over the world. To learn how to become a travel photographer in Colorado’s Dumont Lake or beyond, or to learn new tricks, check out our workshops here.

Somewhere Over the Double Rainbow

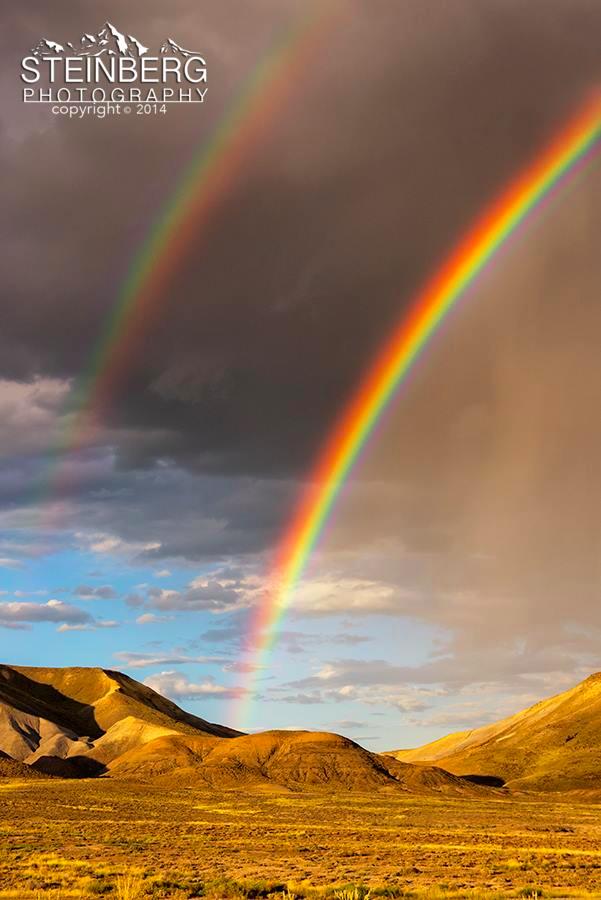
As we drove through the desert in Colorado’s Delta County, a double rainbow overtook the sky. We were compelled to pull the car over and capture one of nature’s greatest marvels.


Delving into the history of the double rainbow, it is said in Chinese culture that a primary rainbow illustrates a human descending from the heavens, red symbolic of the feet, violet representing the head, and the middle colors indicative of other body parts. Because the secondary arc of a double rainbow has reversed colors, the human figure ascends from earth to heaven. Because of its rarity, seeing a double rainbow is considered to be a blessing and great reason for reflection and meditation.


Rainbows are formed when sunlight passes through raindrops. Because the light bends entering the drop and then again as it leaves the front of the drop, it forms a curvature. The bending is what separates the colors, but you can only see the rainbow if the sun is behind you.


Do you have a photograph of a double rainbow? If so, we’d love to see it! Upload it to Twitter, Facebook or Instagram and link to Steinberg Photography with #DoubleRainbow. Award-winning photographers Jim & Lori Steinberg capture nature’s wonders all over the world. To learn how to become a travel photographer in Colorado or beyond, or to learn new tricks, check out our workshops here and connect with us on Facebook to see more photographs of nature’s wonders.

Into the Colorado Wild

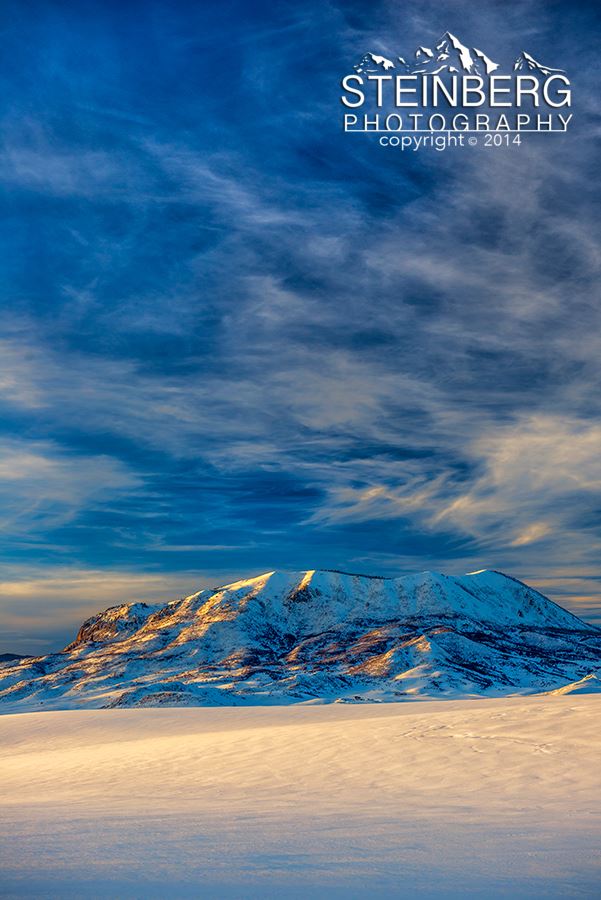
In 1990, Emory graduate Chris McCandless embarked on the rugged adventure of a lifetime to live in the Alaskan wilderness. On his way, he traveled through various states, camping, hiking, canoeing and walking. Experiencing the humbleness and beauty that comes from a nomadic way of life, McCandless was empowered by his will to travel. We experienced the same feeling at the Elk Mountain in the Colorado wild’s Routt County.

Also known as ‘The Sleeping Giant,’ Elk Mountain is a peak that risies almost 9,000 feet and stands out prominently above the Elk River just outside of Steamboat Springs, Colorado. Unlike the nearby Zirkels, Park Range, or Elkhead mountains, The Sleeping Giant stands alone and is not distinctly linked to other peaks or ridges.

Though McCandless didn’t survive, his epic adventure encompasses the joie de vivre that many go through life not knowing. Life’s simple pleasures of natural wonders, divine sunsets, godly mountains and the purity of the untouched world are oftentimes taken for granted. Through photography, we hope to spread some of the beauty McCandless lived in.

Award-winning photographers Jim & Lori Steinberg capture nature’s wonders all over the world. To learn how to become a travel photographer in the Colorado wild and beyond, or to learn new tricks, check out our workshops here and connect with us on Facebook to see more photographs from the Elk Mountains.

The Best Ways to Become a Pro at Photographing in the Snow

Want to become a pro at photographing in the snow? Whether you want to capture the snow-capped mountains of Switzerland or create moments of your children building a snowman in the backyard, we have the tips you need to become a master of wintertime photography.

  • Photograph with the sun to your side to capture the best winter scenic. By doing so, you’ll create texture and add a dynamic layer to your image.
  • Turn off auto settings, even the snow scene mode. This helps eliminate the blue hue that snowy images can take on when a camera is in automatic. With the amount of white, your LCD likely won’t depict an accurate image of the captured scene, so do not pay particular attention to the LCD when viewing the image. Instead, try Matrix metering on a manual setting and check the histogram to view what the image will download as. Also, be sure to turn on your highlight indicator in order to make sure there are no blown highlights as in a snowy scene they would be almost impossible to recover.
  • If the sun is strong, you can handle light streaming in from behind by closing the eyepiece viewfinder. And because wintry images tend to overexpose easily, we suggest adjusting the white balance.
  • While the stark whiteness of snow is beautiful, pops of color add contrast and depth to your photograph. Look for warm tones that will add richness.
  • Rise with the birds to capture a fresh snowfall. The early morning is the best time to become a pro at photographing in the snow because the sun isn’t too high and hasn’t begun to melt the snow.

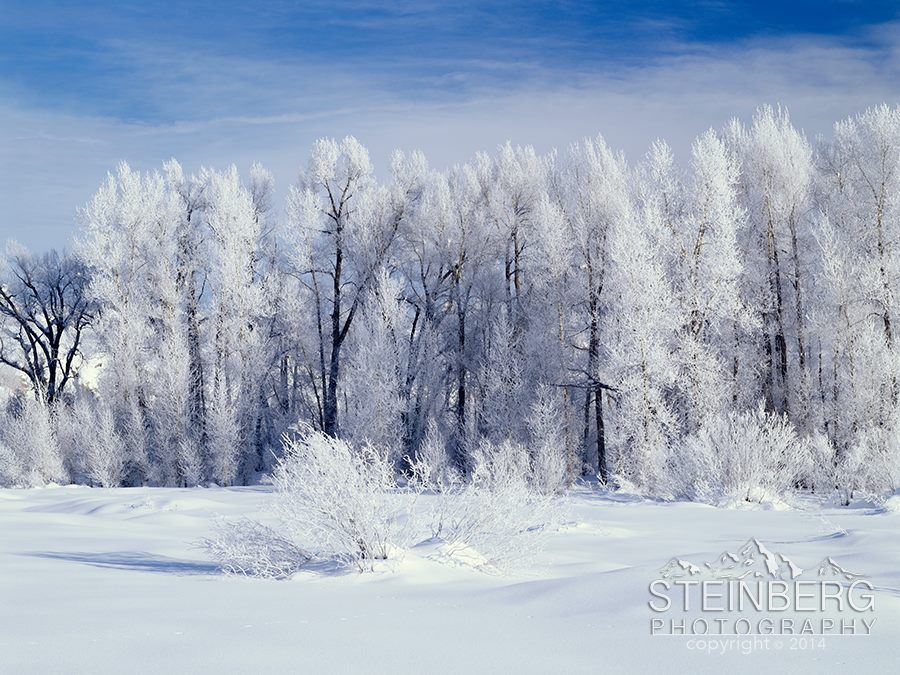
Here’s our example of photographing in the snow: This shot was taken on the Yampa River in northwest Colorado. The Yampa runs 250 miles from high in the Flat Top Mountains to its confluence with the Green River in Dinosaur National Park. Further downriver it flows into the Colorado River in Canyonlands National Park, Utah. The Yampa was named in 1843 by the explorer John C. Frémont after noticing a bounty in the watershed of the Perideridia plant commonly known as Cow’s Parsnip.

Award-winning photographers Jim & Lori Steinberg are pros at photographing in the snow. To learn to capture stunning photographs in the winter season and beyond, check out our workshops here and be sure to come back next week for more insider tips and tricks!

1 6 7 8 15